
PowerBook G4 Titanium DVI PC Card Cage Replacement

What you need

  1. PowerBook G4 Titanium DVI PC Card Cage Replacement, PowerBook G4 Titanium DVI PC Card Cage Replacement: step 1, image 1 of 2 PowerBook G4 Titanium DVI PC Card Cage Replacement, PowerBook G4 Titanium DVI PC Card Cage Replacement: step 1, image 2 of 2
    • Locate the battery release tab on the underside of the G4.

    • Slide the battery release tab to the left and lift the battery out of the computer.

    Add Comment

  2. PowerBook G4 Titanium DVI PC Card Cage Replacement: step 2, image 1 of 1
    • Turn the keyboard locking screw located in the middle of the keyboard so that it is parallel to the space bar. A half turn from parallel to parallel will unlock it. Another half turn will lock it again.

    • Pull the keyboard release tabs toward you and lift up on the keyboard until it pops free.

    Add Comment

  3. PowerBook G4 Titanium DVI PC Card Cage Replacement: step 3, image 1 of 1
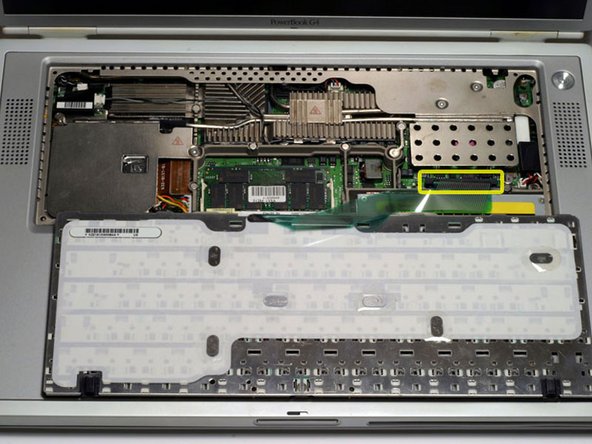
    • Rest the keyboard face down on the trackpad area.

    • Disconnect the keyboard connector from the logic board.

    Add Comment

  4. PowerBook G4 Titanium DVI PC Card Cage Replacement: step 4, image 1 of 1
    • Your laptop should look approximately like this.

    Add Comment

  5. PowerBook G4 Titanium DVI PC Card Cage Replacement: step 5, image 1 of 1
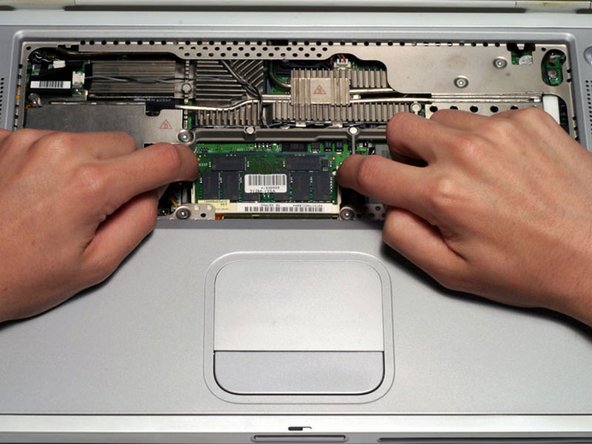
    • Release the tabs on each side of the RAM chip at the same time. These tabs lock the chip in place and releasing them will cause the chip to "pop" up.

    • Pull the RAM chip out.

    • Repeat this process if a second RAM chip is installed.

    Add Comment

  6. PowerBook G4 Titanium DVI PC Card Cage Replacement: step 6, image 1 of 2 PowerBook G4 Titanium DVI PC Card Cage Replacement: step 6, image 2 of 2
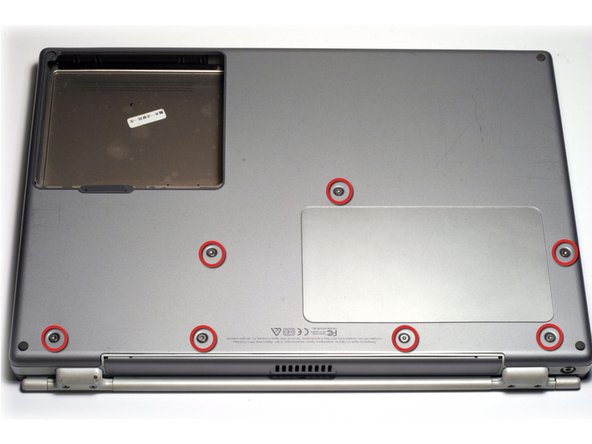
    • Remove the seven T8 Torx screws from the lower case.

    • Using your thumbs, slide the lower case toward the front of the computer.

    • The lower case may stick in the front on a tab just above the center of the optical drive. Be careful as you work the case off, or you may break the thin strip of plastic just above the drive.

    • Lift the lower case off.

    Add Comment

  7. PowerBook G4 Titanium DVI PC Card Cage Replacement: step 7, image 1 of 1
    • Firmly grasp the plastic tab attached to the Airport card and pull up and to the left.

    • Disconnect the antenna cable from the left side of the Airport card.

    Add Comment

  8. PowerBook G4 Titanium DVI PC Card Cage Replacement: step 8, image 1 of 1
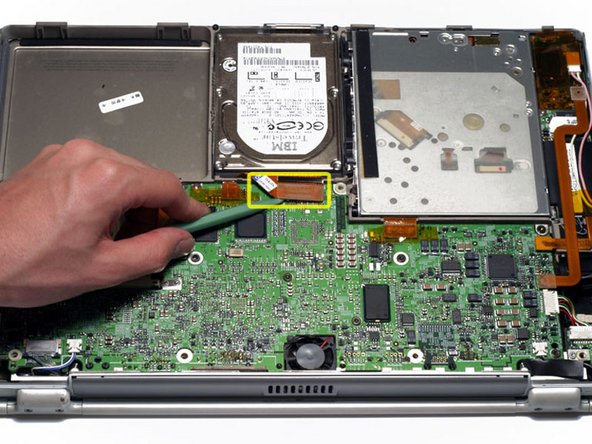
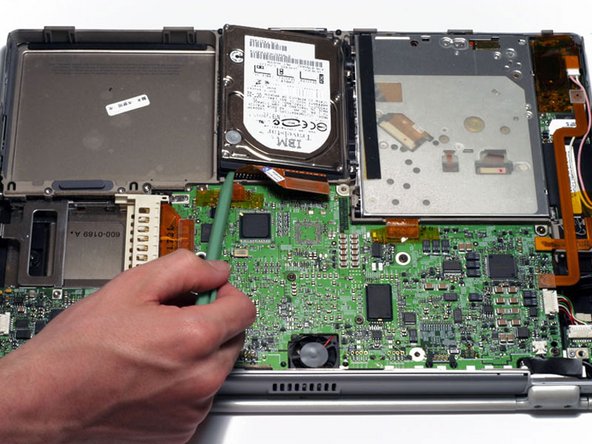
    • Disconnect the hard drive ribbon from the logic board using a spudger or the tip of your finger.

    Add Comment

  9. PowerBook G4 Titanium DVI PC Card Cage Replacement: step 9, image 1 of 1
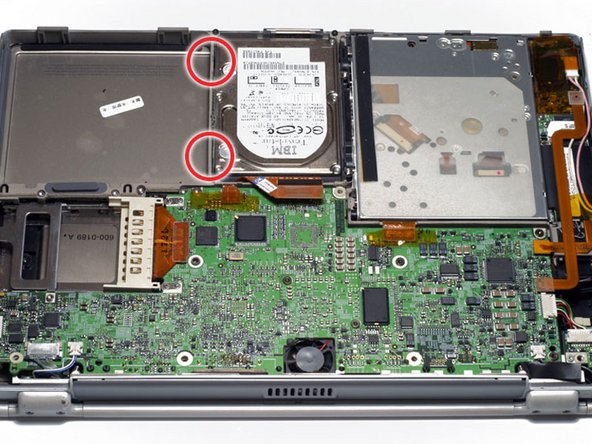
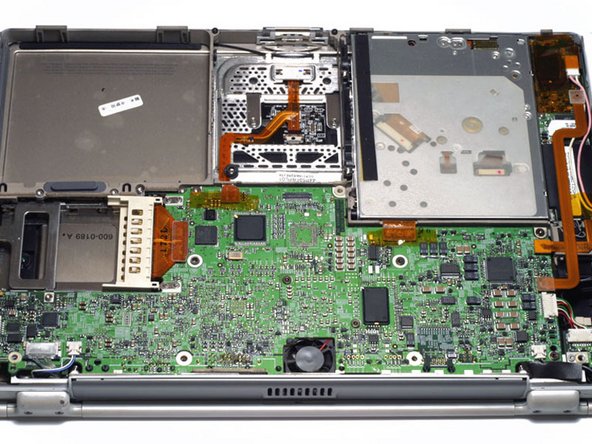
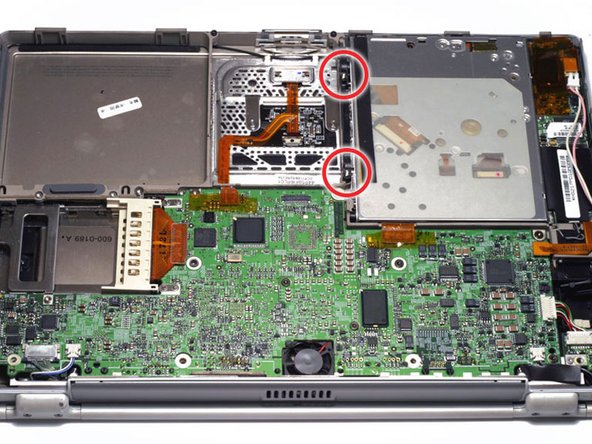
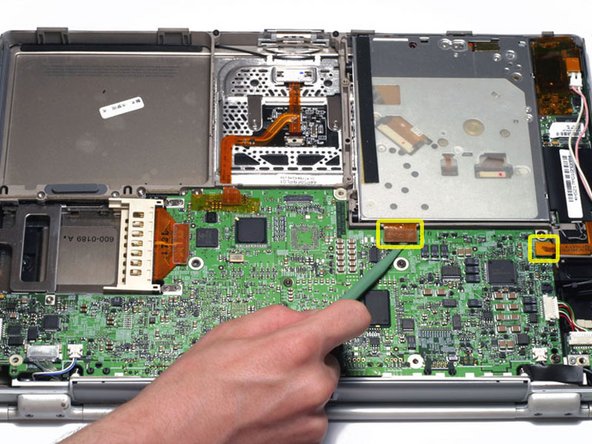
    • To free the hard drive, remove the two T8 Torx screws from the right wall of the battery housing.

    Add Comment

  10. PowerBook G4 Titanium DVI PC Card Cage Replacement: step 10, image 1 of 1
    • Remove the hard drive by lifting the left edge up and out of the computer.

    • There are four rubber bumpers that fit over the hard drive screws. Ensure that these bumpers come out when you remove the hard drive.

    Add Comment

  11. PowerBook G4 Titanium DVI PC Card Cage Replacement: step 11, image 1 of 1
    • Your laptop should look approximately like this.

    Add Comment

  12. PowerBook G4 Titanium DVI PC Card Cage Replacement: step 12, image 1 of 1
    • Disconnect and remove the indicated orange ribbon cable.

    Add Comment

  13. PowerBook G4 Titanium DVI PC Card Cage Replacement: step 13, image 1 of 1
    • Disconnect the pink and white inverter cable from the inverter board.

    • The display inverter has orange plastic shielding around it that looks similar to the tape used elsewhere within the computer. Do not remove the shielding from the inverter.

    Add Comment

  14. PowerBook G4 Titanium DVI PC Card Cage Replacement: step 14, image 1 of 1
    • Remove the two silver T8 Torx screws from the black plastic bar.

    • Lift the black plastic bar out.

    • Reassembly will be significantly easier if you reseat the hard drive before returning the black bar to its place.

    Add Comment

  15. PowerBook G4 Titanium DVI PC Card Cage Replacement: step 15, image 1 of 1
    • Disconnect the two orange connectors from the logic board, removing tape as necessary.

    Add Comment

  16. PowerBook G4 Titanium DVI PC Card Cage Replacement: step 16, image 1 of 1
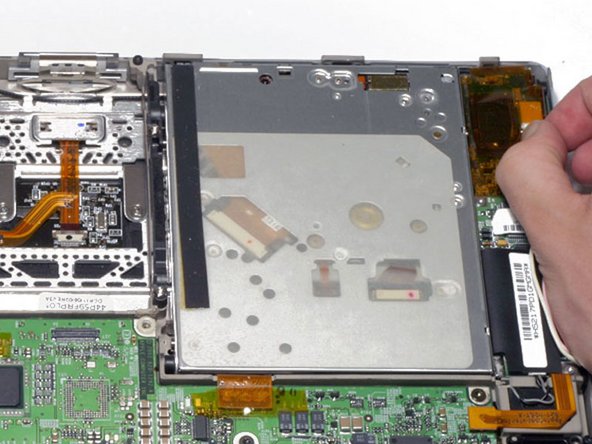
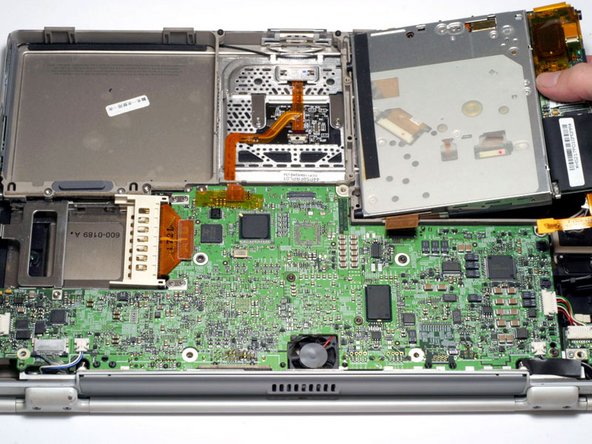
    • Lift the drive up on the right side so that you can access and disconnect the modem cable and inverter cable.

    Add Comment

  17. PowerBook G4 Titanium DVI PC Card Cage Replacement: step 17, image 1 of 1
    • Remove the drive by lifting the right edge up and out of the computer.

    Add Comment

  18. PowerBook G4 Titanium DVI PC Card Cage Replacement: step 18, image 1 of 1
    • Disconnect the large DC-In connector from the right side of the logic board.

    Add Comment

  19. PowerBook G4 Titanium DVI PC Card Cage Replacement: step 19, image 1 of 1
    • Remove the two T6 Torx screws from the DC-In board.

    Add Comment

  20. PowerBook G4 Titanium DVI PC Card Cage Replacement: step 20, image 1 of 1
    • Lift the DC-In board out of the computer by pulling up and away from you.

    • If you don't have a 667 MHz computer, there is a fan in this location which makes it a bit difficult to remove the DC-In board.

    • If there is a fan present, rotate the DC-In board slightly clockwise before easing it out at a slight angle in order to clear the fan clamp on top of it.

    Add Comment

  21. PowerBook G4 Titanium DVI PC Card Cage Replacement: step 21, image 1 of 1
    • Before continuing, place a soft cloth on your work surface to rest the computer on. Turn the G4 over and place it on the cloth.

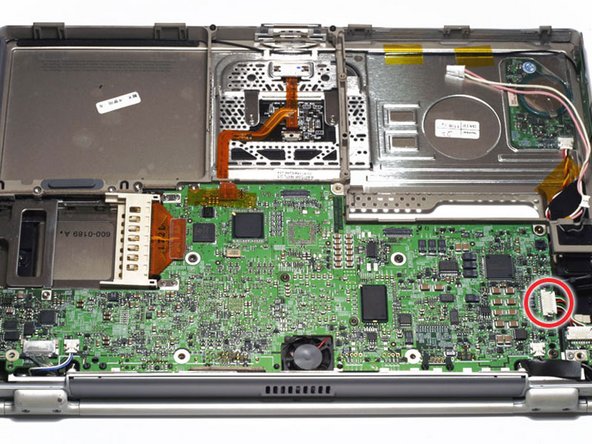
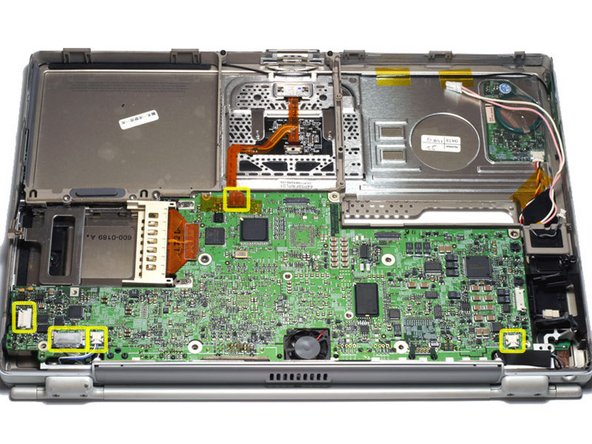
    • Disconnect the four indicated connectors from the logic board.

    • The large multicolor cable may be difficult to free.

    • The top center cable may not need to be disconnected to remove the modem filter board. It connects to the logic board fan to its immediate left, which is attached to the logic board itself.

    Add Comment

  22. PowerBook G4 Titanium DVI PC Card Cage Replacement: step 22, image 1 of 1
    • Remove the T8 Torx screw near the heat pipe.

    Add Comment

  23. PowerBook G4 Titanium DVI PC Card Cage Replacement: step 23, image 1 of 1
    • Disconnect the two connectors from the modem filter board.

    • To the immediate right of the modem filter board, the heatsink has two sets of five fins with a double-wide space in between them. This space is where the gray & black coiled wire is supposed to go to ensure a flush fit.

    Add Comment

  24. PowerBook G4 Titanium DVI PC Card Cage Replacement: step 24, image 1 of 1
    • Remove the T6 Torx screw from the modem filter board.

    Add Comment

  25. PowerBook G4 Titanium DVI PC Card Cage Replacement: step 25, image 1 of 1
    • Remove the modem filter board from the computer by pulling up and to the right.

    • There is a small plastic post which helps hold the modem filter board in place. You need to clear this post to remove the modem filter board from the computer.

    Add Comment

  26. PowerBook G4 Titanium DVI PC Card Cage Replacement: step 26, image 1 of 1
    • Turn the G4 over.

    • Remove the seven T8 Torx screws from the logic board.

    • The five black screws go on the right side of the logic board, the large silver screw goes at the top, and the small silver screw is located on the left side.

    Add Comment

  27. PowerBook G4 Titanium DVI PC Card Cage Replacement: step 27, image 1 of 1
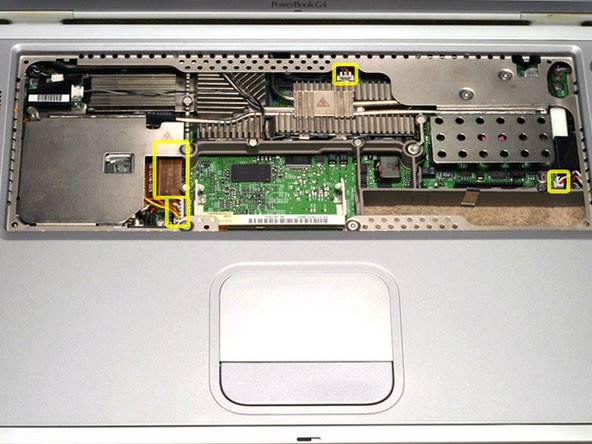
    • Disconnect the 5 indicated connectors from the logic board, removing tape as necessary.

    • Reassembly Tip: Reseating the logic board will be much easier if you use kapton tape to hold these five connectors out of the way until it is in place.

    • Caution: If taping the connectors back, be careful not to use tape with anything but very weak adhesive (i.e. kapton tape). Even electrical tape can pull the paint off the hinges when removed.

    Add Comment

  28. PowerBook G4 Titanium DVI PC Card Cage Replacement: step 28, image 1 of 1
    • Carefully lift the logic board up and pull it away from you.

    • This step requires some force, but if the logic board will not come up, make sure that you have removed all the necessary screws and connectors. Warming the heatsink with a heatgun or blow dryer will help release the logic board.

    • On 800 MHz and above G4s, you must disconnect the fan cable from the logic board before you lift the board entirely off.

    Add Comment

  29. PowerBook G4 Titanium DVI PC Card Cage Replacement: step 29, image 1 of 1
    • Your laptop should look approximately like this.

    Add Comment

  30. PowerBook G4 Titanium DVI PC Card Cage Replacement: step 30, image 1 of 1
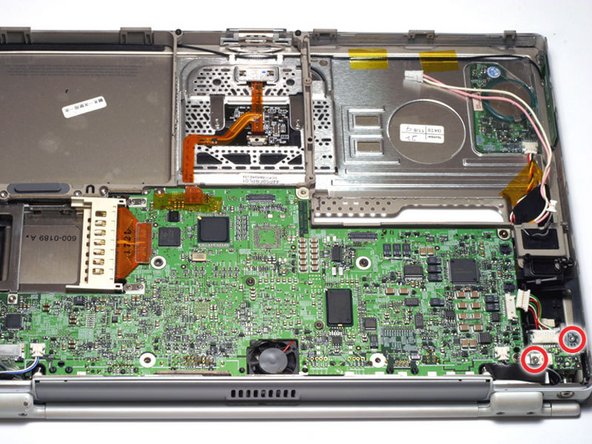
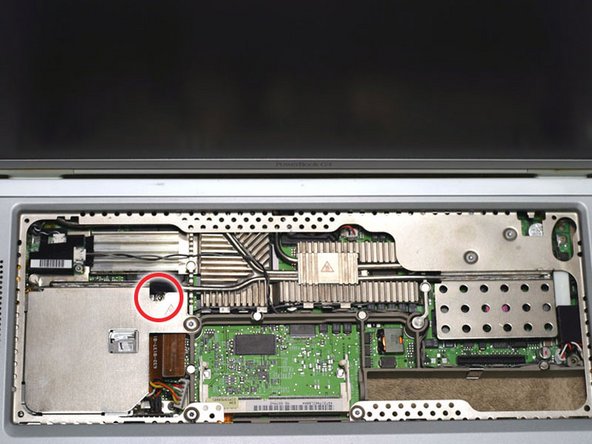
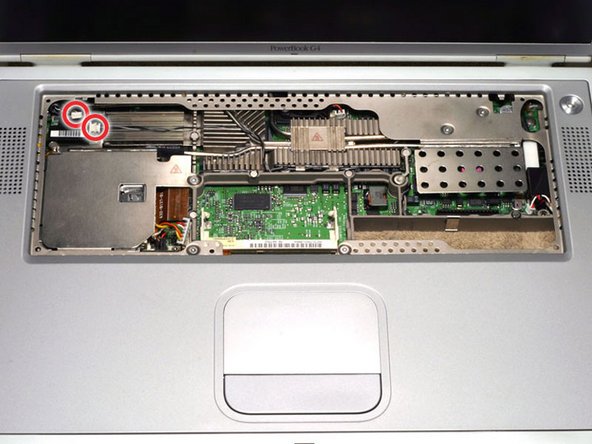
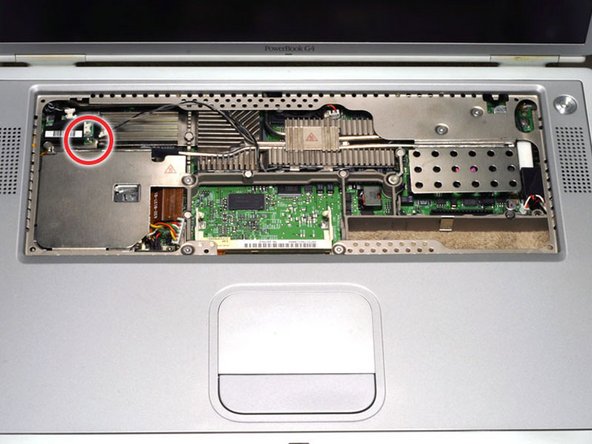
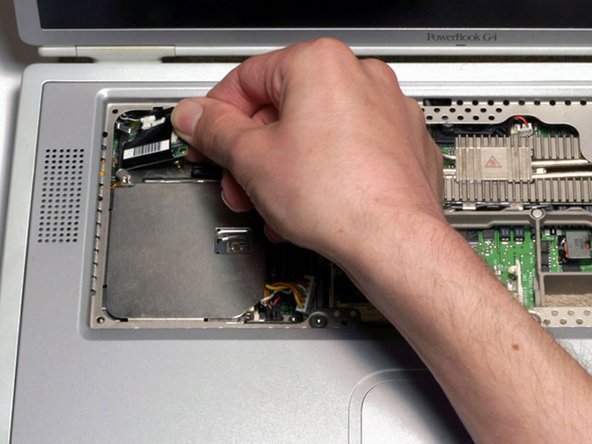
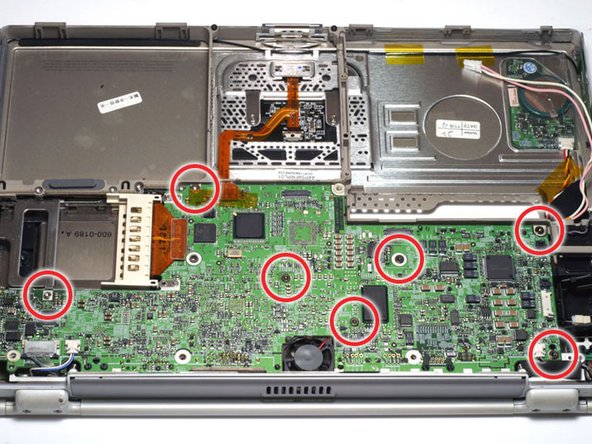
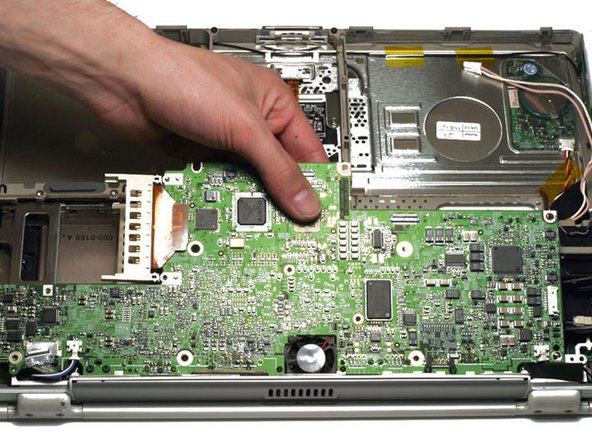
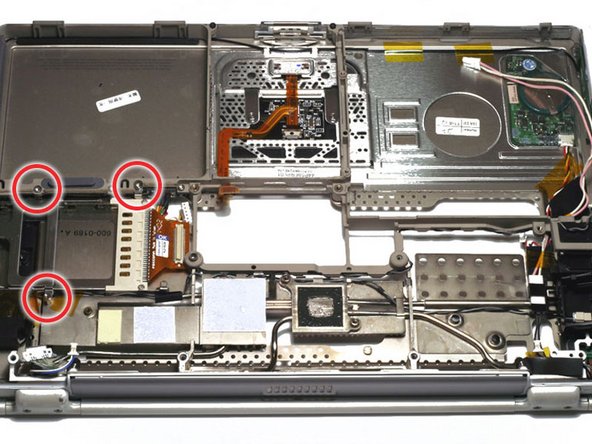
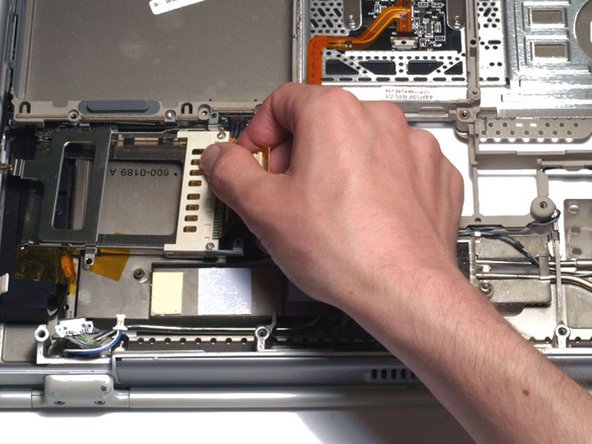
    • Remove the two T8 Torx screws that secure the PC Card cage.

    • Remove the 4 mm hex nut from the PC Card cage.

    Add Comment

  31. PowerBook G4 Titanium DVI PC Card Cage Replacement: step 31, image 1 of 1
    • Remove the PC Card cage by pulling it to the right and twisting slightly toward you.

    Add Comment

Conclusion

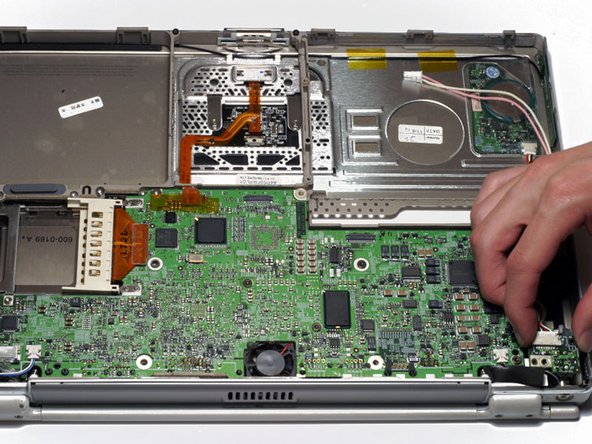
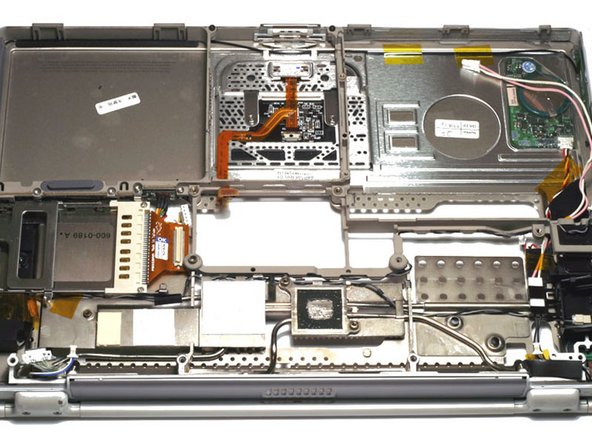
To reassemble your device, follow these instructions in reverse order.

Cancel: I did not complete this guide.

System

Member since: 09/24/09

2,562 Guides authored

0 Guide Comments

Add Comment

View Statistics:

Past 24 Hours: 0

Past 7 Days: 0

Past 30 Days: 1

All Time: 23