
PowerBook G4 Titanium Mercury Modem Replacement

What you need

  1. PowerBook G4 Titanium Mercury Modem Replacement, PowerBook G4 Titanium Mercury Modem Replacement: step 1, image 1 of 1
    • Remove the battery.

    • Turn the keyboard locking screw so that it is parallel to the space bar.

    • Pull the keyboard release tabs toward you and lift up on the keyboard until it pops free.

    Add Comment

  2. PowerBook G4 Titanium Mercury Modem Replacement: step 2, image 1 of 1
    • Rest the keyboard face down on the trackpad area.

    • Disconnect the keyboard connector from the logic board.

    Add Comment

  3. PowerBook G4 Titanium Mercury Modem Replacement: step 3, image 1 of 1
    • Your laptop should look approximately like this.

    Add Comment

  4. PowerBook G4 Titanium Mercury Modem Replacement: step 4, image 1 of 1
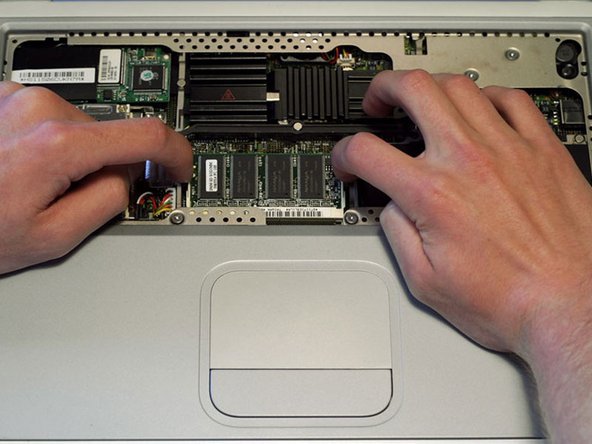
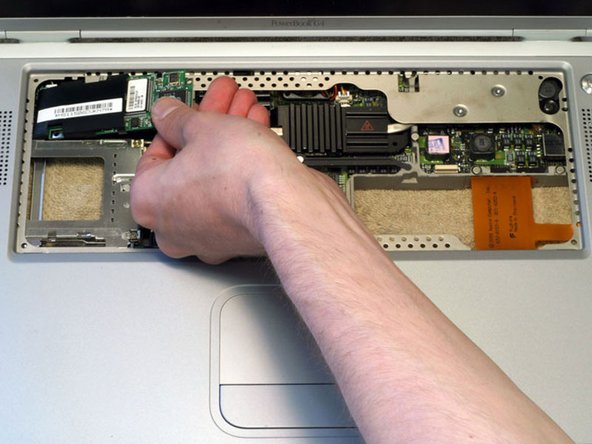
    • Release the tabs on each side of the RAM chip at the same time. These tabs lock the chip in place and releasing them will cause the chip to "pop" up.

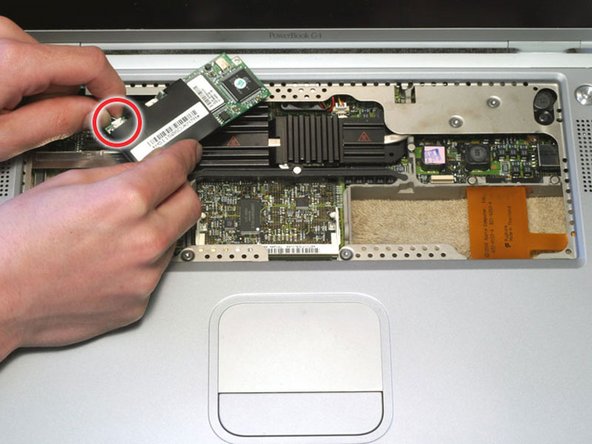
    • Pull the RAM chip out.

    • Repeat this process if a second RAM chip is installed.

    Add Comment

    • Turn the G4 over.

    • Remove the eight Phillips screws from the lower case.

    Add Comment

  5. PowerBook G4 Titanium Mercury Modem Replacement: step 6, image 1 of 1
    • Using your thumbs, slide the lower case away from you.

    • The lower case may stick in the front on a tab just above the center of the DVD drive. Be careful as you work the case off, or you may break the thin strip of plastic just above the drive.

    • Lift the lower case off.

    Add Comment

  6. PowerBook G4 Titanium Mercury Modem Replacement: step 7, image 1 of 1
    • Your laptop should look approximately like this.

    Add Comment

  7. PowerBook G4 Titanium Mercury Modem Replacement: step 8, image 1 of 1
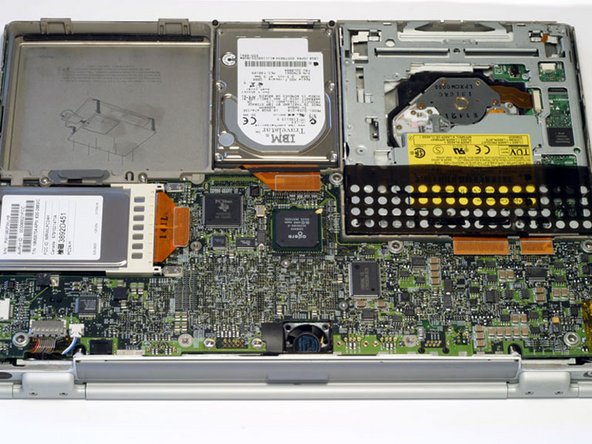
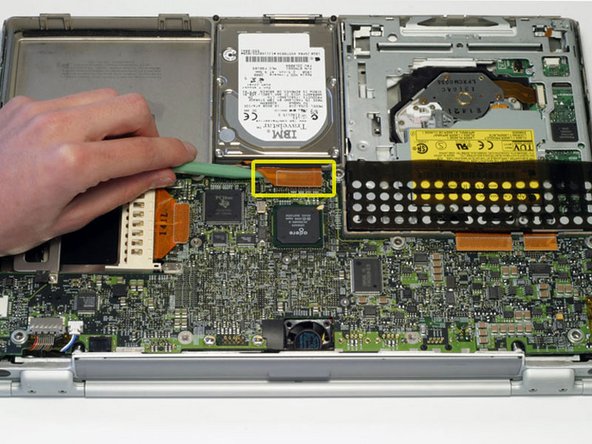
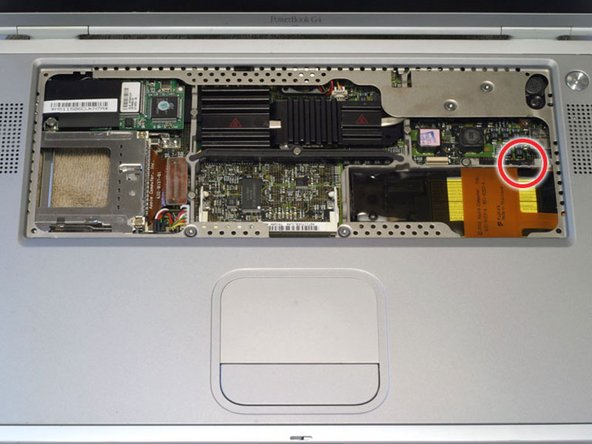
    • Disconnect the hard drive ribbon from the logic board using a spudger or the tip of your finger.

    Add Comment

  8. PowerBook G4 Titanium Mercury Modem Replacement: step 9, image 1 of 1
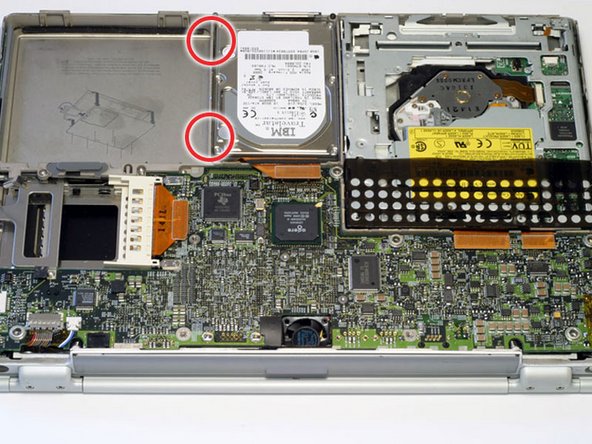
    • To free the hard drive, remove the two T8 Torx screws from the right wall of the battery housing.

    Add Comment

  9. PowerBook G4 Titanium Mercury Modem Replacement: step 10, image 1 of 1
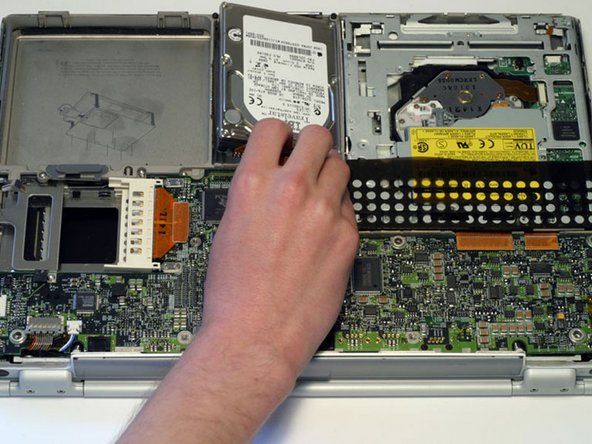
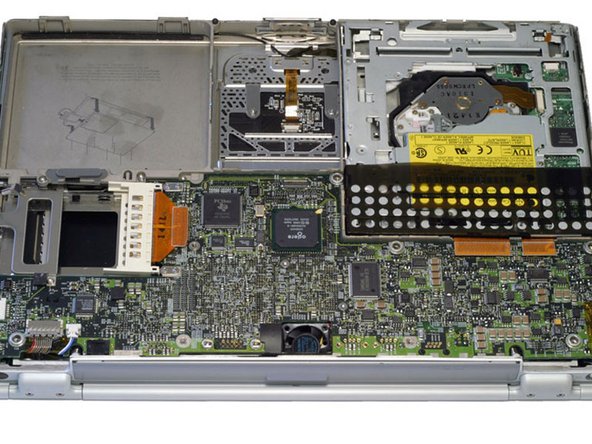
    • Remove the hard drive by gently grasping the orange ribbon cable and lifting the left edge up and out of the computer.

    • There are four rubber bumpers that fit over the hard drive screws. Ensure that these bumpers come out when you remove the hard drive.

    Add Comment

  10. PowerBook G4 Titanium Mercury Modem Replacement: step 11, image 1 of 1
    • Your laptop should look approximately like this.

    Add Comment

  11. PowerBook G4 Titanium Mercury Modem Replacement: step 12, image 1 of 1
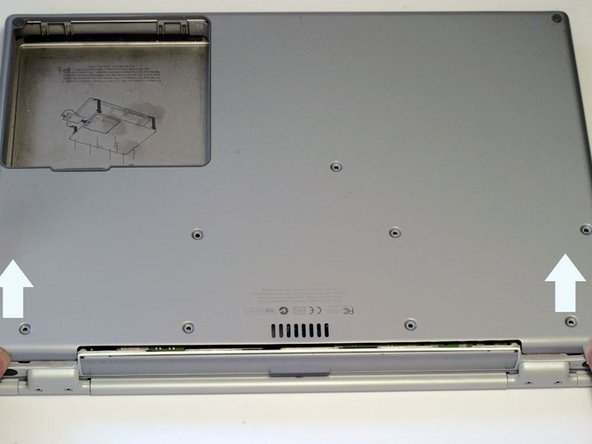
    • Before continuing, place a soft cloth on your work surface to rest the computer on. Turn the G4 over, making sure the DVD drive doesn't fall out.

    • Carefully peel the adhesive strip away from the DVD drive. The plastic dust shield covering the DVD drive is easily damaged. Try to start at the four corners and work toward the center.

    Add Comment

  12. PowerBook G4 Titanium Mercury Modem Replacement: step 13, image 1 of 1
    • Bend the silver metal EMI clip so that it is vertical. This part may fall out after removing the DVD drive.

    • The EMI clip is not essential for reassembling the computer. If the clip falls out, don't worry about putting it back in.

    Add Comment

  13. PowerBook G4 Titanium Mercury Modem Replacement: step 14, image 1 of 1
    • Turn the G4 over.

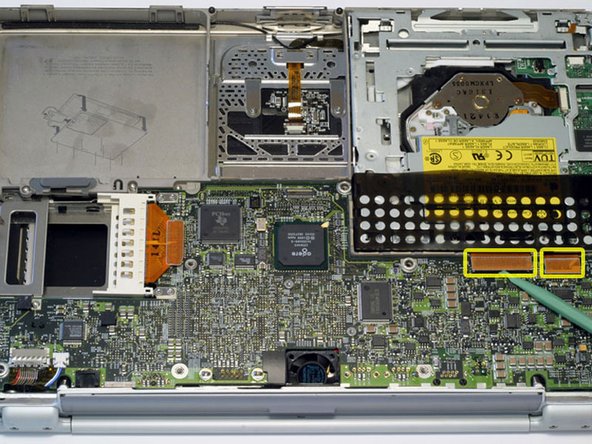
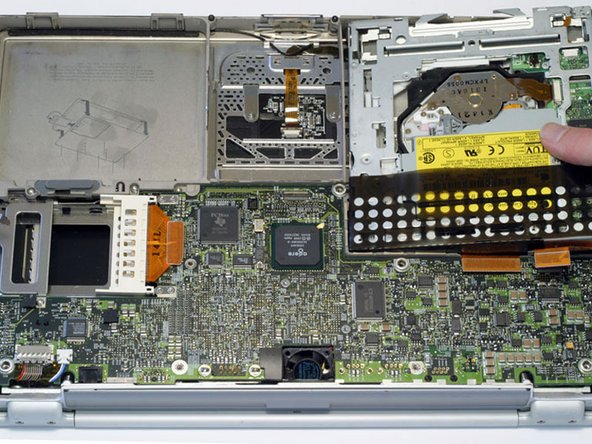
    • Disconnect both orange ribbon cables from the logic board using a spudger or the tip of your finger.

    Add Comment

  14. PowerBook G4 Titanium Mercury Modem Replacement: step 15, image 1 of 1
    • Remove the DVD drive by lifting the right edge up and out of the computer.

    • If you have a CD or any other object jammed in your optical drive, we have an optical drive repair guide.

    Add Comment

  15. PowerBook G4 Titanium Mercury Modem Replacement: step 16, image 1 of 1
    • Turn the G4 over.

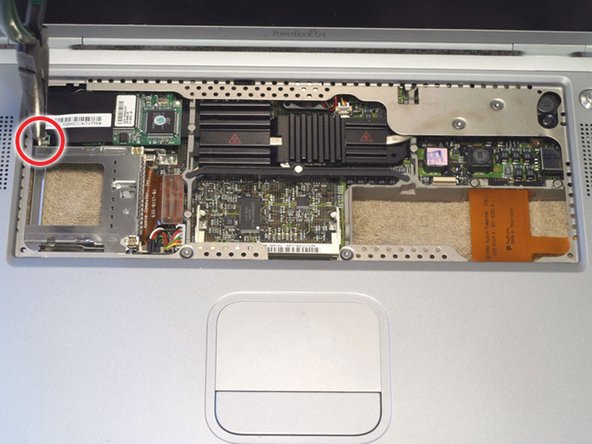
    • Using a 5 mm nut driver or needle-nose pliers, remove the hex nut from the modem.

    Add Comment

  16. PowerBook G4 Titanium Mercury Modem Replacement: step 17, image 1 of 1
    • Lift the modem out by pulling up and to the right.

    • The plastic shielding on the modem may catch on the computer's case. Rocking the modem from side to side will help free the modem.

    Add Comment

  17. PowerBook G4 Titanium Mercury Modem Replacement: step 18, image 1 of 1
    • Disconnect the connector cable from the modem.

    Add Comment

Conclusion

To reassemble your device, follow these instructions in reverse order.

Cancel: I did not complete this guide.

System

Member since: 09/24/09

2,562 Guides authored

0 Guide Comments

Add Comment

View Statistics:

Past 24 Hours: 0

Past 7 Days: 0

Past 30 Days: 0

All Time: 9