/

Removal/Replacement of Dell Inspiron E1705 Hard Drive

What you need

  1. Removal/Replacement of Dell Inspiron E1705 Hard Drive, Removal/Replacement of Dell Inspiron E1705 Hard Drive: step 1, image 1 of 1
    • Make sure that the computer is turned off and is disconnected from external power source.

    • Turn it upside down and locate the battery release switch.

  2. Removal/Replacement of Dell Inspiron E1705 Hard Drive: step 2, image 1 of 2 Removal/Replacement of Dell Inspiron E1705 Hard Drive: step 2, image 2 of 2
    • While holding the switch in the open position, lift out the battery.

    • If you plan to work on any internal laptop components, press and hold the power button for 5 seconds. This will dissipate any residual charge on the motherboard to prevent electrical shock when you begin to handle it.

  3. Removal/Replacement of Dell Inspiron E1705 Hard Drive: step 3, image 1 of 2 Removal/Replacement of Dell Inspiron E1705 Hard Drive: step 3, image 2 of 2
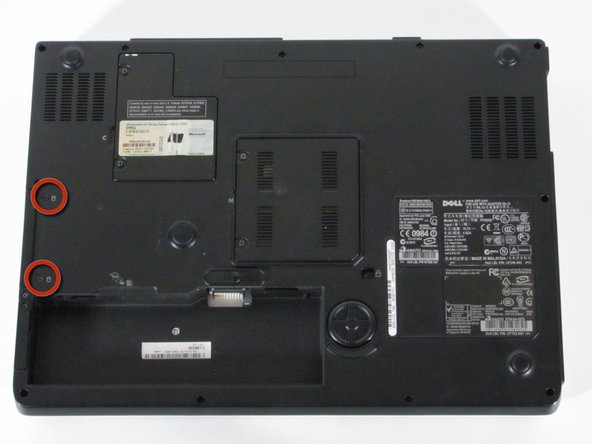
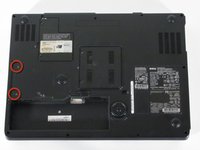
    • Remove the two Phillips #1 screws on the left side of the computer, just above the battery compartment.

    • These screws hold the hard drive tray into the hard drive compartment.

  4. Removal/Replacement of Dell Inspiron E1705 Hard Drive: step 4, image 1 of 1
    • Slide the hard drive tray out of the hard drive compartment.

Conclusion

To reassemble your device, follow these instructions in reverse order.

System

Member since: 09/24/09

2,562 Guides authored

0 Comments

Add Comment

View Statistics:

Past 24 Hours: 0

Past 7 Days: 0

Past 30 Days: 0

All Time: 34