/

Removing PowerMac G4 M5183 DVD-ROM Drive Tray

What you need

  1. Removing PowerMac G4 M5183 DVD-ROM Drive Tray, Removing PowerMac G4 M5183 DVD-ROM Drive Tray: step 1, image 1 of 2 Removing PowerMac G4 M5183 DVD-ROM Drive Tray, Removing PowerMac G4 M5183 DVD-ROM Drive Tray: step 1, image 2 of 2
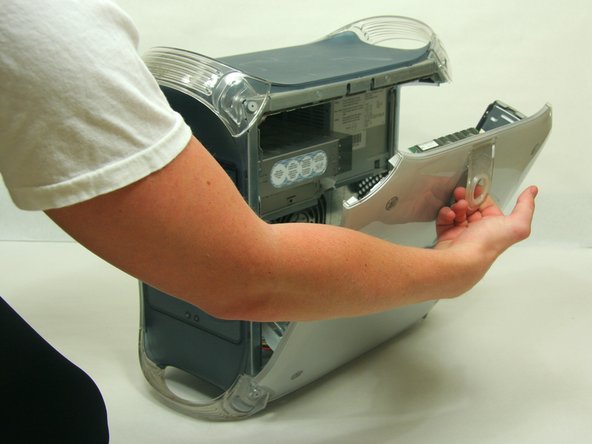
    • Pull on outer latch.

    • Lower door until it is level with your work surface.

    • Before working on the computer make sure it is not plugged into a power supply, then touch a metal object. This discharges static electricity, which could damage the computer.

  2. Removing PowerMac G4 M5183 DVD-ROM Drive Tray: step 2, image 1 of 2 Removing PowerMac G4 M5183 DVD-ROM Drive Tray: step 2, image 2 of 2
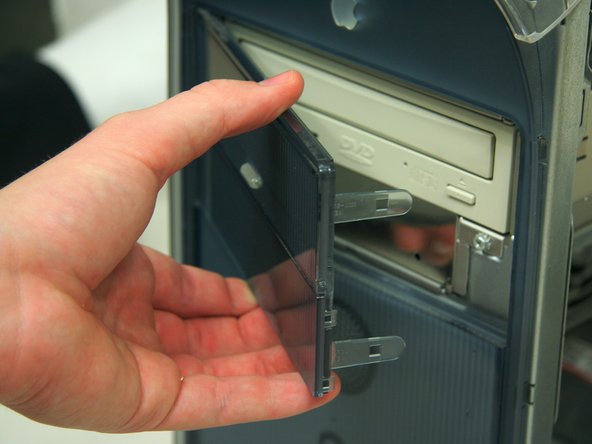
    • Removing the faceplate.

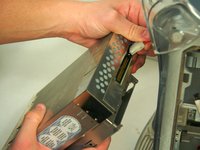
    • On the inside of the case, find the two plastic tabs.

    • While depressing the tabs, remove the faceplate by pulling and rotating outward.

  3. Removing PowerMac G4 M5183 DVD-ROM Drive Tray: step 3, image 1 of 1
    • Remove the two screws on the front of the drive with the Phillips #1 screwdriver.

  4. Removing PowerMac G4 M5183 DVD-ROM Drive Tray: step 4, image 1 of 3 Removing PowerMac G4 M5183 DVD-ROM Drive Tray: step 4, image 2 of 3 Removing PowerMac G4 M5183 DVD-ROM Drive Tray: step 4, image 3 of 3
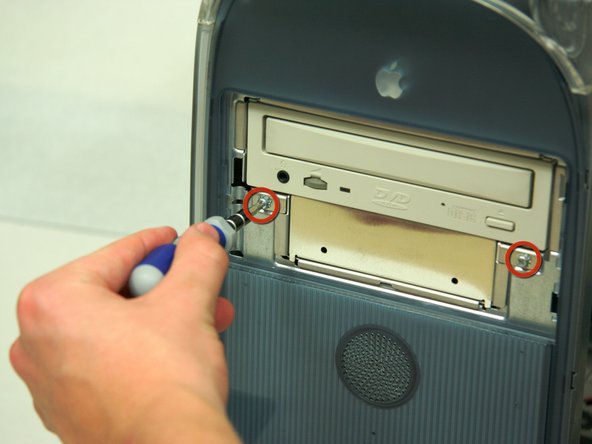
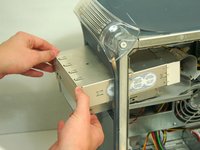
    • Pull the drive out to allow access to the power and ribbon cables. Do not fully remove.

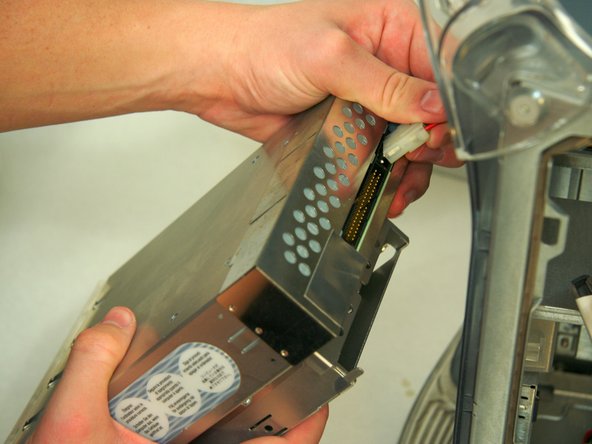
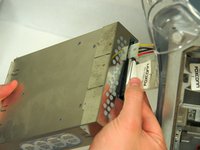
    • Remove both the power and ribbon cable.

Finish Line

System

Member since: 09/24/09

2,562 Guides authored

0 Comments

Add Comment

View Statistics:

Past 24 Hours: 0

Past 7 Days: 0

Past 30 Days: 0

All Time: 7