What you need
-
-
Carefully remove the camera-cover. It is levered with a metal-spattle and attached with adhesive tape.
-
-
-
Remove 3 screws from below the camera cover and carefully open the 20 clips that are used to attach the back-cover to the main body.
-
-
-
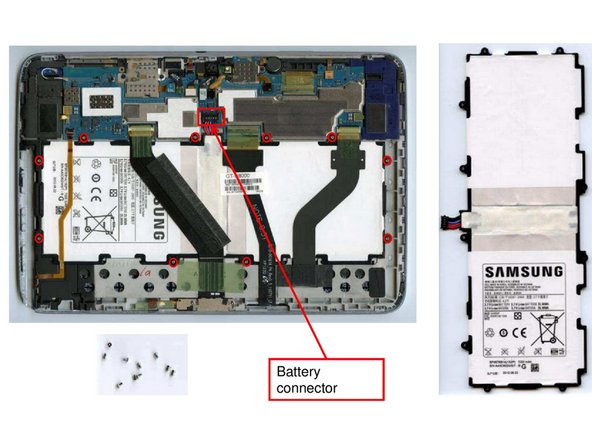
Next, you may remove the 4 screws that hold the battery fixed to the mainboard.
-
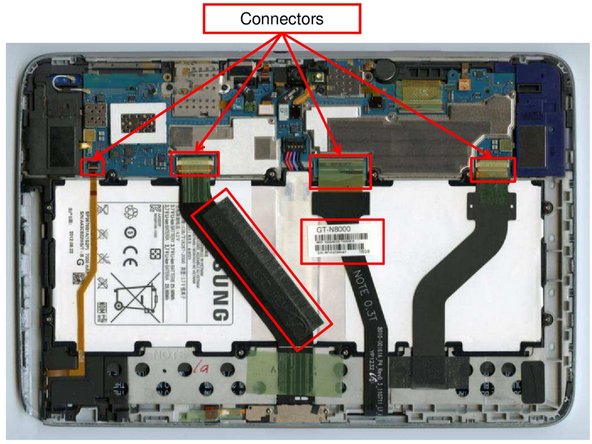
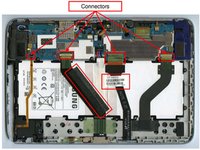
Carefully disconnect the four ribbon cables and pull off the 2 adhesives that hold down the wirings.
-
Now, you can remove the battery.
-
-
-
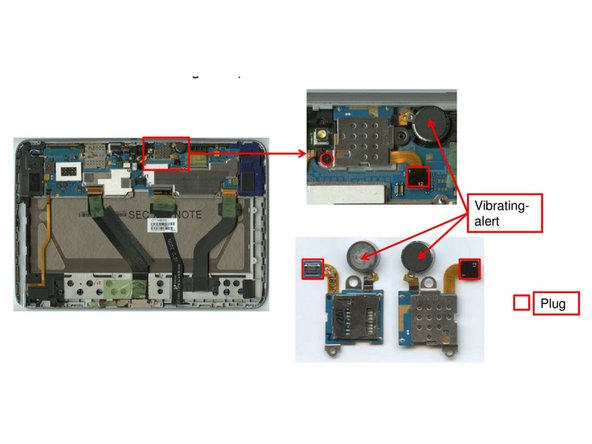
Carefully unscrew the scre that holds down the uSD-Card Reader, unplug the device. The Vibrating-Alert may be fixed with adhesives.
-
-
-
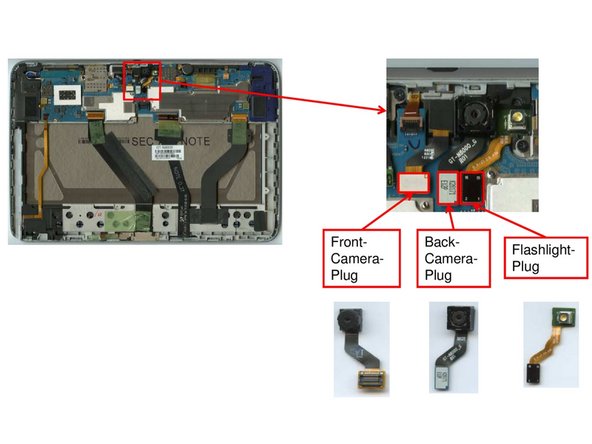
Carefully unplug the camera connectors from the mainboard and remove the cameras from their mounting. They may be attached by adhesives.
-
-
-
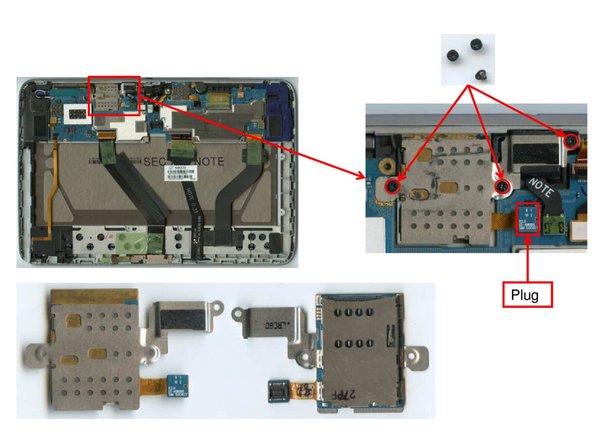
Carefully remove the 3 screws that attach the SIM-Card-Reader to the Mainboard. Detach the plug. remove the Card-Reader
-
-
-
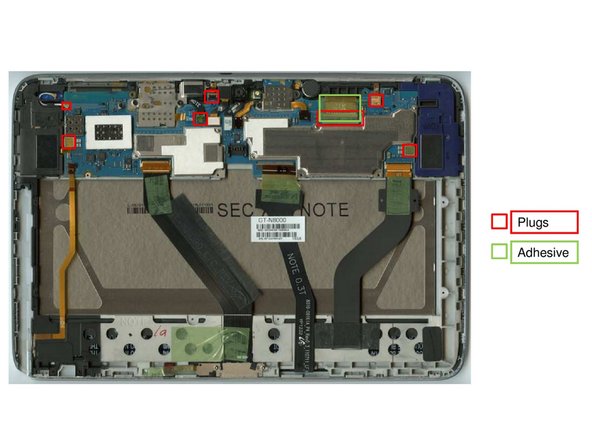
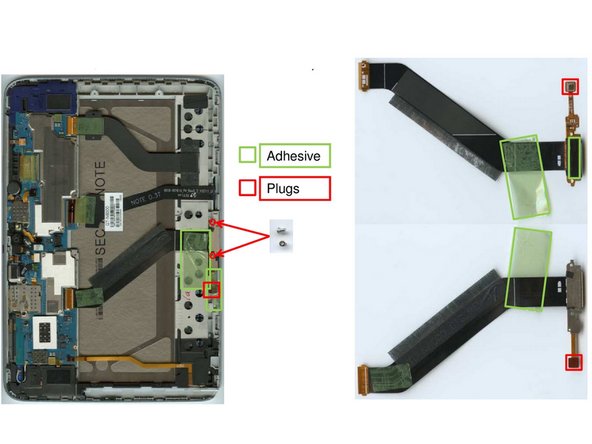
In order to remove the mainboard, 7 plugs must be loosened and the adhesive displayed in the graphic must be pulled off. The Mainboard can now be removed.
-
-
-
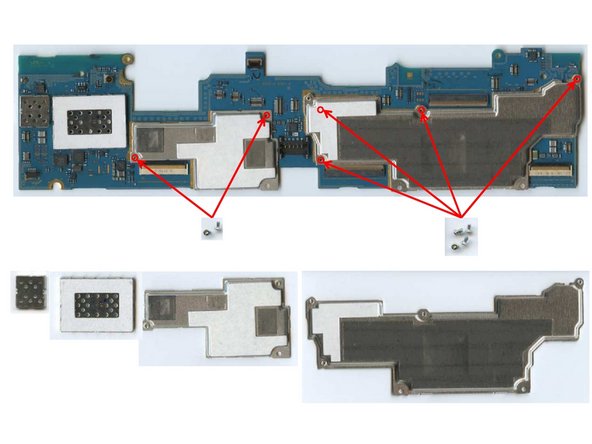
To remove the EMI-Shields, it is necessary to remove 4 screws from the back of the device. You can now lift off the EMI Shield. In order to remove the small Shield, 2 more screws need to be removed. After this the shields can be removed.
-
-
-
The connectors may now be removed by detaching the adhesives under the cables and unplugging the two plugs.
-
In Order to remove the dock connector first two screws from the that hold down the plug need to be removed. Using a small tweezer carefully remove the plug.
-
-
-
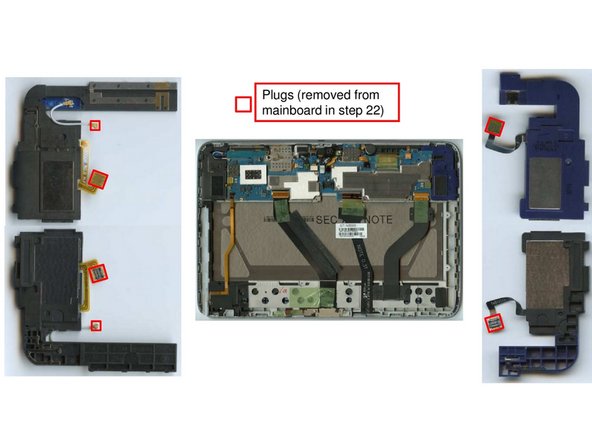
Carefully remove the speakers by loosening 2 plugs from each connector. Note that the speaker on the right side has an antenna unit attached to it.
-
-
-
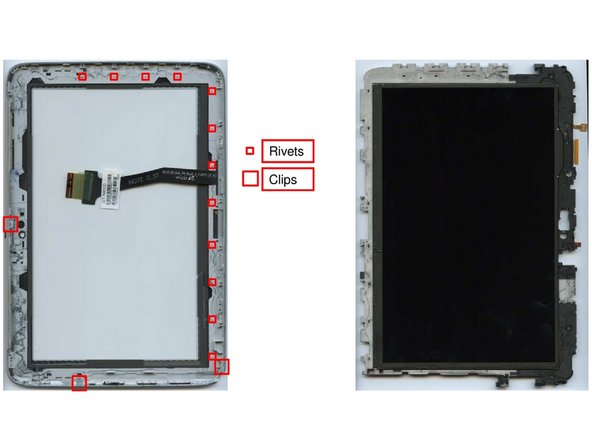
For the removal of the front glass, brutal force is required. The twelve clips that hold down the front glass must be (carefully) destroyed in order to detach the glass from the rest of the device.
-
-
-
As glass and frame are bonded with strong adhesives, in order to separate both, a good lever is needed. The separation will likely leave scratches on both of the components.
-
-
-
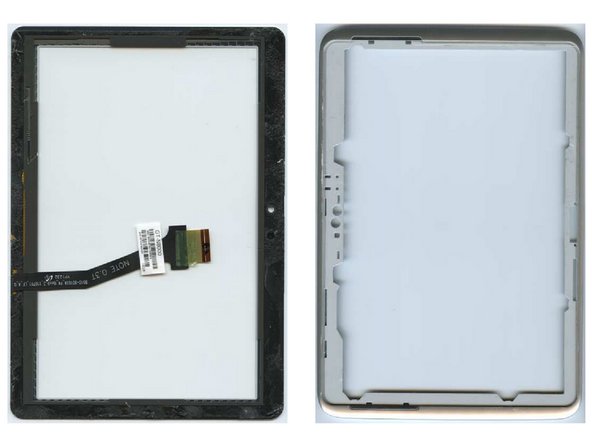
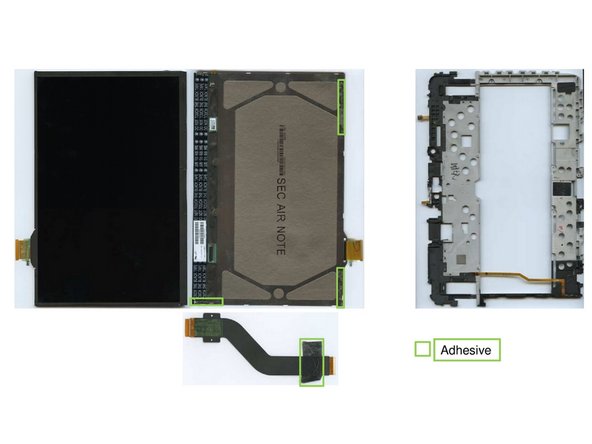
Once the front glass is removed, separating display unit and frame is a peace of cake. Just unplug the ribbon cable und detach it from the double sided adhesive that it is fixed with and pull off the display unit from the three adhesive areas. The display can be lifted off easily.
-