Sanyo VPC-X1200 LCD Screen Replacement

What you need

    1. Sanyo VPC-X1200 LCD Screen Replacement, Sanyo VPC-X1200 LCD Screen Replacement: step 1, image 1 of 3 Sanyo VPC-X1200 LCD Screen Replacement, Sanyo VPC-X1200 LCD Screen Replacement: step 1, image 2 of 3 Sanyo VPC-X1200 LCD Screen Replacement, Sanyo VPC-X1200 LCD Screen Replacement: step 1, image 3 of 3
      • Remove the five case screws with a Phillips #00 Screwdriver.

      • Five 3.5mm Phillips Screws

      Add Comment

    2. Sanyo VPC-X1200 LCD Screen Replacement: step 2, image 1 of 1
      • Gently lift up the back cover and set aside.

      Add Comment

    3. Sanyo VPC-X1200 LCD Screen Replacement: step 3, image 1 of 2 Sanyo VPC-X1200 LCD Screen Replacement: step 3, image 2 of 2
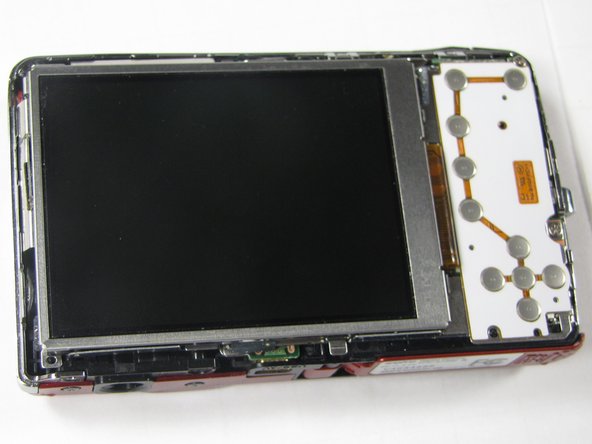
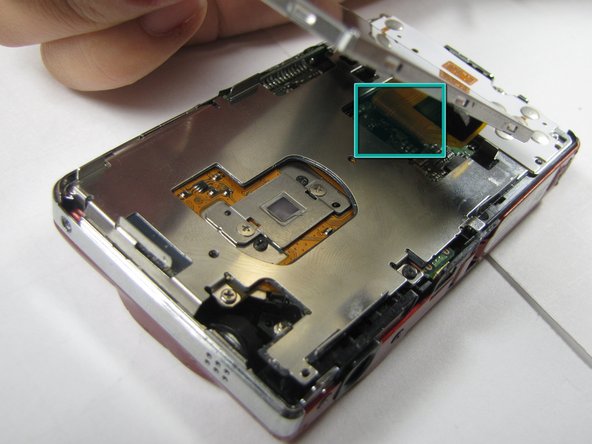
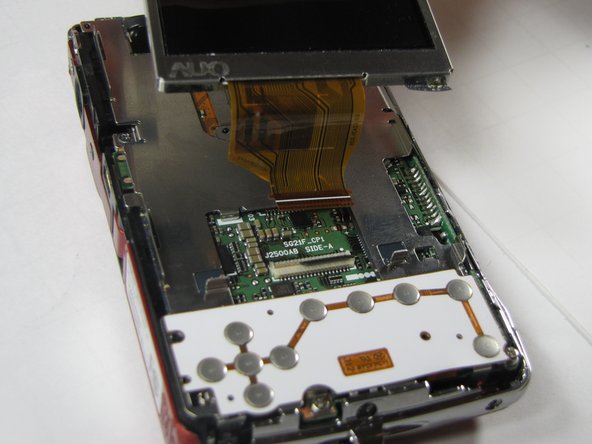
      • Gently lift up on the left side of the LCD and slowly pull it to the left side of the camera but do not remove entirely, there is a ribbon connector.

      • Be careful not to rip out the ribbon connector.

      Add Comment

    4. Sanyo VPC-X1200 LCD Screen Replacement: step 4, image 1 of 2 Sanyo VPC-X1200 LCD Screen Replacement: step 4, image 2 of 2
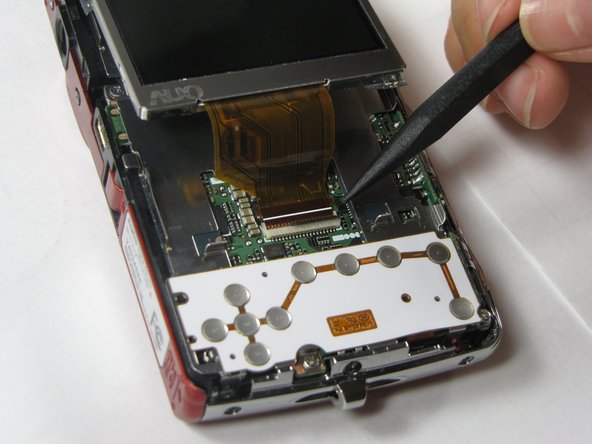
      • To clear the ribbon connection underneath the screen, lift up the black ribbon gate with the spudger.

      • Gently lift ribbon out of the gate and set screen aside.

      Add Comment

Conclusion

To reassemble your device, follow these instructions in reverse order.

Cancel: I did not complete this guide.

System

Member since: 09/24/09

2,562 Guides authored

0 Guide Comments

Add Comment

View Statistics:

Past 24 Hours: 0

Past 7 Days: 0

Past 30 Days: 0

All Time: 12