Sony Cyber-shot DSC-P52 Motherboard Replacement

What you need

    1. Sony Cyber-shot DSC-P52 Motherboard Replacement, Sony Cyber-shot DSC-P52 Motherboard Replacement: step 1, image 1 of 1
      • Open battery compartment and remove batteries.

      • Remove all visible screws on the outside of the case.

      • There should be three of them that are all easily located.

      Add Comment

    2. Sony Cyber-shot DSC-P52 Motherboard Replacement: step 2, image 1 of 1
      • Open the memory card compartment.

      • Remove the screw next to the memory card slot.

      Add Comment

    3. Sony Cyber-shot DSC-P52 Motherboard Replacement: step 3, image 1 of 1
      • Pull apart front and back cover pieces carefully.

      • The front cover should come completely free with little effort.

      • The back cover will still be attached to the circuit board.

      Add Comment

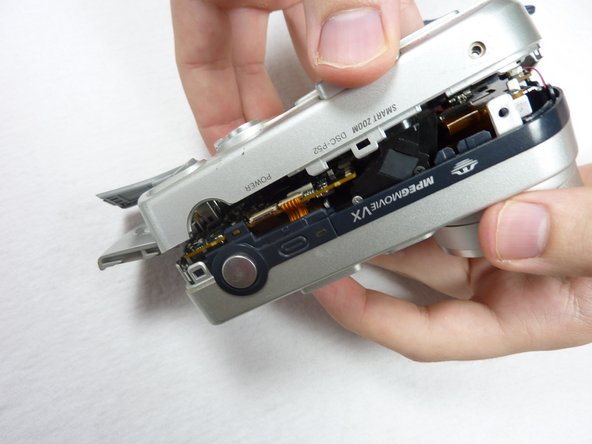
    4. Sony Cyber-shot DSC-P52 Motherboard Replacement: step 4, image 1 of 1
      • Unclip all of the clips holding in the circuitry simultaneously and remove the back case.

      • The circuitry will still be connected to the back case by ribbon cables.

      Add Comment

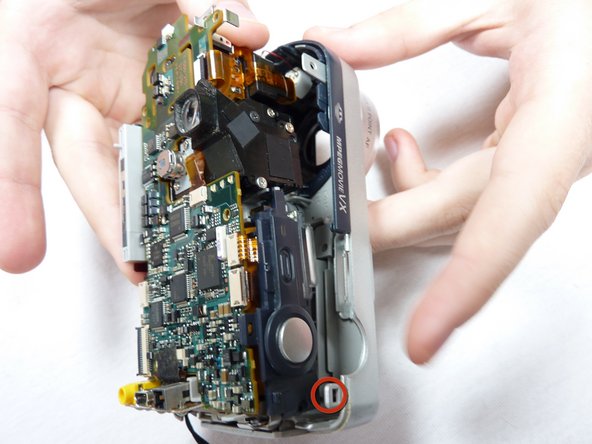
    5. Sony Cyber-shot DSC-P52 Motherboard Replacement: step 5, image 1 of 1
      • Open case as shown.

      Add Comment

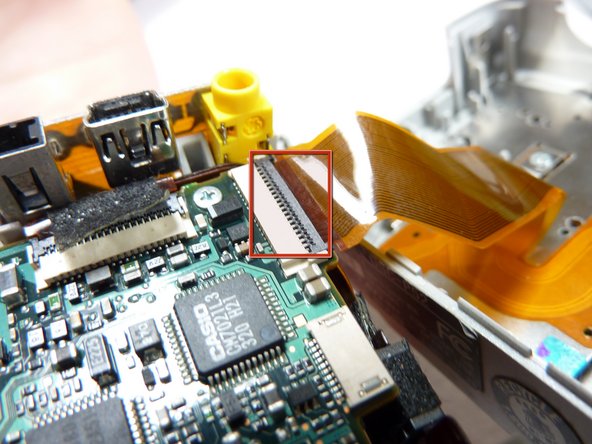
    6. Sony Cyber-shot DSC-P52 Motherboard Replacement: step 6, image 1 of 1
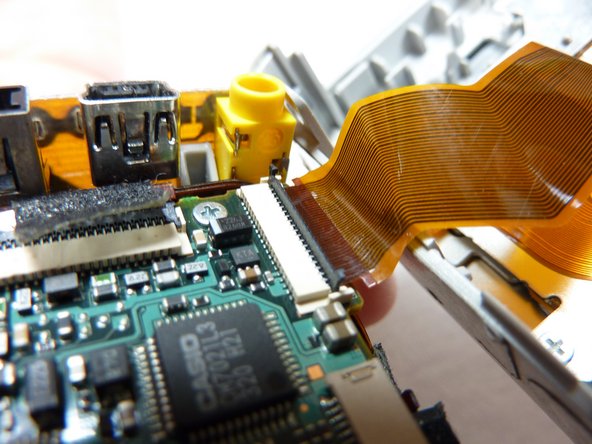
      • Unclip the clip holding the ribbon cable in.

      • Other ribbon cables might not have a clips.

      Add Comment

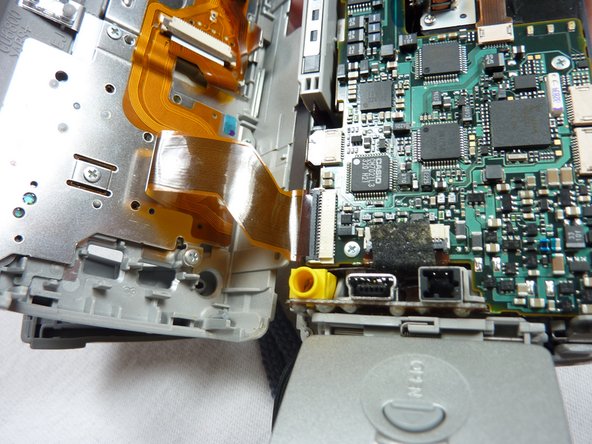
    7. Sony Cyber-shot DSC-P52 Motherboard Replacement: step 7, image 1 of 1
      • Pull the ribbon cable out.

      Add Comment

    8. Sony Cyber-shot DSC-P52 Motherboard Replacement: step 8, image 1 of 1
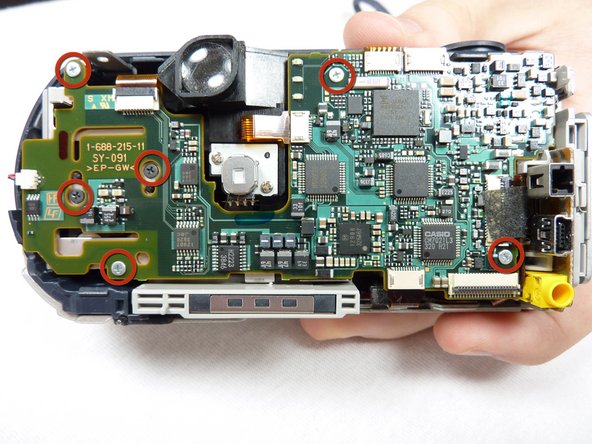
      • Remove all six screws on the front side of the motherboard circled in the picture.

      • Pull the motherboard from the rest of the housing.

      • It will still be connected to the flash unit.

      Add Comment

    9. Sony Cyber-shot DSC-P52 Motherboard Replacement: step 9, image 1 of 1
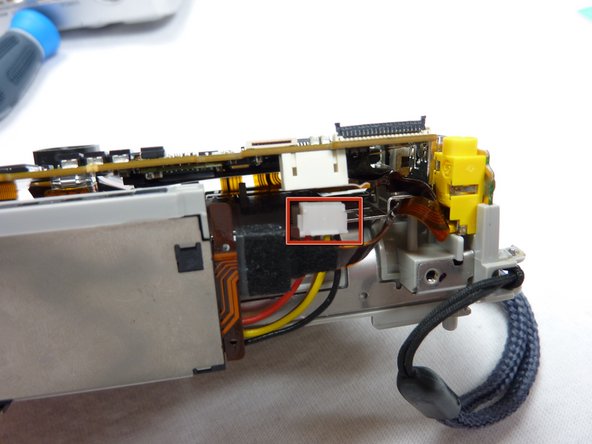
      • Remove the cable on the back side of the motherboard.

      Add Comment

    10. Sony Cyber-shot DSC-P52 Motherboard Replacement: step 10, image 1 of 1
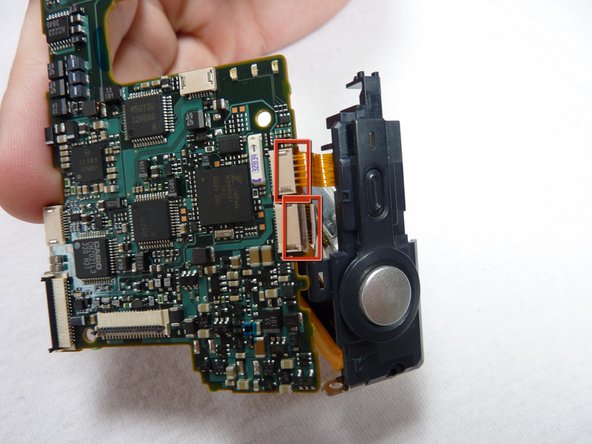
      • Detach the ribbon cables shown.

      • Careful! Touching the leads of the large yellow capacitor can result in a painful shock.

      • Remove the flash unit from the motherboard.

      Add Comment

    11. Sony Cyber-shot DSC-P52 Motherboard Replacement: step 11, image 1 of 1
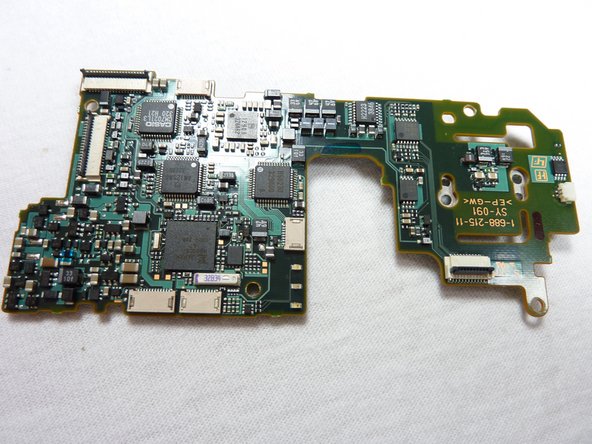
      • The motherboard is now free, and ready to be replaced by a new one.

      Add Comment

Conclusion

To reassemble your device, follow these instructions in reverse order.

Cancel: I did not complete this guide.

System

Member since: 09/24/09

2,562 Guides authored

0 Guide Comments

Add Comment

View Statistics:

Past 24 Hours: 0

Past 7 Days: 0

Past 30 Days: 0

All Time: 27