What you need
-
-
The device must be pried open to access the interior. It is possible to remove the camera cover with a lever. Note that the camera cover is fixed with 7 clips to the backside and where it reaches the front side of the device 3 small patches of double-sided adhesives glue the cover to the rest.
-
The cover for the charging cable can be removed manually using your fingers.
-
-
-
Destroying the structural integrity of 15 clips that hold the back cover should be enough to remove it.
-
8 screws must be removed that attach the inner back cover to the rest of the device. The screws should be clearly visible (2 next to the speaker's covers, 6 right in the middle, 2 in the other two corners) and can be unscrewed using a screw driver.
-
-
-
Once the inner back cover has been removed, the removal of the battery should be in reach.
-
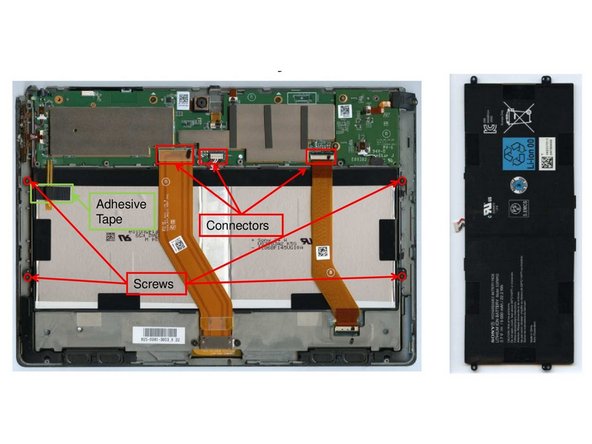
Detach the sticker above the temperature sensor (green box in the graphic). Unscrew 4 screws near the edges of the battery. Unplug 2 connectors, of the ribbon cables that are located above the battery and one that connects the battery to the mainboard.
-
Remove the battery from the device.
-
-
-
The SD-Card-Reader is located in one of the corners of the device's mainboard (see graphic).
-
First remove the adhesive tape from the connector to the speakers. Then unplug 2 connectors. Unscrew 2 screws that fix the SD-Card-Reader to the mainboard.
-
Extract the SD-Card-Reader from the device.
-
-
-
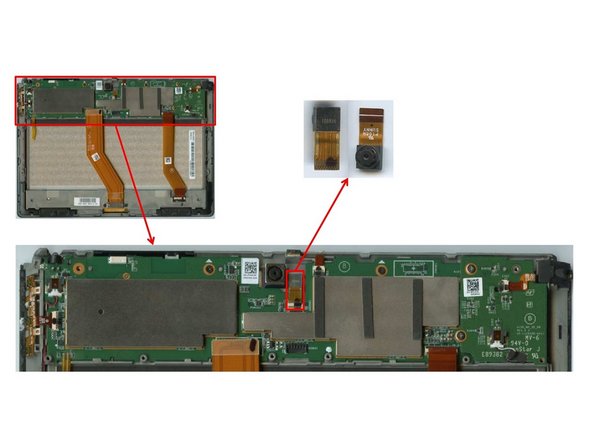
The front camera is located in the center of where the camera cover used to be. Remove it by unplugging its connector to the mainboard.
-