Toshiba Satellite M305D-S4829 Motherboard Removal

What you need

    1. Toshiba Satellite M305D-S4829 Motherboard Removal, Toshiba Satellite M305D-S4829 Motherboard Removal: step 1, image 1 of 1
      • Unlatch the battery by pushing outward on both latches.

      Add Comment

    2. Toshiba Satellite M305D-S4829 Motherboard Removal: step 2, image 1 of 1
      • Slide battery out.

      Add Comment

    3. Toshiba Satellite M305D-S4829 Motherboard Removal: step 3, image 1 of 1
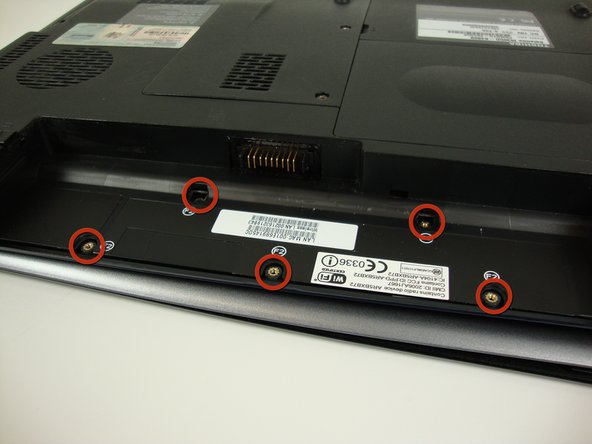
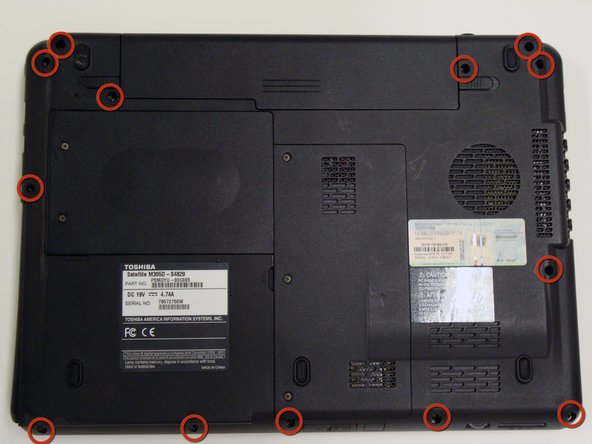
      • Remove the five "F2" screws with a Phillips #0 screwdriver.

      Add Comment

    4. Toshiba Satellite M305D-S4829 Motherboard Removal: step 4, image 1 of 2 Toshiba Satellite M305D-S4829 Motherboard Removal: step 4, image 2 of 2
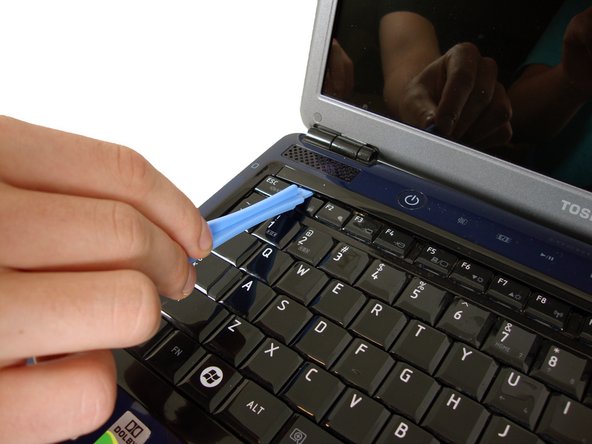
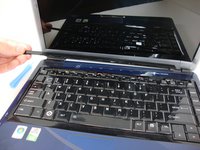
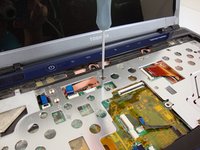
      • Insert the plastic opening tool above the F1 key.

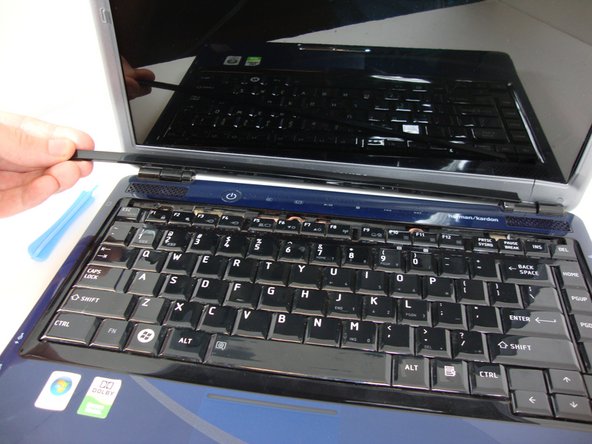
      • Apply upward pressure until the black plastic strip snaps off. The entire strip will easily come off from left to right.

      Add Comment

    5. Toshiba Satellite M305D-S4829 Motherboard Removal: step 5, image 1 of 2 Toshiba Satellite M305D-S4829 Motherboard Removal: step 5, image 2 of 2
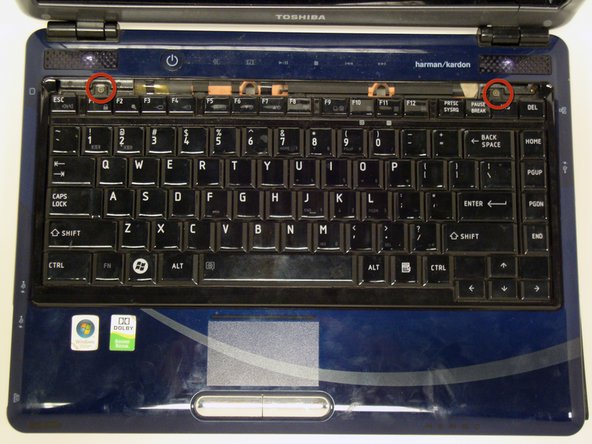
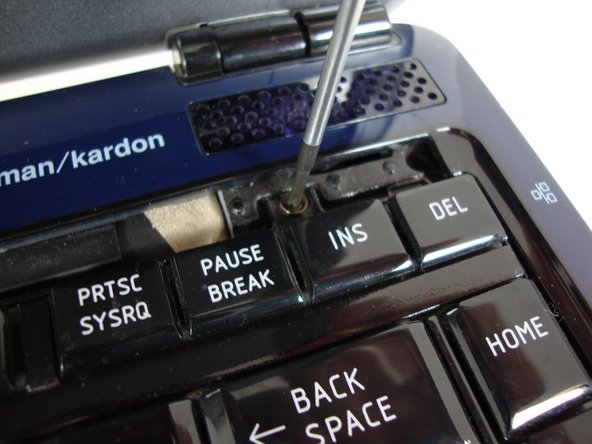
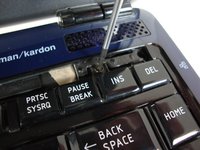
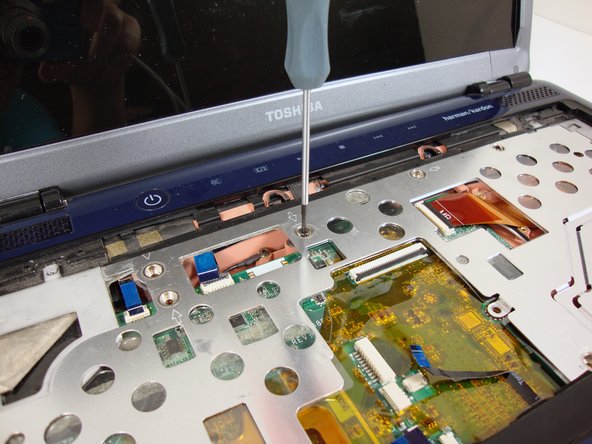
      • Find the screws above the F1 and INS keys.

      • Unscrew both screws with a Phillips #0 screwdriver.

      Add Comment

    6. Toshiba Satellite M305D-S4829 Motherboard Removal: step 6, image 1 of 2 Toshiba Satellite M305D-S4829 Motherboard Removal: step 6, image 2 of 2
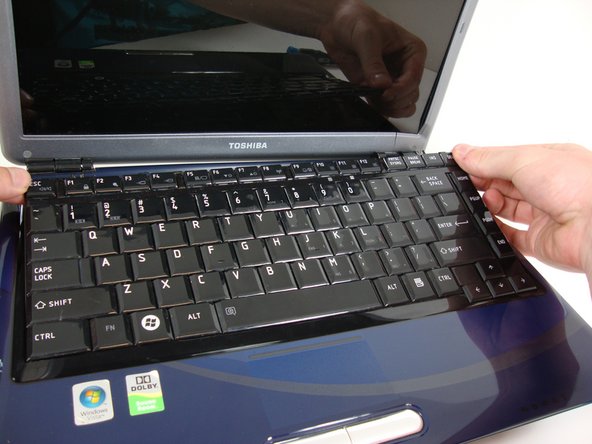
      • Slowly lift the top edge of the keyboard out with your fingers.

      • The ribbon cable located on the back of the keyboard will become accessible.

      Add Comment

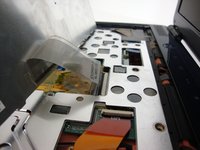
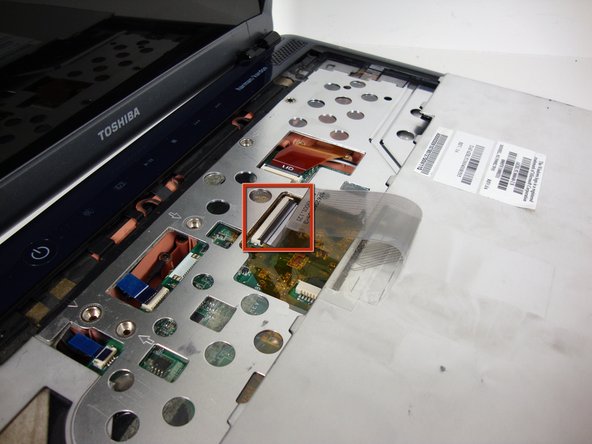
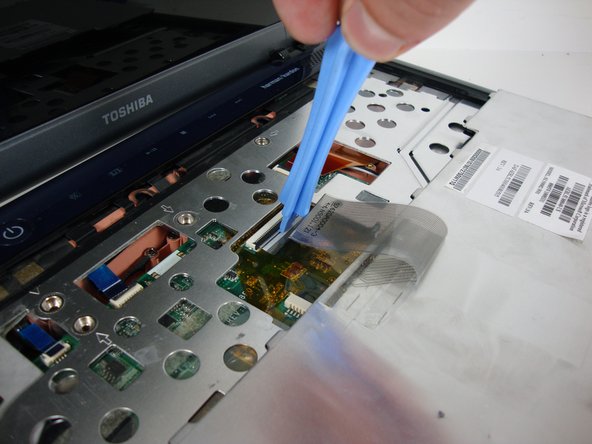
    7. Toshiba Satellite M305D-S4829 Motherboard Removal: step 7, image 1 of 2 Toshiba Satellite M305D-S4829 Motherboard Removal: step 7, image 2 of 2
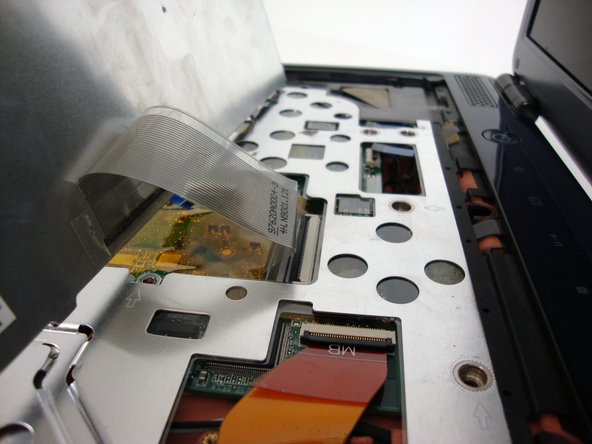
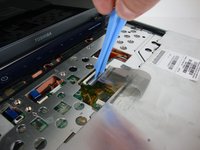
      • Locate the black ribbon cable flap.

      • Detach flap with plastic opening tool. The ribbon cable will become free.

      Add Comment

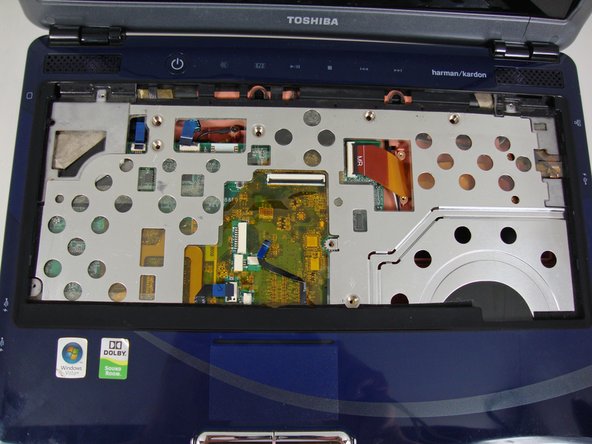
    8. Toshiba Satellite M305D-S4829 Motherboard Removal: step 8, image 1 of 1
      • Your keyboard has now been successfully removed.

      Add Comment

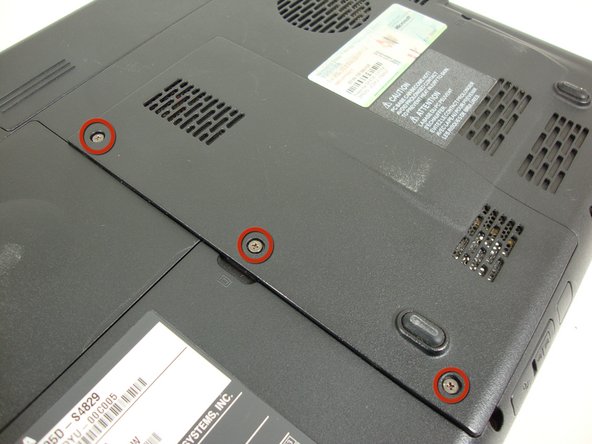
    9. Toshiba Satellite M305D-S4829 Motherboard Removal: step 9, image 1 of 1
      • Remove the back panel by removing the three labeled screws with a Phillips #0 screwdriver.

      Add Comment

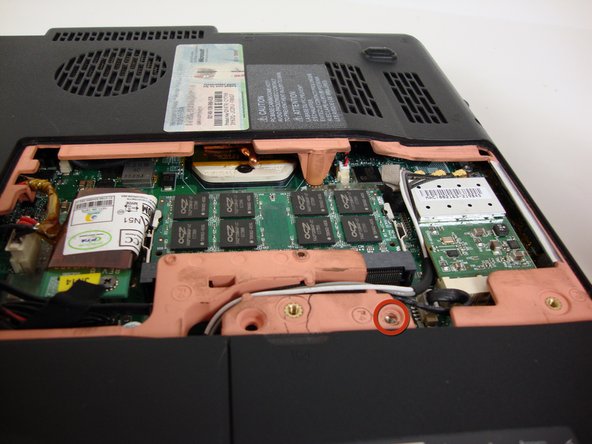
    10. Toshiba Satellite M305D-S4829 Motherboard Removal: step 10, image 1 of 2 Toshiba Satellite M305D-S4829 Motherboard Removal: step 10, image 2 of 2
      • Locate and remove the circled screw with a Phillips #0 screwdriver.

      Add Comment

    11. Toshiba Satellite M305D-S4829 Motherboard Removal: step 11, image 1 of 1
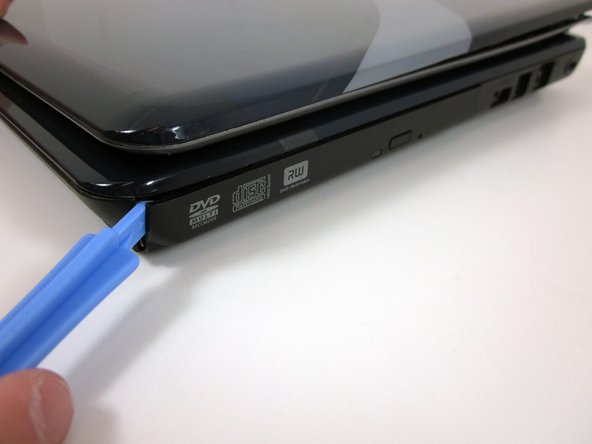
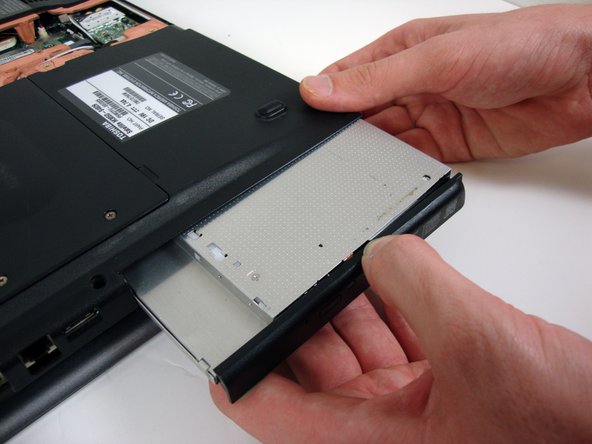
      • Use the plastic opening tool to pry the CD/DVD drive out of the frame.

      Add Comment

    12. Toshiba Satellite M305D-S4829 Motherboard Removal: step 12, image 1 of 1
      • Gently remove the CD/DVD drive from the laptop body.

      Add Comment

    13. Toshiba Satellite M305D-S4829 Motherboard Removal: step 13, image 1 of 2 Toshiba Satellite M305D-S4829 Motherboard Removal: step 13, image 2 of 2
      • Remove the circled screws with Phillips #0 screwdriver.

      Add Comment

    14. Toshiba Satellite M305D-S4829 Motherboard Removal: step 14, image 1 of 1
      • Remove these screws from the underside of the laptop with Phillips #0 screwdriver.

      Add Comment

    15. Toshiba Satellite M305D-S4829 Motherboard Removal: step 15, image 1 of 1
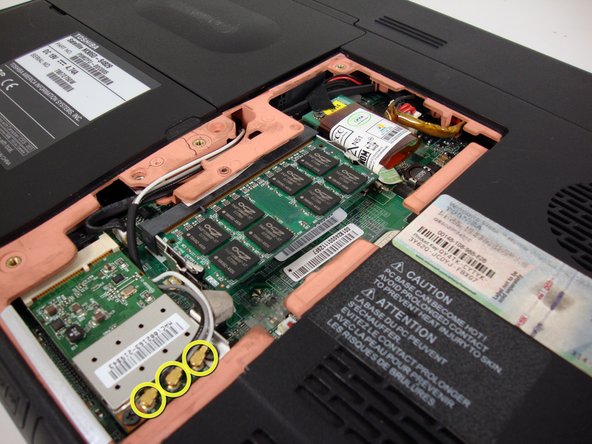
      • Disconnect the three circled antennas by lightly pulling upward with your fingers. They should detach easily.

      • Note: Yours may only have two (2) antennas. Pay attention to the Orientation of the Aluminum bracket with the pads for reinstallation.

      Add Comment

    16. Toshiba Satellite M305D-S4829 Motherboard Removal: step 16, image 1 of 1
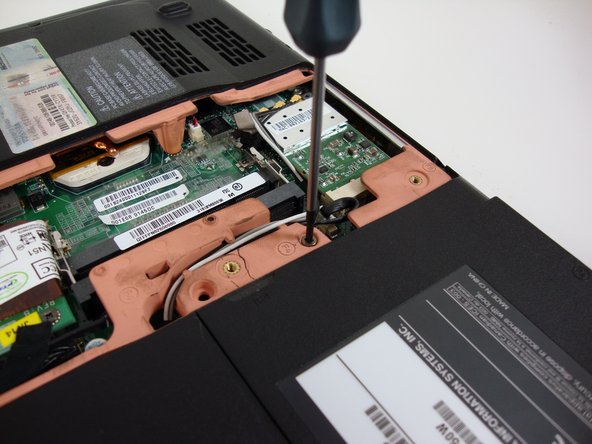
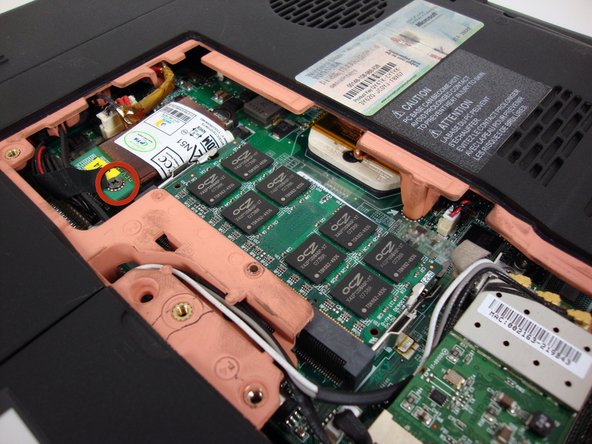
      • Remove the circled screw with a Phillips #0 screwdriver.

      Add Comment

    17. Toshiba Satellite M305D-S4829 Motherboard Removal: step 17, image 1 of 1
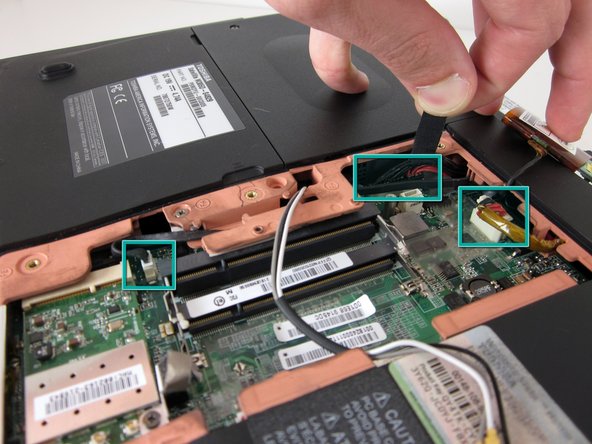
      • Detach the 3 marked cables by pulling them out with you fingers as shown.

      • This may require some force. They do not come out easily.

      Add Comment

    18. Toshiba Satellite M305D-S4829 Motherboard Removal: step 18, image 1 of 1
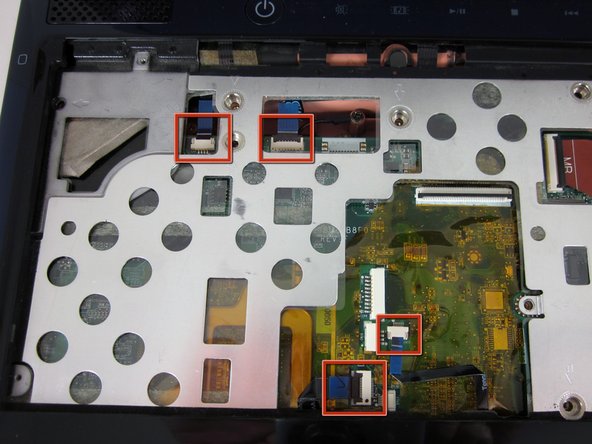
      • Detach the four blue ribbon cables carefully with tweezers. Some of the ribbons may require a flap to be raised because it secures the ribbon in.

      Add Comment

    19. Toshiba Satellite M305D-S4829 Motherboard Removal: step 19, image 1 of 1
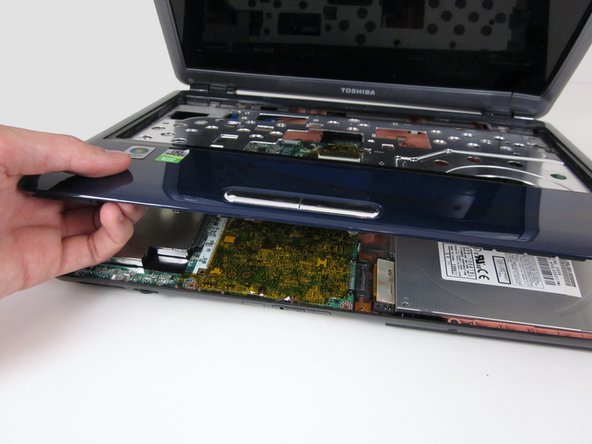
      • Remove the top plastic cover by lifting upward from the bottom left-hand corner as shown. The cover will come off easily.

      Add Comment

    20. Toshiba Satellite M305D-S4829 Motherboard Removal: step 20, image 1 of 1
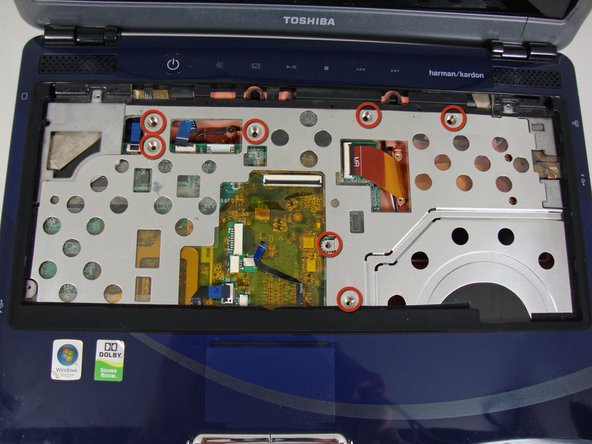
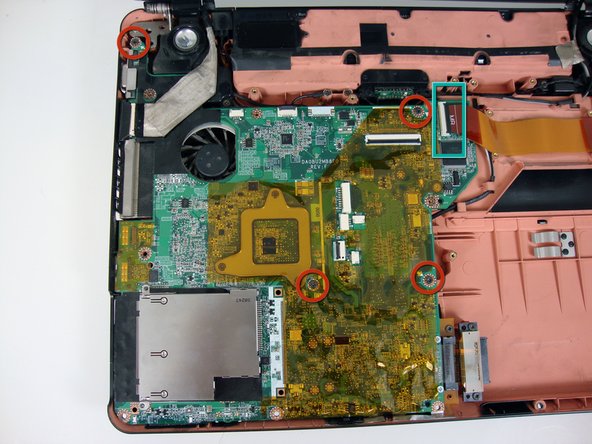
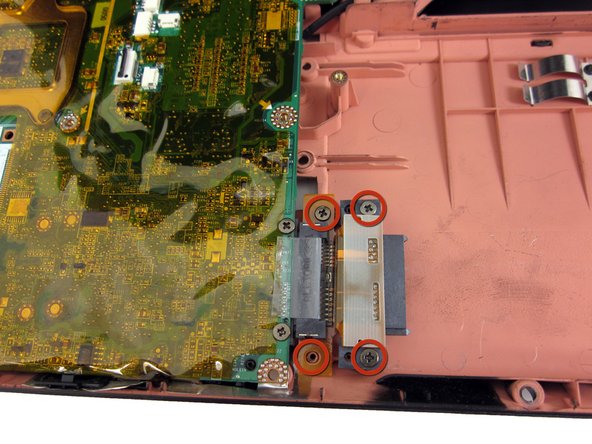
      • Remove the circled motherboard screws with a Phillips #0 Scewdriver.

      • Disconnect this ribbon cable.

      Add Comment

    21. Toshiba Satellite M305D-S4829 Motherboard Removal: step 21, image 1 of 1
      • Remove these screws with a Phillips #0 screwdriver.

      Add Comment

    22. Toshiba Satellite M305D-S4829 Motherboard Removal: step 22, image 1 of 1
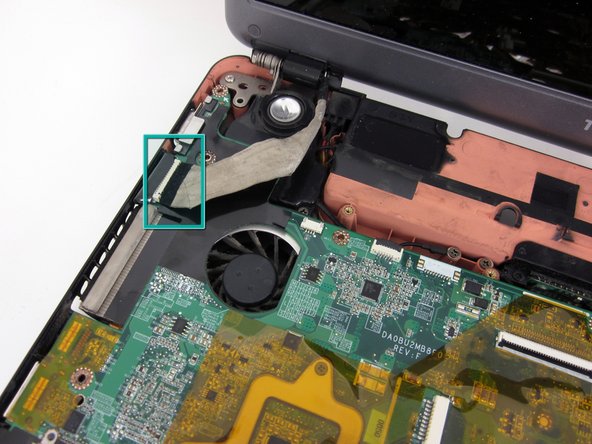
      • Detach the display cable by gently pulling it out with your fingers.

      Add Comment

    23. Toshiba Satellite M305D-S4829 Motherboard Removal: step 23, image 1 of 2 Toshiba Satellite M305D-S4829 Motherboard Removal: step 23, image 2 of 2
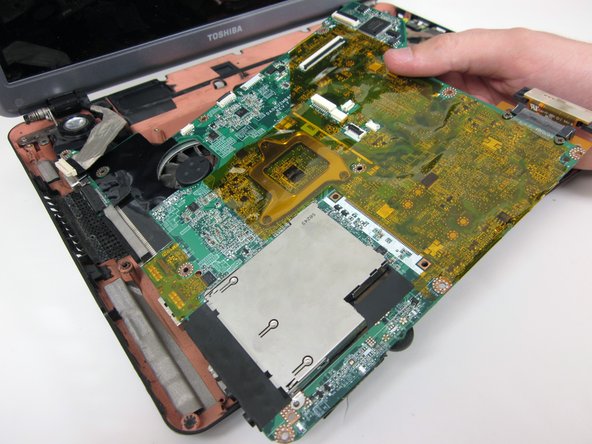
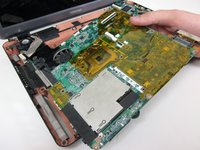
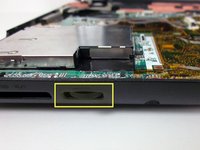
      • Remove the motherboard from the left side by gently lifting the left side upward.

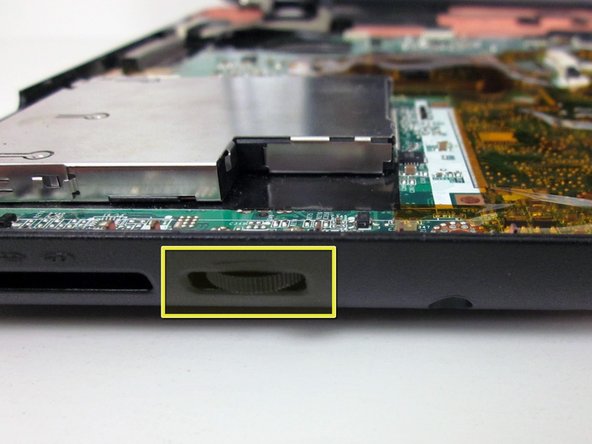
      • The boxed volume control may snag on the laptop frame when pulling the motherboard out.

      Add Comment

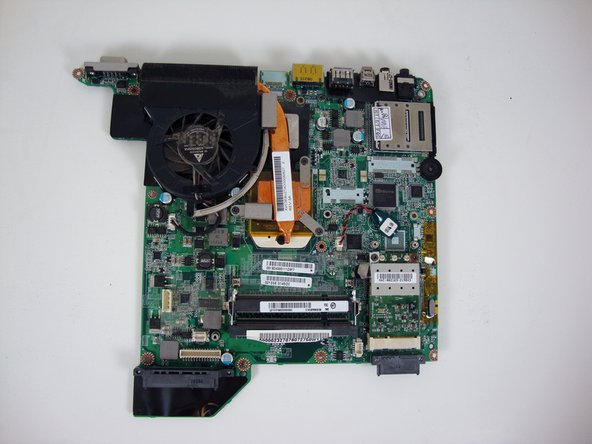
    24. Toshiba Satellite M305D-S4829 Motherboard Removal: step 24, image 1 of 1
      • The motherboard has now been removed from laptop.

      Add Comment

Conclusion

To reassemble your device, follow these instructions in reverse order.

Cancel: I did not complete this guide.

System

Member since: 09/24/09

2,562 Guides authored

0 Guide Comments

Add Comment

View Statistics:

Past 24 Hours: 3

Past 7 Days: 3

Past 30 Days: 6

All Time: 54