/

Yamaha YPG-225 Main Circuit Board Replacement

What you need

  1. Yamaha YPG-225 Main Circuit Board Replacement, Yamaha YPG-225 Main Circuit Board Replacement: step 1, image 1 of 1
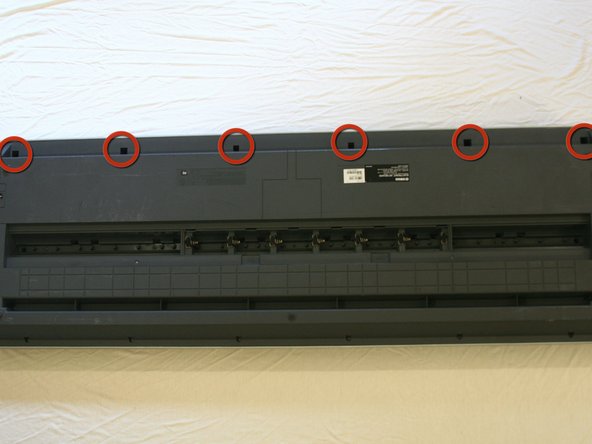
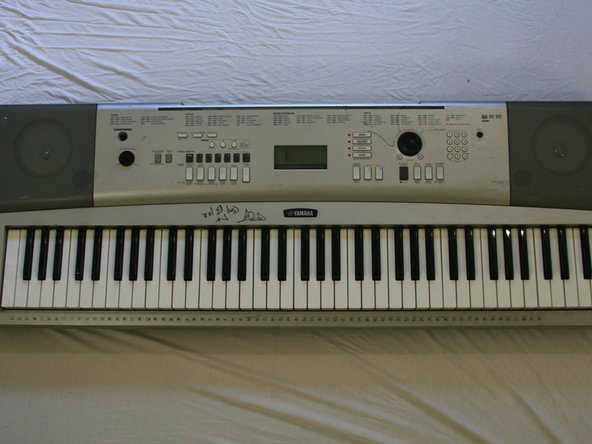
    • Turn the keyboard over so that the keys are facing the ground.

  2. Yamaha YPG-225 Main Circuit Board Replacement: step 2, image 1 of 1
    • Pop the tabs on the battery casing and remove it from the back plate.

  3. Yamaha YPG-225 Main Circuit Board Replacement: step 3, image 1 of 1
    • Locate the six batteries and remove them from the battery cavity.

  4. Yamaha YPG-225 Main Circuit Board Replacement: step 4, image 1 of 1
    • Remove the six 10mm screws at the top of the backplate.

  5. Yamaha YPG-225 Main Circuit Board Replacement: step 5, image 1 of 1
    • Remove the seven 12mm screws in the middle of the back plate.

  6. Yamaha YPG-225 Main Circuit Board Replacement: step 6, image 1 of 1
    • Remove the eight 10mm screws from the side and the bottom of the back plate.

  7. Yamaha YPG-225 Main Circuit Board Replacement: step 7, image 1 of 1
    • As the face plate is no longer connected to the body of the keyboard, be careful to not drop the body when performing this step.

    • Flip over the keyboard

  8. Yamaha YPG-225 Main Circuit Board Replacement: step 8, image 1 of 2 Yamaha YPG-225 Main Circuit Board Replacement: step 8, image 2 of 2
    • Lifting from the front and the back of the face plate equally, pull the face plate up and then back, away from the keyboard.

    • Be careful when removing the face plate. There are wires attached.

  9. Yamaha YPG-225 Main Circuit Board Replacement: step 9, image 1 of 1
    • Locate the main circuit board - it should be toward the middle of the detached face plate.

  10. Yamaha YPG-225 Main Circuit Board Replacement: step 10, image 1 of 2 Yamaha YPG-225 Main Circuit Board Replacement: step 10, image 2 of 2
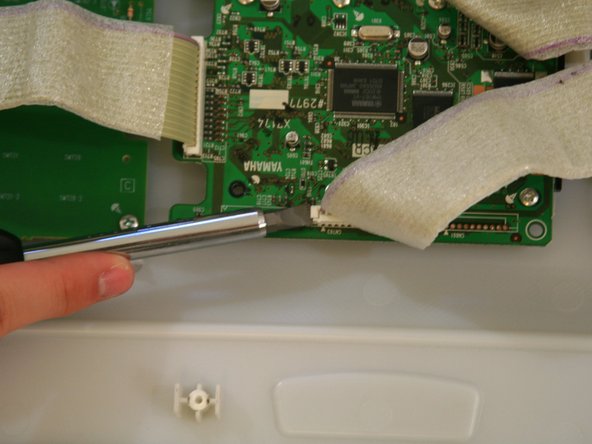
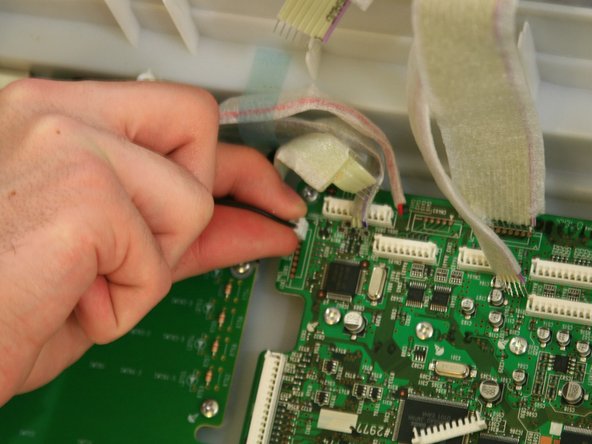
    • Using a flat head screwdriver, carefully pry up the beige ribbon connectors and remove the wires from them.

    • Use a slightly upward force with the screwdriver as parallel to the ground as possible.

    • Be sure to make a mental note or jot down the locations of the specific ribbon cables. Some are in close proximity to each other and it can be easy to forget which ribbon goes where.

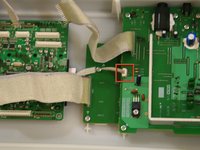
    • Be sure to unplug the smaller ribbon that connects to a different circuit board.

    • Take care not to use too much force. The connectors are fragile, the ribbon wires are easily bent, and too much force may damage the circuit board if you happen to miss.

  11. Yamaha YPG-225 Main Circuit Board Replacement: step 11, image 1 of 1
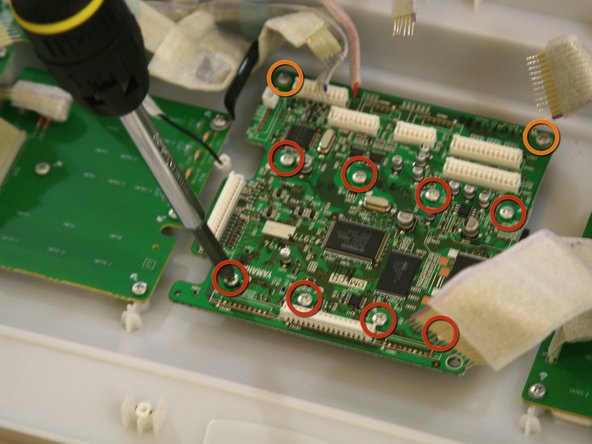
    • Move the ribbons out of the way and remove the eight 10mms crews in the middle that hold the circuit board down.

    • Remove the two 12mm screws in the corner of the circuit board.

  12. Yamaha YPG-225 Main Circuit Board Replacement: step 12, image 1 of 1
    • Remove this wire carefully by hand.

  13. Yamaha YPG-225 Main Circuit Board Replacement: step 13, image 1 of 1
    • Completely remove the circuit board from the face plate.

Conclusion

To reassemble your device, follow these instructions in reverse order.

System

Member since: 09/24/09

2,562 Guides authored

0 Comments

Add Comment

View Statistics:

Past 24 Hours: 0

Past 7 Days: 0

Past 30 Days: 0

All Time: 2