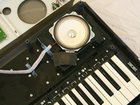
Yamaha YPG-225 Speaker Replacement

Views: 59

View statistics:

Past 24 Hours:
0
Past 7 Days:
0
Past 30 Days:
0
All Time:
59
Comments: 0

No one has left comments on this guide. Will you be first?

Go to guide comments
Completed: 0

No one has marked this guide "completed." Will you be the first?

Favorites: 0

No one has favorited (and subscribed to) this guide. Will you be the first?

Time Required: 00:15:00 - 00:20:00
Difficulty: Moderate
Grammatical Errors

This guide has grammatical errors or does not meet the site's writing guidelines.

Unsatisfactory Images

This guide has low-quality images. Pictures need to be either re-edited or re-taken.

Yamaha YPG-225 Speaker Replacement

Introduction

Go to step 1 ↓

Learn to remove and replace a speaker for your keyboard with this guide. The process is fairly simple and mostly requires the removal of screws.

    1. Yamaha YPG-225 Speaker Replacement, Yamaha YPG-225 Speaker Replacement: step 1, image 1 of 1
      • Turn the keyboard over so that the keys are facing the ground.

      Add Comment

    2. Yamaha YPG-225 Speaker Replacement: step 2, image 1 of 1
      • Pop the tabs on the battery casing and remove it from the back plate.

      Add Comment

    3. Yamaha YPG-225 Speaker Replacement: step 3, image 1 of 1
      • Locate the six batteries and remove them from the battery cavity.

      Add Comment

    4. Yamaha YPG-225 Speaker Replacement: step 4, image 1 of 1
      • Remove the six 10mm screws at the top of the backplate.

      Add Comment

    5. Yamaha YPG-225 Speaker Replacement: step 5, image 1 of 1
      • Remove the seven 12mm screws in the middle of the back plate.

      Add Comment

    6. Yamaha YPG-225 Speaker Replacement: step 6, image 1 of 1
      • Remove the eight 10mm screws from the side and the bottom of the back plate.

      Add Comment

    7. Yamaha YPG-225 Speaker Replacement: step 7, image 1 of 1
      • As the face plate is no longer connected to the body of the keyboard, be careful to not drop the body when performing this step.

      • Flip over the keyboard

      Add Comment

    8. Yamaha YPG-225 Speaker Replacement: step 8, image 1 of 2 Yamaha YPG-225 Speaker Replacement: step 8, image 2 of 2
      • Lifting from the front and the back of the face plate equally, pull the face plate up and then back, away from the keyboard.

      • Be careful when removing the face plate. There are wires attached.

      Add Comment

    9. Yamaha YPG-225 Speaker Replacement: step 9, image 1 of 1
      • Locate the speaker and remove the four 10mm screws in the corners of the speaker.

      Add Comment

    10. Yamaha YPG-225 Speaker Replacement: step 10, image 1 of 1
      • Unplug the speaker's black and red wires from the small circuit board.

      • Do not be afraid to use a little force to get the plug out, but take care not to pull the wires from the plug.

      Add Comment

    11. Yamaha YPG-225 Speaker Replacement: step 11, image 1 of 1
      • Remove the translucent blue tape that holds the speaker wires to the keyboard.

      Add Comment

Conclusion

To reassemble your device, follow these instructions in reverse order.

Cancel: I did not complete this guide.

System

Member since: 09/24/09

2,562 Guides authored

0 Guide Comments

Add Comment

View Statistics:

Past 24 Hours: 0

Past 7 Days: 0

Past 30 Days: 0

All Time: 59