iBook G3 Clamshell CD Faceplate Replacement

What you need

    1. iBook G3 Clamshell CD Faceplate Replacement, iBook G3 Clamshell CD Faceplate Replacement: step 1, image 1 of 1
      • Use a coin to turn both battery locking screws 90 degrees to the left.

      • Remove the battery cover.

      • Remove the battery from the computer by pulling up on the plastic tab.

      Add Comment

    2. iBook G3 Clamshell CD Faceplate Replacement: step 2, image 1 of 1
      • Use a straightened paperclip to manually eject the CD-ROM tray.

      Add Comment

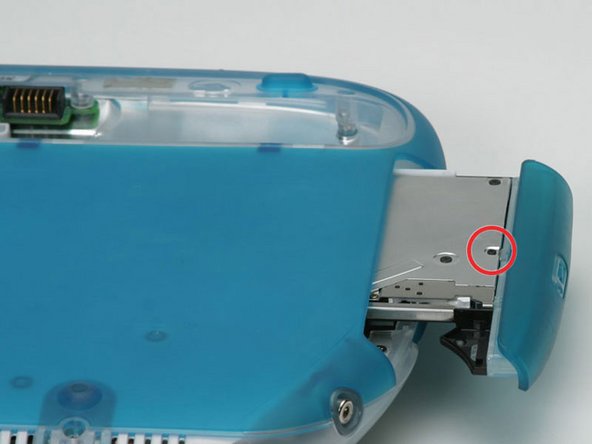
    3. iBook G3 Clamshell CD Faceplate Replacement: step 3, image 1 of 1
      • Remove the single black Phillips screw from the center of the CD-ROM bezel.

      Add Comment

    4. iBook G3 Clamshell CD Faceplate Replacement: step 4, image 1 of 1
      • Grasp the CD-ROM bezel and rotate it upward to remove it from the drive.

      Add Comment

Conclusion

To reassemble your device, follow these instructions in reverse order.

Cancel: I did not complete this guide.

System

Member since: 09/24/09

2,562 Guides authored

0 Guide Comments

Add Comment

View Statistics:

Past 24 Hours: 0

Past 7 Days: 0

Past 30 Days: 0

All Time: 48