iBook G4 14" 933 MHz-1.33 GHz Keyboard Replacement

What you need

    1. iBook G4 14" 933 MHz-1.33 GHz Keyboard Replacement, iBook G4 14" 933 MHz-1.33 GHz Keyboard Replacement: step 1, image 1 of 1
      • Use a coin to rotate the battery locking screw 90 degrees clockwise.

      Add Comment

    2. iBook G4 14" 933 MHz-1.33 GHz Keyboard Replacement: step 2, image 1 of 1
      • Lift the battery out of the computer.

      Add Comment

    3. iBook G4 14" 933 MHz-1.33 GHz Keyboard Replacement: step 3, image 1 of 1
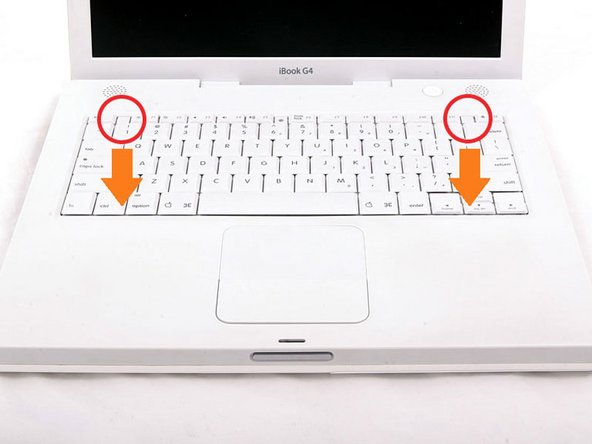
      • Pull the keyboard release tabs toward you and lift up on the keyboard until it pops free.

      • If the keyboard does not come free, use a small flathead screwdriver to turn the keyboard locking screw 180 degrees in either direction and try again.

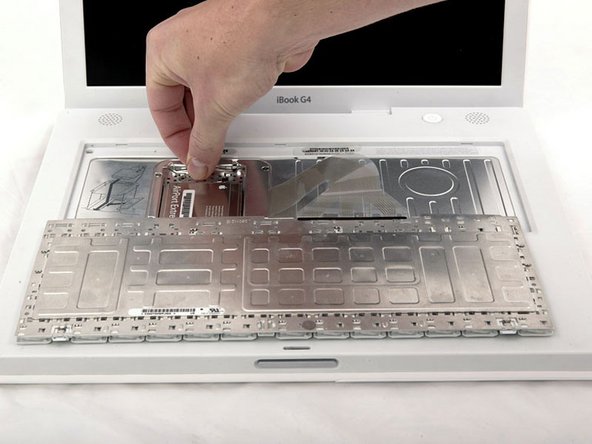
      • Flip the keyboard over, away from the screen, and rest it face-down on the trackpad area.

      Add Comment

    4. iBook G4 14" 933 MHz-1.33 GHz Keyboard Replacement: step 4, image 1 of 1
      • If the computer has an AirPort card installed, follow the next three steps to remove it.

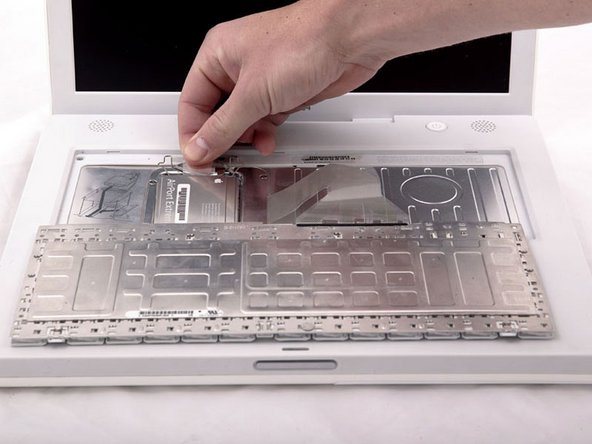
      • Push the wire clasp away from the AirPort card and toward the display, then rotate up to free it from the RAM shield.

      Add Comment

    5. iBook G4 14" 933 MHz-1.33 GHz Keyboard Replacement: step 5, image 1 of 1
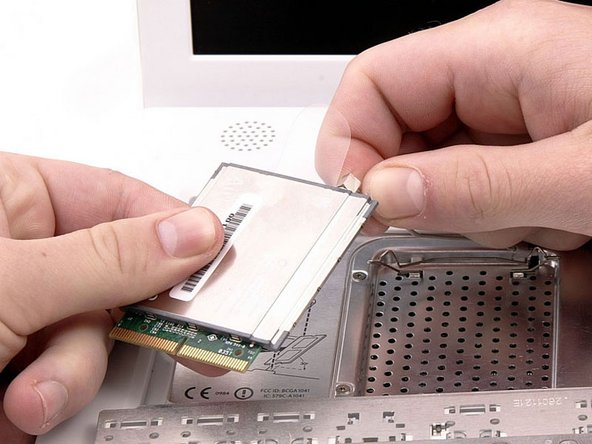
      • Grasp the clear plastic tab on the AirPort card and pull toward the display.

      Add Comment

    6. iBook G4 14" 933 MHz-1.33 GHz Keyboard Replacement: step 6, image 1 of 1
      • Hold the AirPort card in one hand and use your other hand to remove the antenna cable.

      Add Comment

    7. iBook G4 14" 933 MHz-1.33 GHz Keyboard Replacement: step 7, image 1 of 1
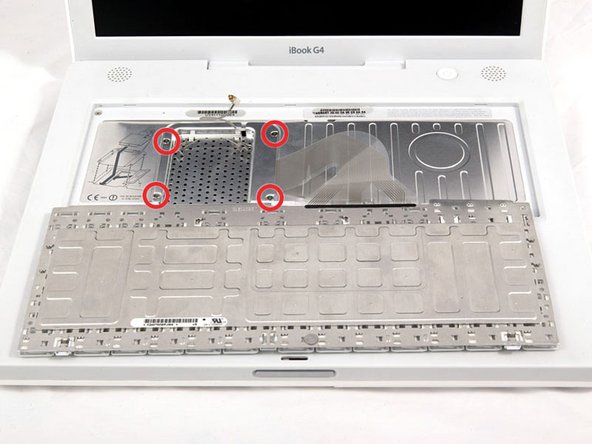
      • Remove the four silver Phillips screws that secure the RAM shield.

      Add Comment

    8. iBook G4 14" 933 MHz-1.33 GHz Keyboard Replacement: step 8, image 1 of 1
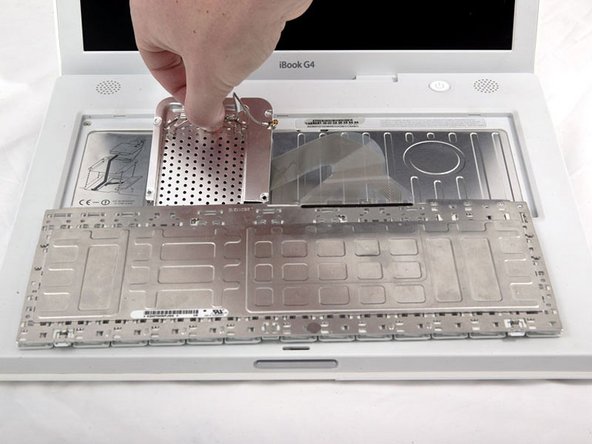
      • Grasp the metal bracket on top of the RAM shield and pull upward to remove the shield.

      Add Comment

    9. iBook G4 14" 933 MHz-1.33 GHz Keyboard Replacement: step 9, image 1 of 1
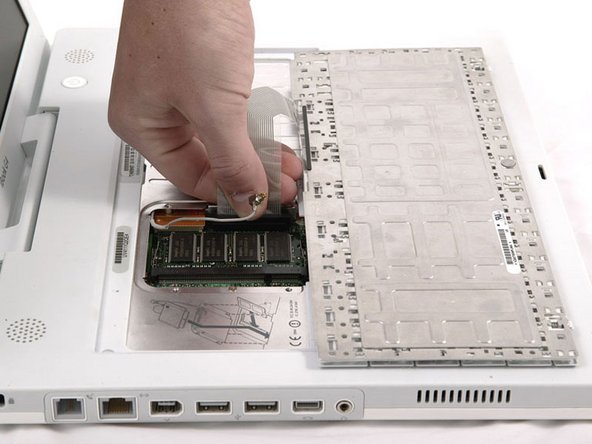
      • Pull the keyboard cable up from the logic board, holding the cable as close to the connector as possible.

      • Make sure that you reconnect the keyboard cable before replacing the RAM shield.

      Add Comment

Conclusion

To reassemble your device, follow these instructions in reverse order.

Cancel: I did not complete this guide.

System

Member since: 09/24/09

2,562 Guides authored

0 Guide Comments

Add Comment

View Statistics:

Past 24 Hours: 0

Past 7 Days: 0

Past 30 Days: 1

All Time: 23