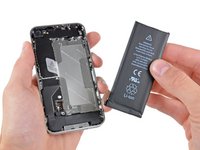
/

iPhone 4 Speaker Enclosure Replacement

What you need

  1. iPhone 4 Speaker Enclosure Replacement, iPhone 4 Speaker Enclosure Replacement: step 1, image 1 of 2 iPhone 4 Speaker Enclosure Replacement, iPhone 4 Speaker Enclosure Replacement: step 1, image 2 of 2
    • Before disassembling your iPhone, be sure it is powered off.

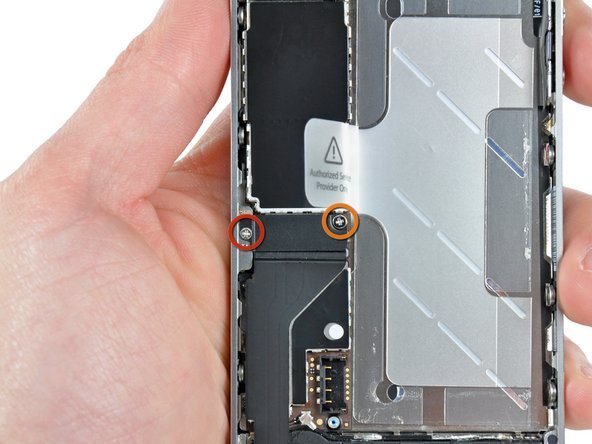
    • Your iPhone 4 rear cover may have either two #000 Phillips screws or Apple's 5-Point "Pentalobe" screws (second image). Check which screws you have, and ensure you also have the correct screwdriver in order to remove them.

    • Remove the two 3.6 mm Pentalobe or Phillips #000 screws next to the dock connector.

    • During reassembly, we recommend you replace the 5-point screws with equivalent Phillips screws. Our provides the tools and screws needed to replace the Pentalobe screws with Phillips screws.

    • The 5-Point Screwdriver should only be used once, as it has the potential to strip the screws.

  2. iPhone 4 Speaker Enclosure Replacement: step 2, image 1 of 2 iPhone 4 Speaker Enclosure Replacement: step 2, image 2 of 2
    • Push the rear panel toward the top edge of the iPhone.

    • The panel will move about 2 mm.

  3. iPhone 4 Speaker Enclosure Replacement: step 3, image 1 of 1
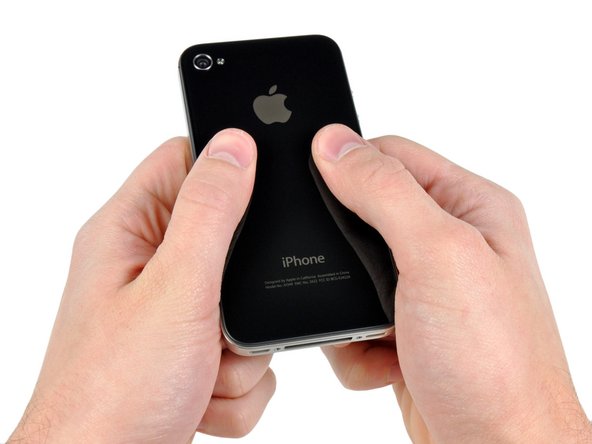
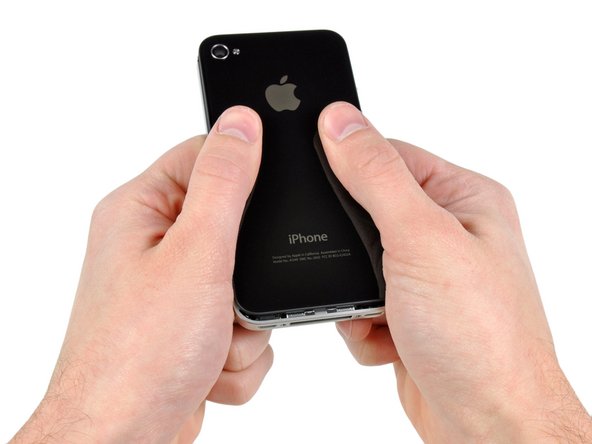
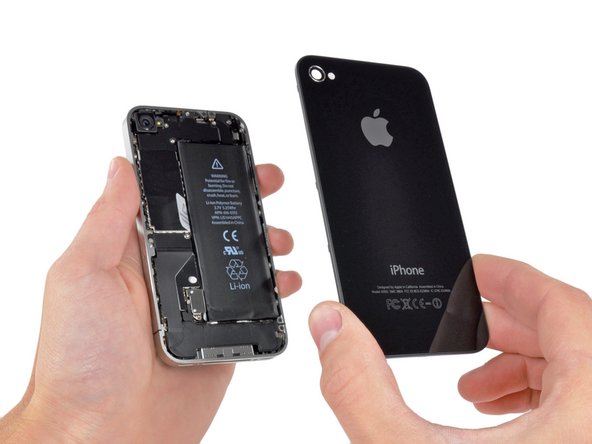
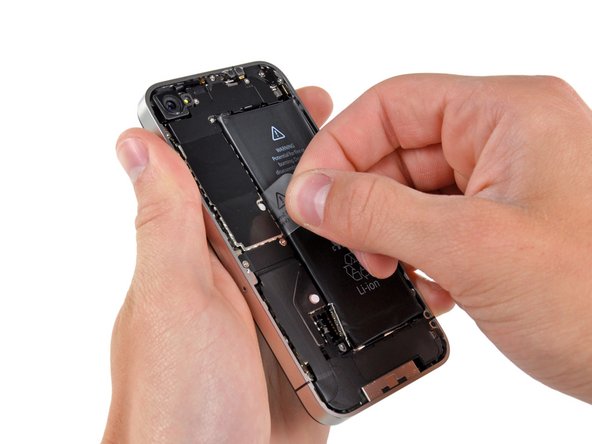
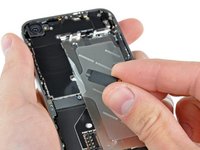
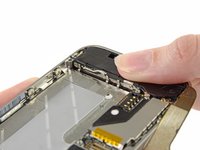
    • Pinch the rear panel with your fingers and lift it away from the iPhone. Alternatively, use a .

    • Be careful not to damage the plastic clips attached to the rear panel.

    • If you are installing a new rear panel, be sure to remove the plastic protective sticker from the inside of the camera lens and the sticker from the large black area near the lens.

  4. iPhone 4 Speaker Enclosure Replacement: step 4, image 1 of 1
    • Remove the single 2.5 mm Phillips screw securing the battery connector to the logic board.

    • Some devices may have two screws, one of which holds down the contact pad which is located above the screw indicated in red in the photo.

  5. iPhone 4 Speaker Enclosure Replacement: step 5, image 1 of 1
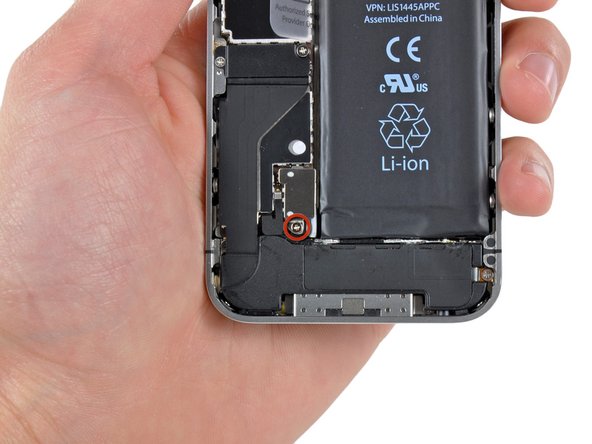
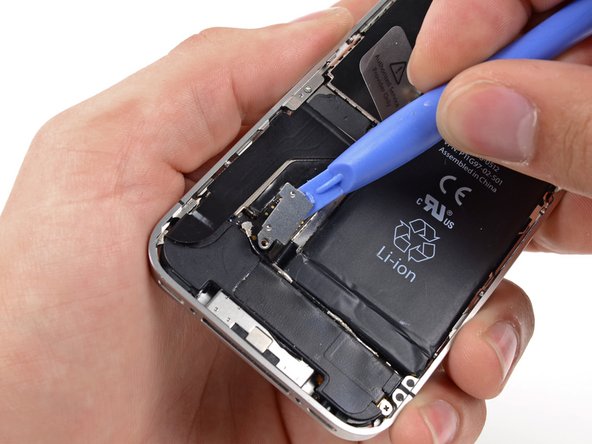
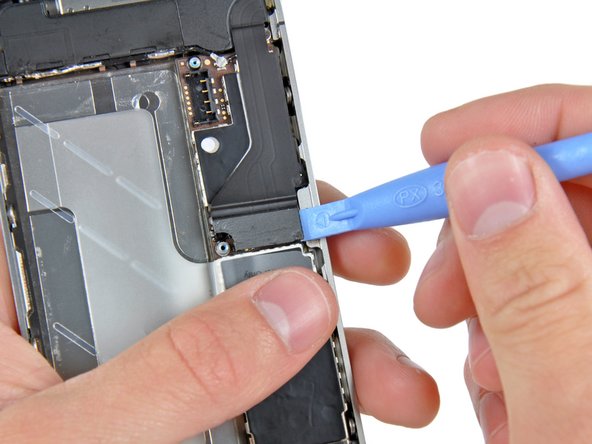
    • Use a plastic opening tool to gently pry the battery connector up from its socket on the logic board.

    • Pry from the top and bottom of the connector bracket—there isn't as much of an overhang on the sides, and you may damage the connector.

    • Be very careful to only pry up on the battery connector and not the socket on the logic board. If you pry up on the logic board socket, you may break it entirely.

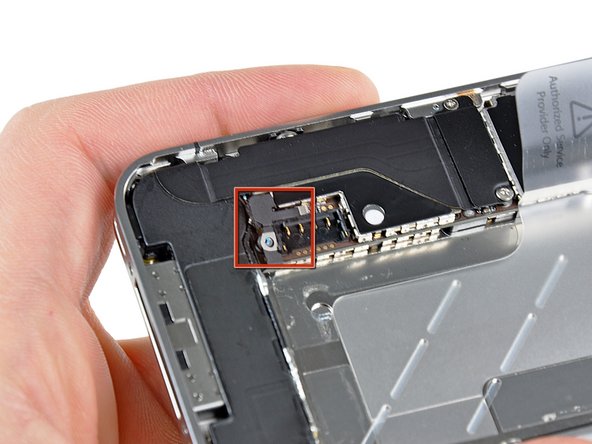
    • Remove the metal clip covering the antenna connector.

  6. iPhone 4 Speaker Enclosure Replacement: step 6, image 1 of 3 iPhone 4 Speaker Enclosure Replacement: step 6, image 2 of 3 iPhone 4 Speaker Enclosure Replacement: step 6, image 3 of 3
    • Use the clear plastic pull tab to gently lift the battery out of the iPhone.

    • You may need to use a plastic opening tool to loosen the adhesive under the battery.

    • Before reconnecting the battery connector, be sure the contact clip (shown in red) is properly positioned next to the battery connector.

    • Before reassembly, clean metal-to-metal contact points with a de-greaser such as windex. The oils from your fingers have the potential to cause wireless interference issues.

    • Perform a hard reset after reassembly. This can prevent several issues and simplify troubleshooting.

  7. iPhone 4 Speaker Enclosure Replacement: step 7, image 1 of 2 iPhone 4 Speaker Enclosure Replacement: step 7, image 2 of 2
    • Remove the following two screws:

    • One 1.2 mm Phillips

    • One 1.6 mm Phillips

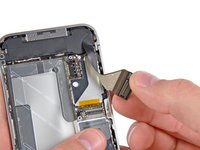
    • Remove the thin steel dock connector cable cover from the iPhone.

    • Before reassembly, be sure to clean all metal-to-metal contact points on the dock connector cable cover with a de-greaser such as windex. The oils on your fingers have the potential to cause wireless interference issues.

  8. iPhone 4 Speaker Enclosure Replacement: step 8, image 1 of 2 iPhone 4 Speaker Enclosure Replacement: step 8, image 2 of 2
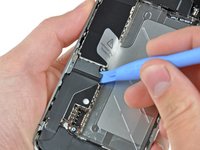
    • Use a plastic opening tool to gently pry the dock cable connector up off the logic board from both short ends of the connector.

  9. iPhone 4 Speaker Enclosure Replacement: step 9, image 1 of 2 iPhone 4 Speaker Enclosure Replacement: step 9, image 2 of 2
    • Carefully peel the dock ribbon cable off the logic board and the lower speaker enclosure.

    • Do not use excessive force to peel the dock ribbon cable off the logic board. Doing so may tear the cable.

  10. iPhone 4 Speaker Enclosure Replacement: step 10, image 1 of 1
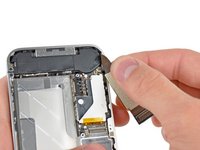
    • Use a plastic opening tool to pry the lower antenna connector up off its socket on the logic board.

  11. iPhone 4 Speaker Enclosure Replacement: step 11, image 1 of 1
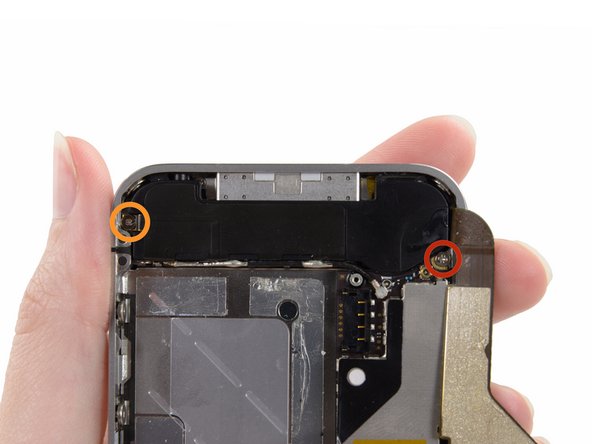
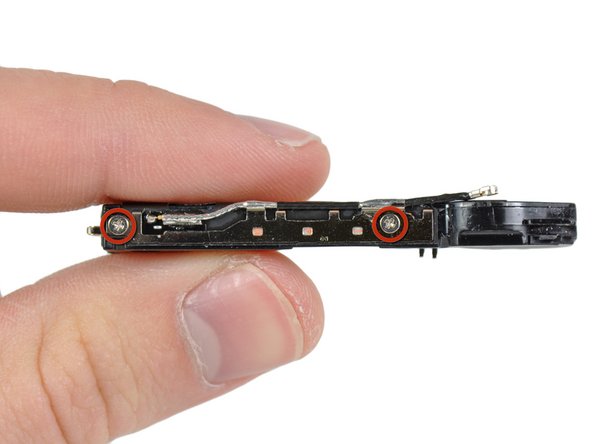
    • Remove the following screws securing the speaker enclosure assembly to the outer case:

    • One 1.9 mm Phillips screw

    • One 2.4 mm Phillips screw

  12. iPhone 4 Speaker Enclosure Replacement: step 12, image 1 of 3 iPhone 4 Speaker Enclosure Replacement: step 12, image 2 of 3 iPhone 4 Speaker Enclosure Replacement: step 12, image 3 of 3
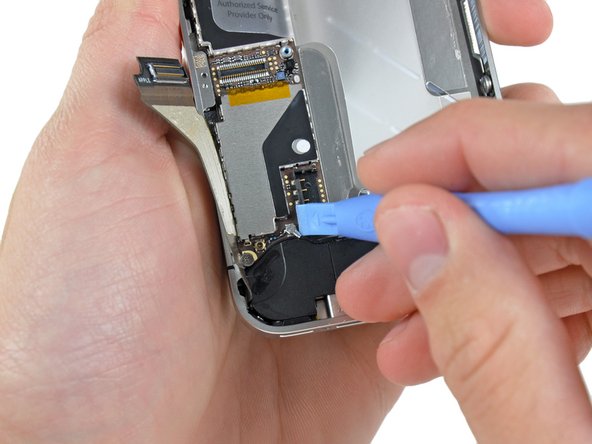
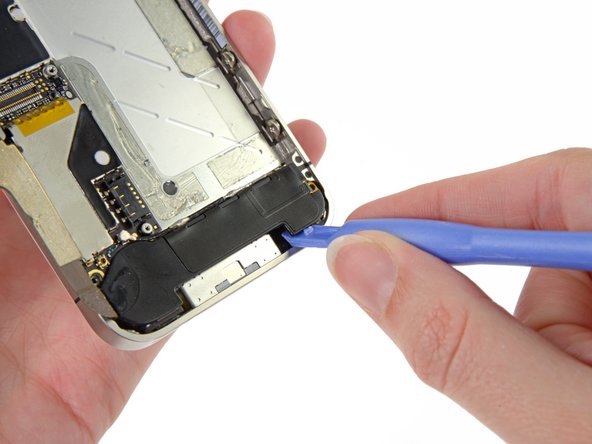
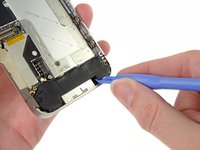
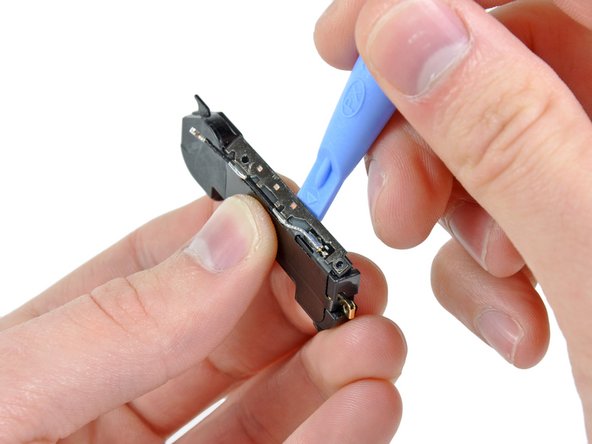
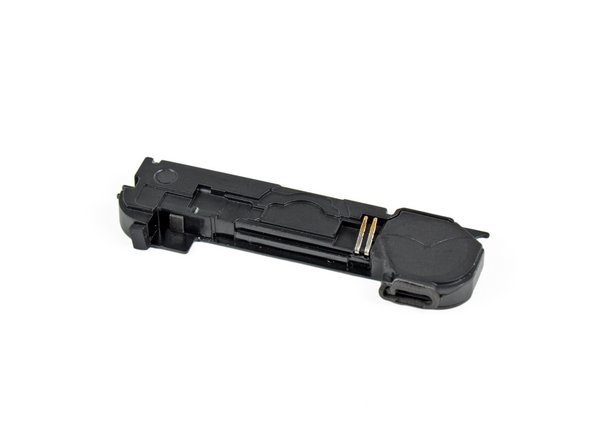
    • Use a plastic opening tool to lift the speaker enclosure assembly out of the case, being sure not to damage the EMI fingers on the attached Wi-Fi antenna.

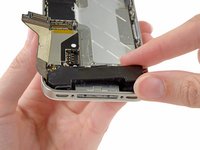
    • Remove the speaker enclosure assembly.

    • Before reinstalling the speaker enclosure assembly's screws, be sure the Wi-Fi grounding fingers are installed below the lip in the iPhone's metal case as seen in the third picture.

    • Before reassembly, be sure to clean all metal-to-metal contact points between the grounding fingers of the Wi-Fi antenna and the case of the iPhone with a de-greaser such as windex or isopropyl alcohol. The oils on your fingers have the potential to cause wireless interference issues.

  13. iPhone 4 Speaker Enclosure Replacement: step 13, image 1 of 1
    • Remove the two Phillips screws securing the antenna to the speaker enclosure.

  14. iPhone 4 Speaker Enclosure Replacement: step 14, image 1 of 3 iPhone 4 Speaker Enclosure Replacement: step 14, image 2 of 3 iPhone 4 Speaker Enclosure Replacement: step 14, image 3 of 3
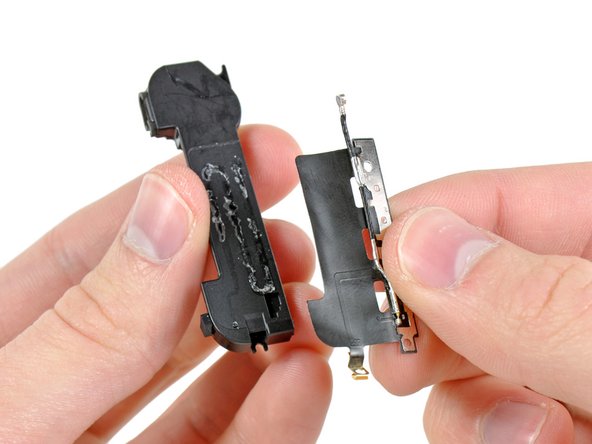
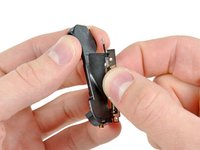
    • Starting near the cellular antenna cable, use the edge of a plastic opening tool to peel the antenna off the speaker enclosure. Make sure you insert the plastic opening tool under the plastic the antenna is mounted on, not the metal plate.

    • Continue peeling the cellular antenna off the speaker enclosure, being careful not to rip the gold bracket attached to one of its edges.

    • Remove the cellular antenna.

    • When installing a new cellular antenna, be sure to slide the gold bracket over the ear molded into the speaker enclosure before sticking the antenna down.

  15. iPhone 4 Speaker Enclosure Replacement: step 15, image 1 of 1
    • Speaker enclosure remains.

Conclusion

To reassemble your device, follow these instructions in reverse order.

System

Member since: 09/24/09

2,562 Guides authored

0 Comments

Add Comment

View Statistics:

Past 24 Hours: 0

Past 7 Days: 0

Past 30 Days: 0

All Time: 0