/

iPhone 4 Wi-Fi Antenna Replacement

What you need

  1. iPhone 4 Wi-Fi Antenna Replacement, iPhone 4 Wi-Fi Antenna Replacement: step 1, image 1 of 2 iPhone 4 Wi-Fi Antenna Replacement, iPhone 4 Wi-Fi Antenna Replacement: step 1, image 2 of 2
    • Before disassembling your iPhone, be sure it is powered off.

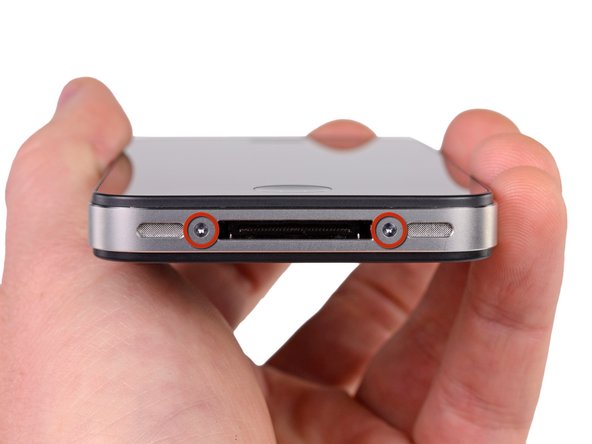
    • Your iPhone 4 rear cover may have either two #000 Phillips screws or Apple's 5-Point "Pentalobe" screws (second image). Check which screws you have, and ensure you also have the correct screwdriver in order to remove them.

    • Remove the two 3.6 mm Pentalobe or Phillips #000 screws next to the dock connector.

    • During reassembly, we recommend you replace the 5-point screws with equivalent Phillips screws. Our provides the tools and screws needed to replace the Pentalobe screws with Phillips screws.

    • The 5-Point Screwdriver should only be used once, as it has the potential to strip the screws.

  2. iPhone 4 Wi-Fi Antenna Replacement: step 2, image 1 of 2 iPhone 4 Wi-Fi Antenna Replacement: step 2, image 2 of 2
    • Push the rear panel toward the top edge of the iPhone.

    • The panel will move about 2 mm.

  3. iPhone 4 Wi-Fi Antenna Replacement: step 3, image 1 of 1
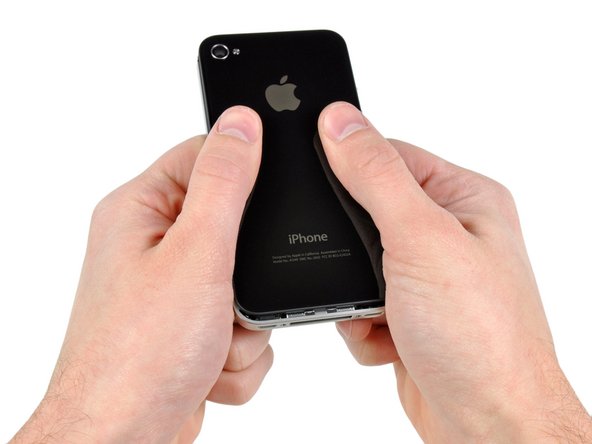
    • Pinch the rear panel with your fingers and lift it away from the iPhone. Alternatively, use a .

    • Be careful not to damage the plastic clips attached to the rear panel.

    • If you are installing a new rear panel, be sure to remove the plastic protective sticker from the inside of the camera lens and the sticker from the large black area near the lens.

  4. iPhone 4 Wi-Fi Antenna Replacement: step 4, image 1 of 1
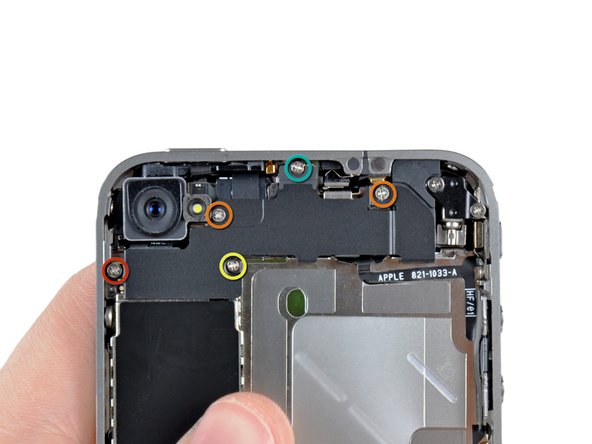
    • Remove the following five screws securing the wi-fi antenna to to the logic board:

    • One 2.3 mm Phillips

    • Two 1.6 mm Phillips

    • One 1.4 mm Phillips

    • One 4.8 mm Phillips

    • When re-assembling, start off with replacing the 4.8 mm Philips screw first, then the 2.3 mm. This is to ensure there is no mix-up, and avoid rendering the LCD and digitizer useless.

    • Also make sure to put the long 4.8 mm Philips back in correctly when reassembling. This is the ground for the wi-fi antenna and is often the culprit if you are having bad wi-fi reception after reassembly.

  5. iPhone 4 Wi-Fi Antenna Replacement: step 5, image 1 of 3 iPhone 4 Wi-Fi Antenna Replacement: step 5, image 2 of 3 iPhone 4 Wi-Fi Antenna Replacement: step 5, image 3 of 3
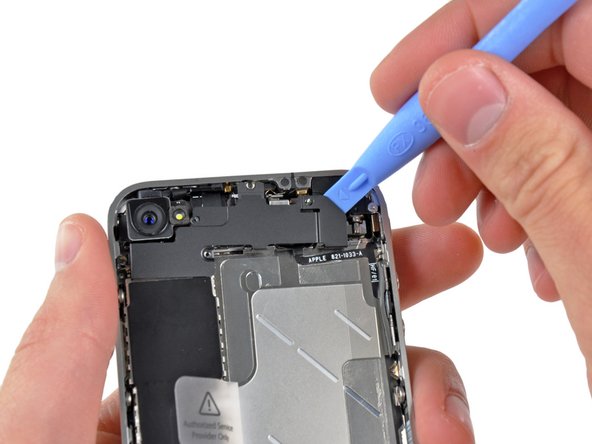
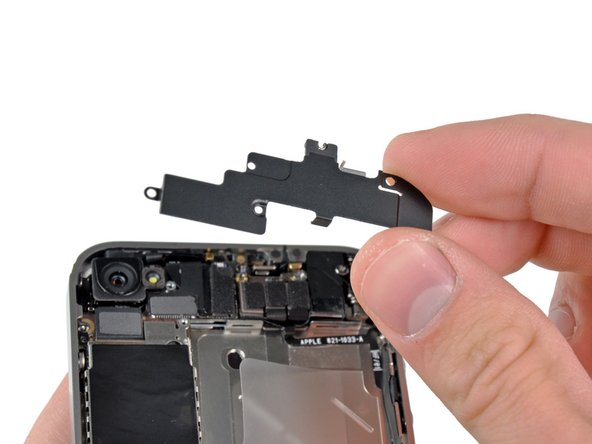
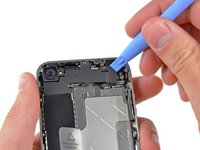
    • Use an iPod opening tool to slightly lift the top edge of the wi-fi antenna away from the logic board.

    • Use the tip of a spudger to pull the wi-fi retaining clips away from the inner frame.

    • Remove the wi-fi antenna from the iPhone. Make sure you don't lose the metal clips on the top of the cover where the 4.8mm screw attaches or the 4.8mm screw. That's the primary reason for abnormal Wi-Fi performance after the reassembly.

    • Before reassembly, be sure to clean all metal-to-metal contact points on the connector cover with a de-greaser such as Windex. The oils on your fingers have the potential to cause wireless interference issues. Do not clean the connectors themselves with Windex.

Conclusion

To reassemble your device, follow these instructions in reverse order.

System

Member since: 09/24/09

2,562 Guides authored

0 Comments

Add Comment

View Statistics:

Past 24 Hours: 0

Past 7 Days: 0

Past 30 Days: 0

All Time: 13