/

iPhone 4S Home Button Ribbon Cable Replacement

What you need

  1. iPhone 4S Home Button Ribbon Cable Replacement, iPhone 4S Home Button Ribbon Cable Replacement: step 1, image 1 of 1
    • Before disassembling your iPhone, be sure it is powered off.

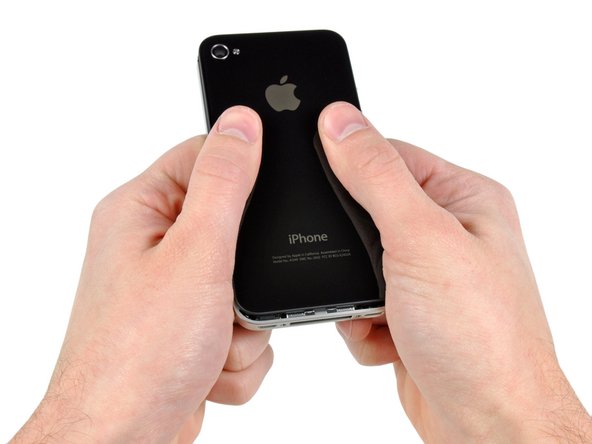
    • Remove the two 3.6 mm Pentalobe P2 screws next to the dock connector.

    • During reassembly, we recommend you replace the 5-point screws with equivalent Phillips screws. Our provides the tools and screws needed to replace the Pentalobe screws with Phillips screws.

    • The 5-Point Screwdriver should only be used once, as it has the potential to strip the screws.

  2. iPhone 4S Home Button Ribbon Cable Replacement: step 2, image 1 of 2 iPhone 4S Home Button Ribbon Cable Replacement: step 2, image 2 of 2
    • Push the rear panel toward the top edge of the iPhone.

    • The panel will move about 2 mm.

  3. iPhone 4S Home Button Ribbon Cable Replacement: step 3, image 1 of 1
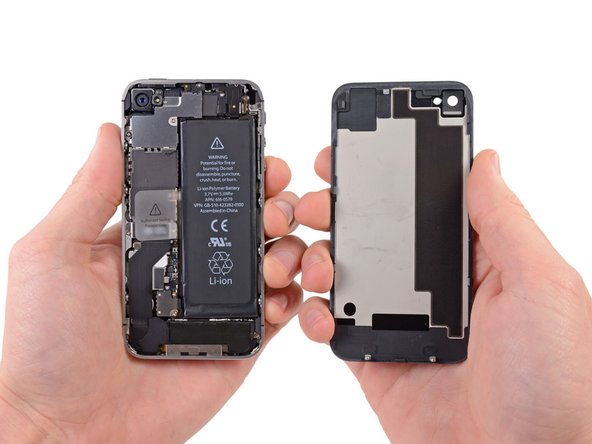
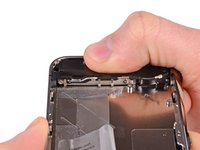
    • Pull the rear panel away from the back of the iPhone, being careful not to damage the plastic clips attached to the rear panel.

    • Remove the rear panel from the iPhone.

  4. iPhone 4S Home Button Ribbon Cable Replacement: step 4, image 1 of 3 iPhone 4S Home Button Ribbon Cable Replacement: step 4, image 2 of 3 iPhone 4S Home Button Ribbon Cable Replacement: step 4, image 3 of 3
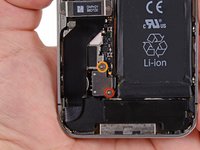
    • Remove the following screws securing the battery connector to the logic board:

    • One 1.7 mm Phillips screw

    • One 1.5 mm Phillips screw.

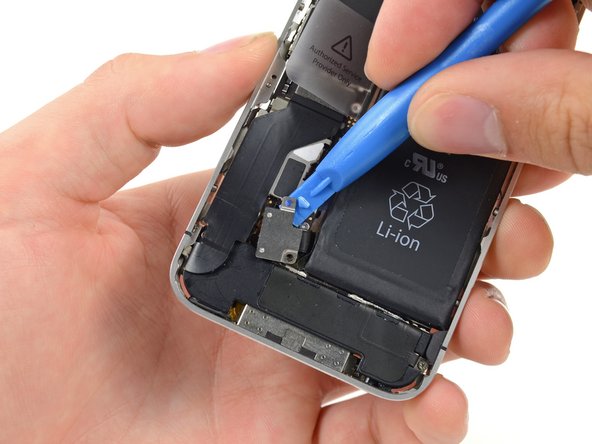
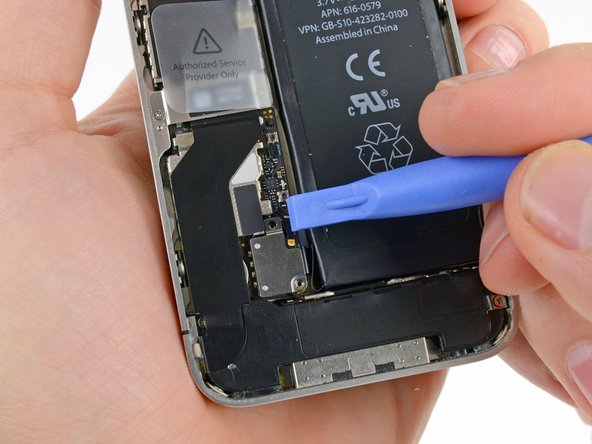
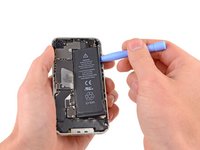
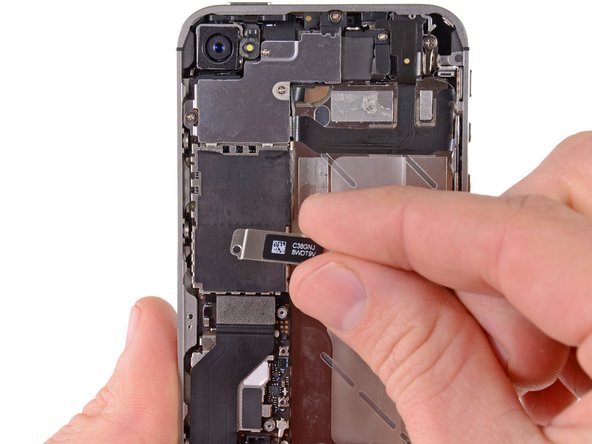
    • Use a plastic opening tool to gently detach the battery connector from the socket on the device. Start lifting off the connector from the bottom side, by placing the tip of the tool between the loudspeaker enclosure and the metal cover of the connector.

    • The battery connector comes off vertically from the logic board. Do not apply force sideways.

    • Pay attention to the pressure contact underneath the top screw of the battery connector. This may come loose while prying the battery connector from its socket.

  5. iPhone 4S Home Button Ribbon Cable Replacement: step 5, image 1 of 3 iPhone 4S Home Button Ribbon Cable Replacement: step 5, image 2 of 3 iPhone 4S Home Button Ribbon Cable Replacement: step 5, image 3 of 3
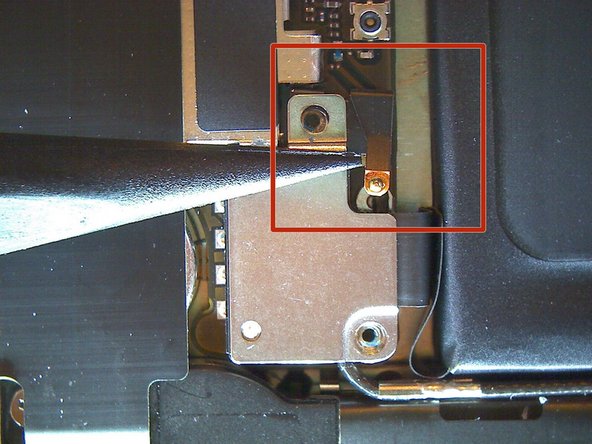
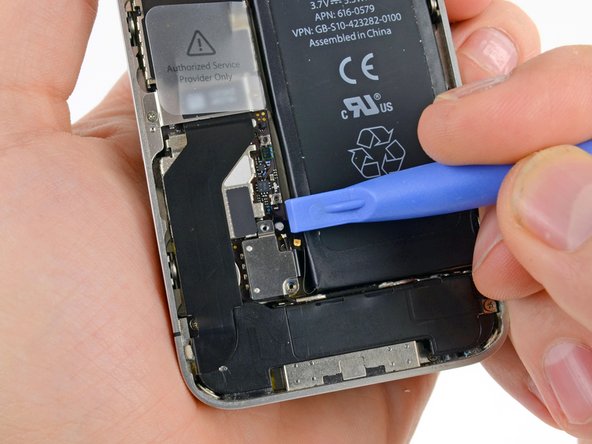
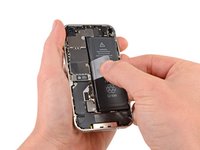
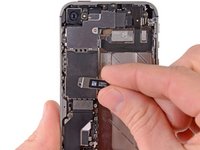
    • Use a plastic opening tool to pull the pressure contact from underneath the battery connector.

    • When reinstalling the pressure contact, be sure to clean it with a degreaser such as windex or isopropyl alcohol. The oils on your fingers have the potential to create wireless interference.

    • Take notice of the position of the small black ground clip on the upper screw of the battery connector. This clip is attached only by the upper screw. When reinstalling, it must be aligned so the gold contact point will press against the back cover.

    • Be careful not to rip off the battery connector socket soldered on the logic board. There are 4 very small soldering points awaiting this mistake!

  6. iPhone 4S Home Button Ribbon Cable Replacement: step 6, image 1 of 2 iPhone 4S Home Button Ribbon Cable Replacement: step 6, image 2 of 2
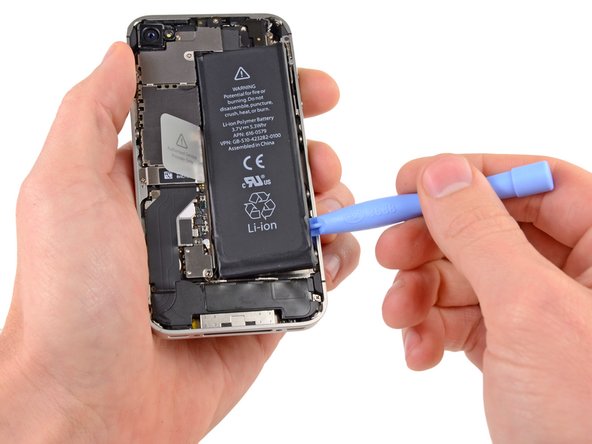
    • Insert the edge of a plastic opening tool between the battery and the outer case near the bottom of the iPhone.

    • Run the plastic opening tool along the right edge of the battery and pry up at several points to completely separate it from the adhesive securing it to the outer case.

  7. iPhone 4S Home Button Ribbon Cable Replacement: step 7, image 1 of 2 iPhone 4S Home Button Ribbon Cable Replacement: step 7, image 2 of 2
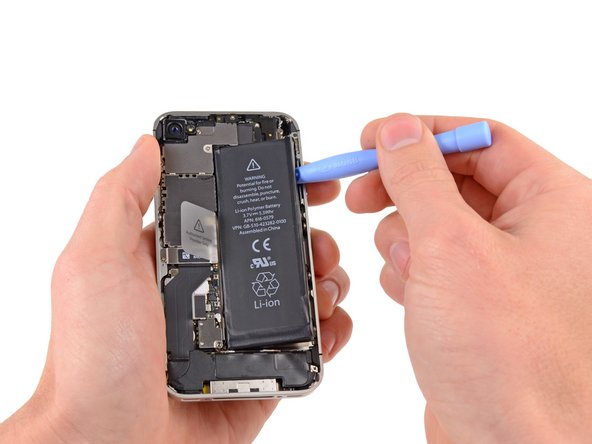
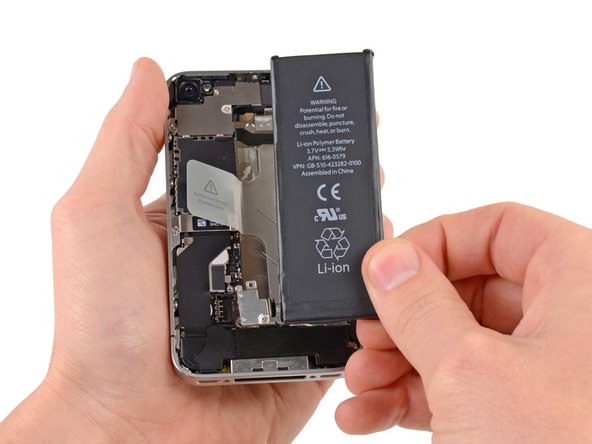
    • Use the exposed clear plastic pull tab to peel the battery off the adhesive securing it to the iPhone.

    • Be careful not to pull the plastic pull tab too hard as it can be ripped off very easily.

    • Remove the battery.

    • Perform a hard reset after reassembly. This can prevent several issues and simplify troubleshooting.

  8. iPhone 4S Home Button Ribbon Cable Replacement: step 8, image 1 of 2 iPhone 4S Home Button Ribbon Cable Replacement: step 8, image 2 of 2
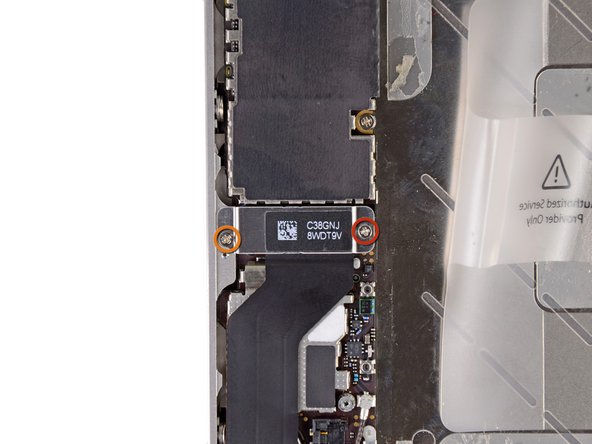
    • Remove the following screws securing the dock connector cable cover to the logic board:

    • One 1.5 mm Phillips screw

    • One 1.2 mm Phillips screw

    • Remove the metal dock connector cable cover.

  9. iPhone 4S Home Button Ribbon Cable Replacement: step 9, image 1 of 1
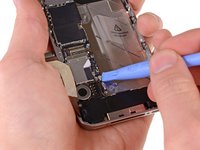
    • Use the edge of a plastic opening tool to pry the dock cable up from its socket on the logic board.

  10. iPhone 4S Home Button Ribbon Cable Replacement: step 10, image 1 of 1
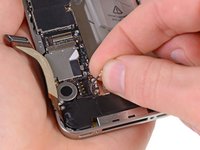
    • Peel the dock connector cable off the adhesive securing it to the logic board and the side of the speaker enclosure.

  11. iPhone 4S Home Button Ribbon Cable Replacement: step 11, image 1 of 2 iPhone 4S Home Button Ribbon Cable Replacement: step 11, image 2 of 2
    • Use the edge of a plastic opening tool to pry the cellular antenna cable up from its socket on the logic board.

    • De-route the cellular antenna cable out from under the metal fingers attached to the logic board.

  12. iPhone 4S Home Button Ribbon Cable Replacement: step 12, image 1 of 1
    • Be wary of the outer plastic ring located on top of the rear camera's flash assembly. It can be easily displaced if not removed during disassembly.

    • You can use tweezers, a plastic opening tool, or a spudger to remove the outer plastic ring.

  13. iPhone 4S Home Button Ribbon Cable Replacement: step 13, image 1 of 1
    • Remove the following four screws securing the cable cover to the logic board:

    • One 2.7 mm Phillips screw

    • One 2.6 mm Phillips screw

    • One 1.3 mm Phillips screw

    • One 1.2 mm Phillips screw

  14. iPhone 4S Home Button Ribbon Cable Replacement: step 14, image 1 of 2 iPhone 4S Home Button Ribbon Cable Replacement: step 14, image 2 of 2
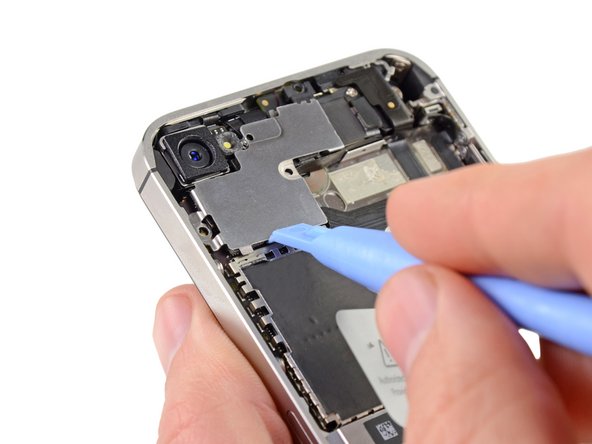
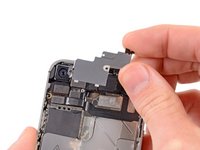
    • Use the edge of a plastic opening tool to pry the cable cover tabs out of their slots cut into the EMI shield on the logic board.

    • Lift the cable cover from its edge nearest the top and remove it from the iPhone.

  15. iPhone 4S Home Button Ribbon Cable Replacement: step 15, image 1 of 2 iPhone 4S Home Button Ribbon Cable Replacement: step 15, image 2 of 2
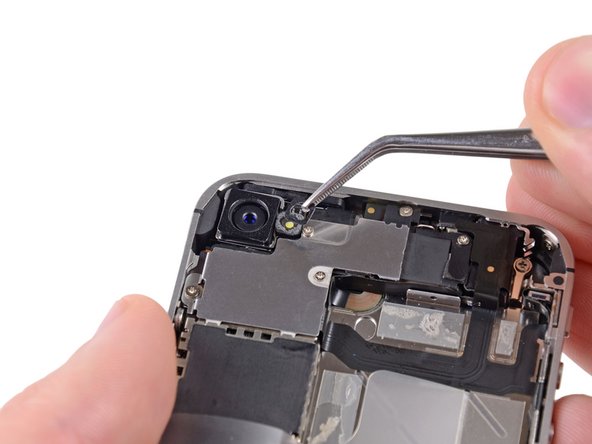
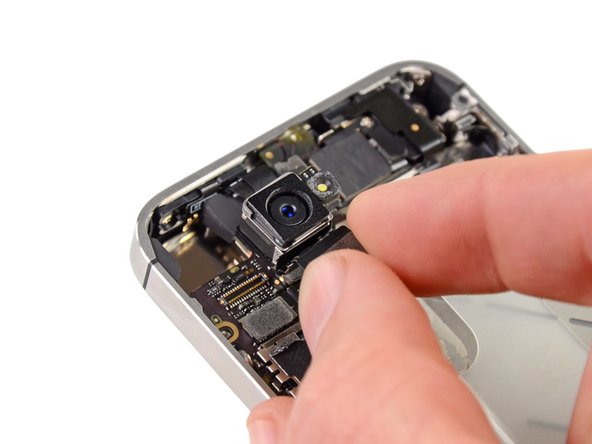
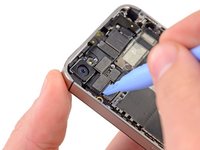
    • Use the edge of a plastic opening tool to pry the rear camera connector up from its socket on the logic board.

    • Be careful not to break any components off the surrounding area on the logic board as you pry upwards.

    • Remove the rear camera from the iPhone.

    • There is a small rubber gasket that sits underneath the rear-facing camera. Make sure that it is properly seated before reassembly.

  16. iPhone 4S Home Button Ribbon Cable Replacement: step 16, image 1 of 2 iPhone 4S Home Button Ribbon Cable Replacement: step 16, image 2 of 2
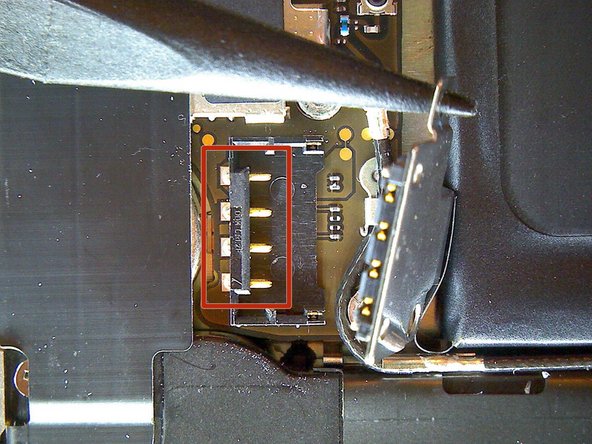
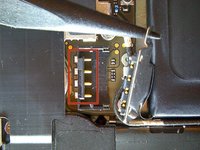
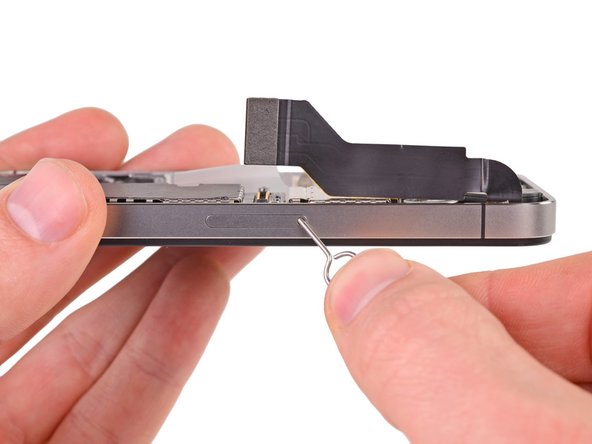
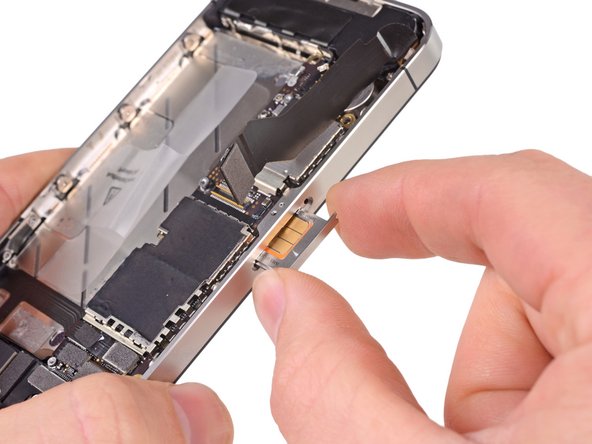
    • Use a SIM card eject tool or a paperclip to eject the SIM card and its holder.

    • This may require a significant amount of force.

    • Remove the SIM card and its holder.

  17. iPhone 4S Home Button Ribbon Cable Replacement: step 17, image 1 of 2 iPhone 4S Home Button Ribbon Cable Replacement: step 17, image 2 of 2
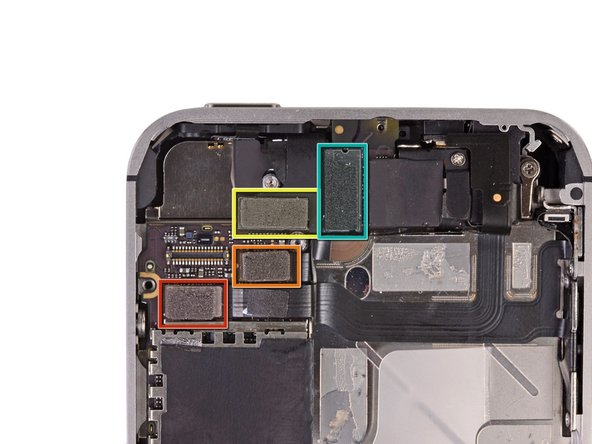
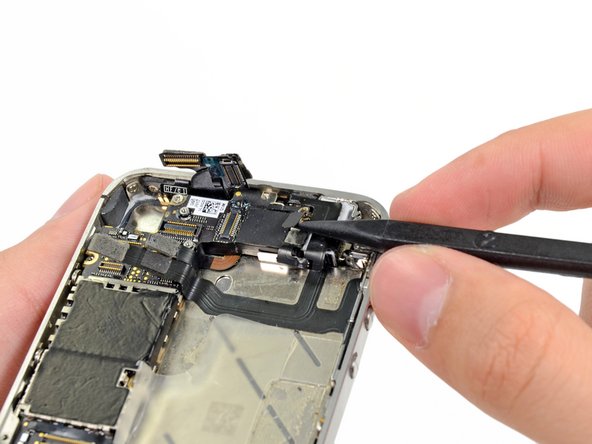
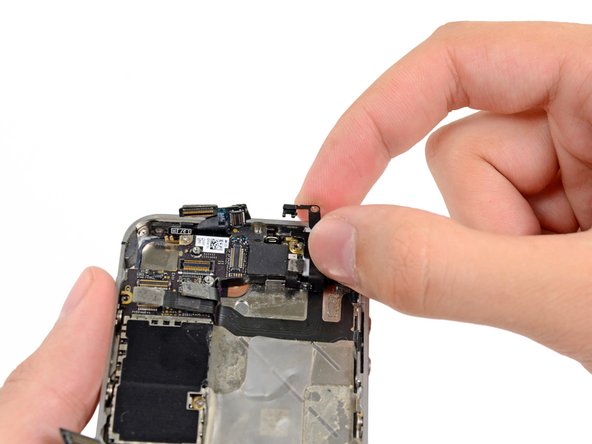
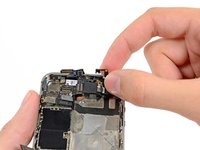
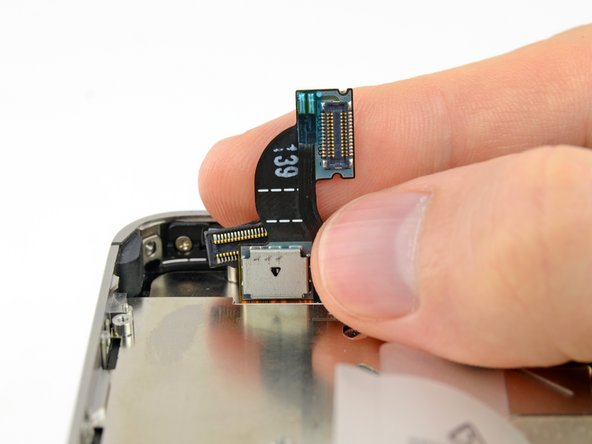
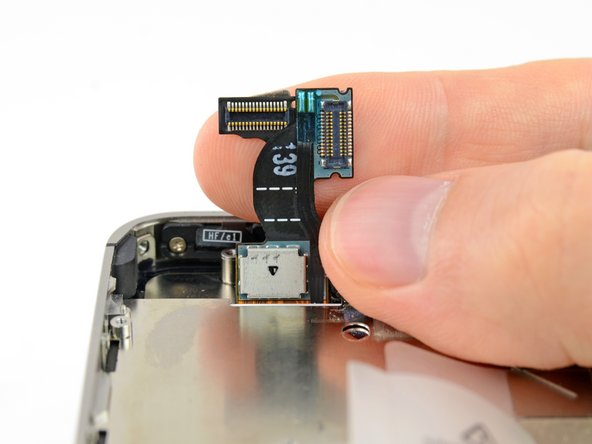
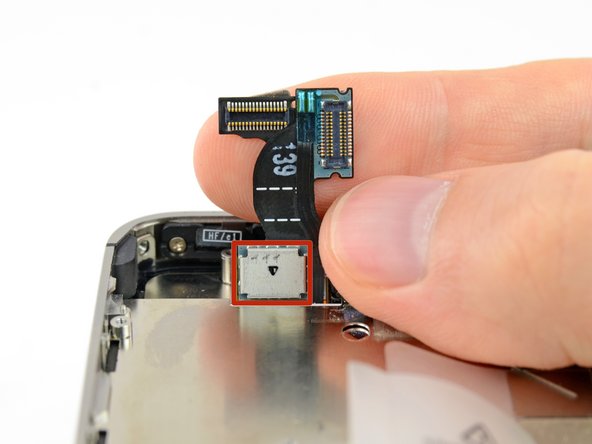
    • Remove the five cables near the top of the logic board in the following order:

    • Headphone jack/volume button cable

    • Front facing camera cable

    • Digitizer cable

    • Display data cable

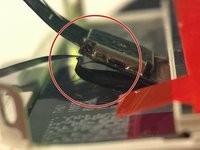
    • Power button cable (located underneath the headphone jack/volume button cable as shown in the second picture.)

    • To disconnect the cables, use the edge of a plastic opening tool to gently lift their connectors up and out of the sockets on the logic board.

    • Be careful not to break any of the small and delicate surface mount components as you disconnect the cables.

  18. iPhone 4S Home Button Ribbon Cable Replacement: step 18, image 1 of 1
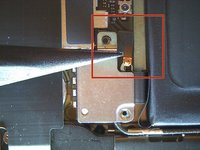
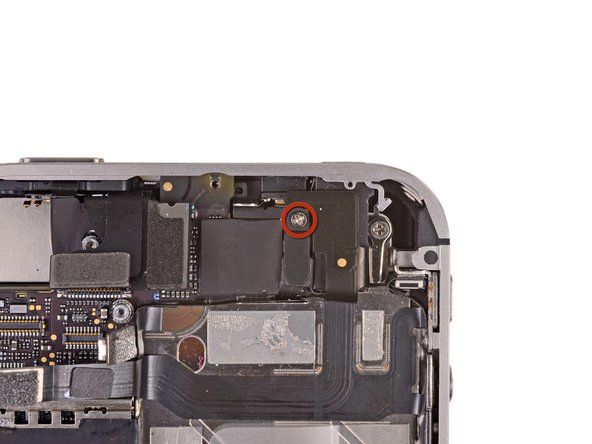
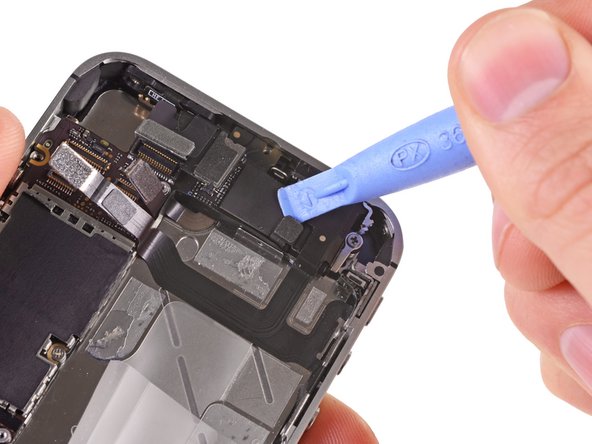
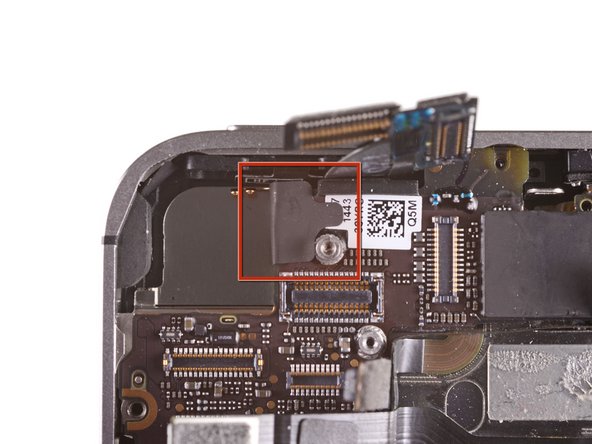
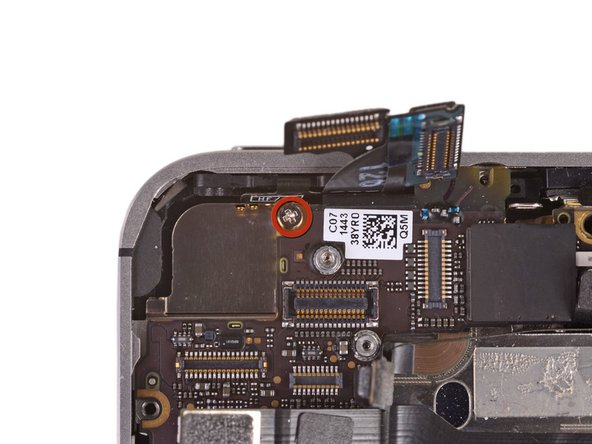
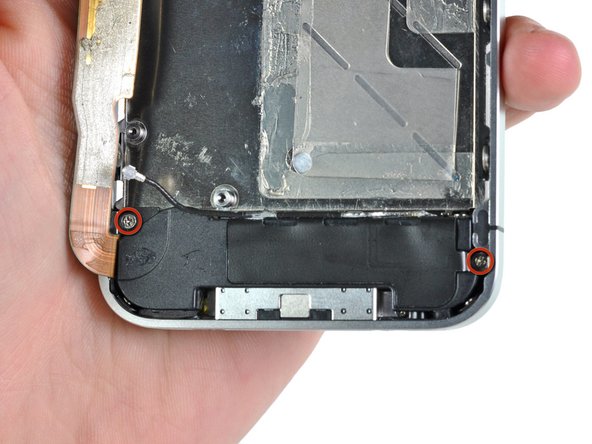
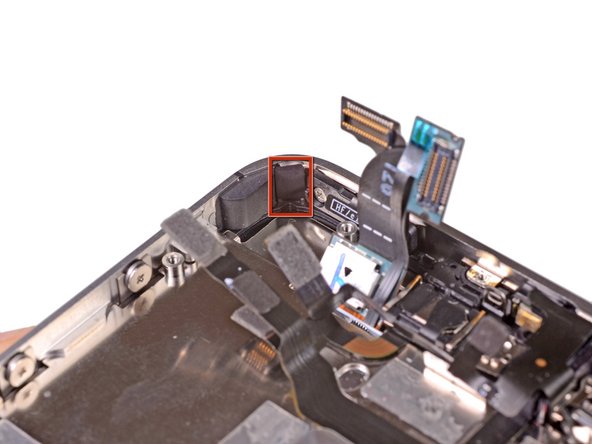
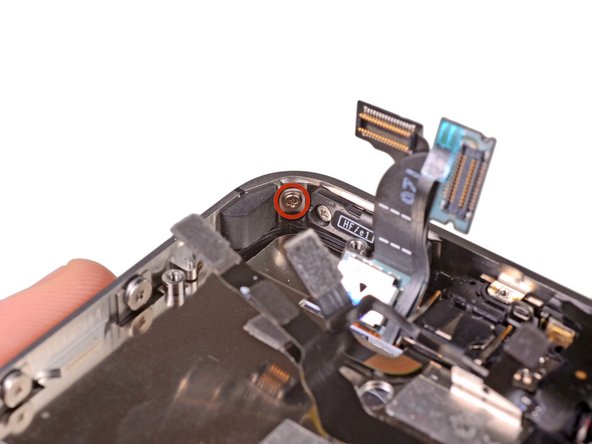
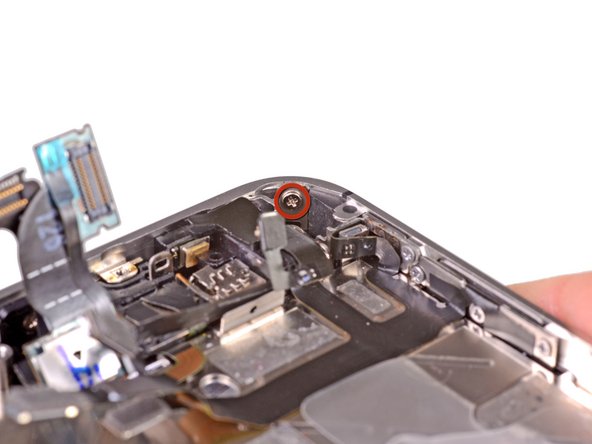
    • Remove the 1.5 mm Phillips screw securing the grounding clip to the logic board near the headphone jack.

  19. iPhone 4S Home Button Ribbon Cable Replacement: step 19, image 1 of 2 iPhone 4S Home Button Ribbon Cable Replacement: step 19, image 2 of 2
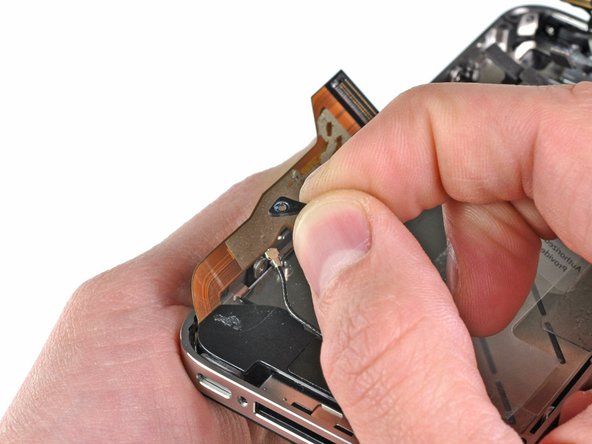
    • Use the tip of a spudger to pry the small grounding clip up off the logic board.

    • Carefully grasp the grounding clip and remove it from the iPhone.

    • Before reassembly, be sure to clean all metal-to-metal contact points on the grounding clip (not the mating halves of connectors) with a de-greaser such as windex or isopropyl alcohol. The oils on your fingers have the potential to cause grounding issues.

  20. iPhone 4S Home Button Ribbon Cable Replacement: step 20, image 1 of 1
    • Use a small flathead screwdriver to remove the 4.8 mm standoff near the headphone jack.

  21. iPhone 4S Home Button Ribbon Cable Replacement: step 21, image 1 of 1
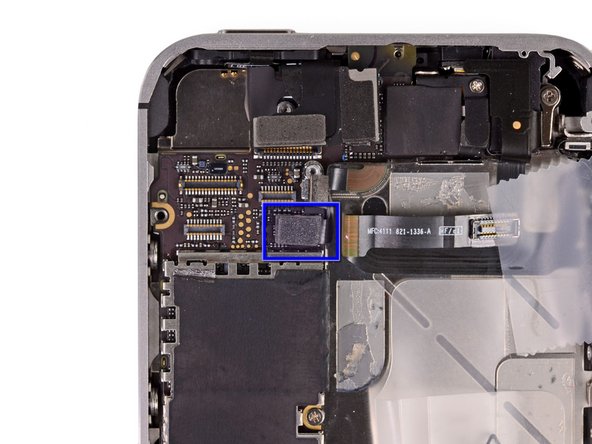
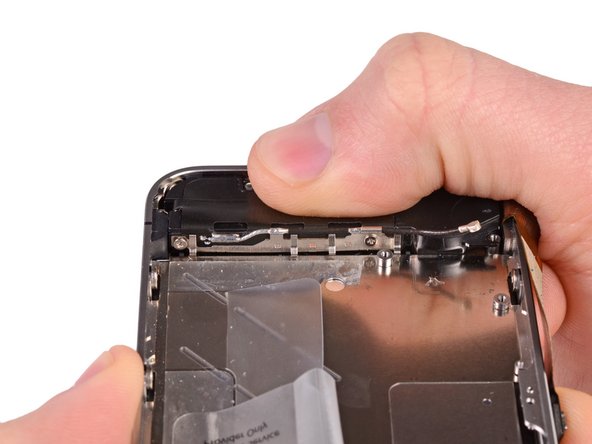
    • Use the edge of a plastic opening tool to disconnect the Wi-Fi antenna from the logic board.

  22. iPhone 4S Home Button Ribbon Cable Replacement: step 22, image 1 of 2 iPhone 4S Home Button Ribbon Cable Replacement: step 22, image 2 of 2
    • If present, peel the piece of black tape covering the hidden screw near the power button.

    • Remove the 2.6 mm Phillips screw securing the logic board near the power button.

    • (Use caution when removing this screw and removing the power contact held by it; the contact tab will come loose with the screw)

    • Notice the small rubber bumper under the screen & digitizer cables (which are detached at top above the Q-code). This bumper can fall off of the logic board when removed or get stuck to the cables and fall off later.

  23. iPhone 4S Home Button Ribbon Cable Replacement: step 23, image 1 of 1
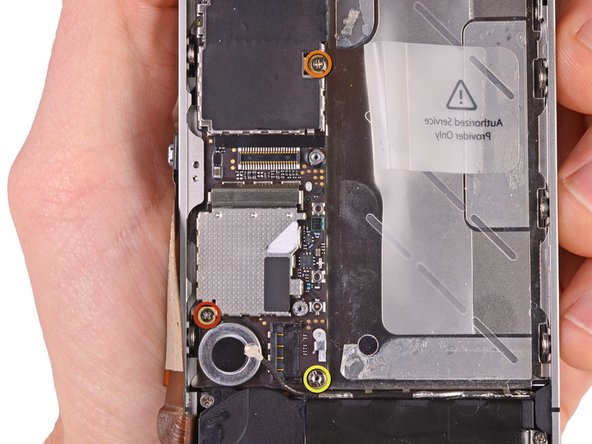
    • Remove the following screws securing the logic board to the case:

    • One 2.5 mm Phillips screw near the vibrator motor

    • One 2.4 mm Phillips screw

    • One 3.6 mm standoff along the side of the logic board nearest the battery opening.

    • Use a small flathead screwdriver to remove the single 3.6 mm standoffscrew.

  24. iPhone 4S Home Button Ribbon Cable Replacement: step 24, image 1 of 1
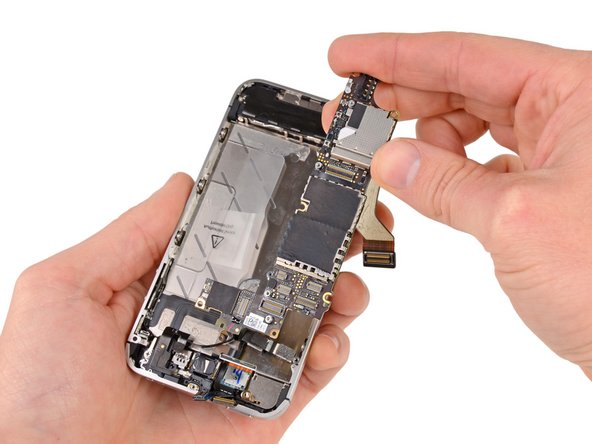
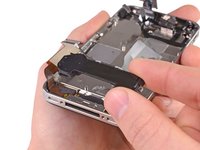
    • Carefully lift the logic board from the end closest to the speaker enclosure and slide it away from the top edge of the iPhone.

    • Remove the logic board.

    • Before reassembly, be sure to clean all metal-to-metal contact points on the logic board (not the mating halves of connectors) with a de-greaser such as windex or isopropyl alcohol. The oils on your fingers have the potential to cause grounding issues.

    • There is a small rubber bumper that sits on the top edge of the logic board where the digitizer and screen cables come through the case. It protects the cables as they bend over the top of the logic board. This can either get stuck to the cables or fall off the logic board when it comes out. Look back over step 22 for more details.

  25. iPhone 4S Home Button Ribbon Cable Replacement: step 25, image 1 of 1
    • Be sure not to lose the small grounding finger for the rear facing camera near the power button. This finger rests on top of the PCB, screwed down, and covered with the adhesive black plastic tape.

  26. iPhone 4S Home Button Ribbon Cable Replacement: step 26, image 1 of 3 iPhone 4S Home Button Ribbon Cable Replacement: step 26, image 2 of 3 iPhone 4S Home Button Ribbon Cable Replacement: step 26, image 3 of 3
    • Wedge the plastic opening tool between the vibrator and the side of the iPhone.

    • Pry the vibrator up to release it from the adhesive securing it to the iPhone.

    • Remove the vibrator.

  27. iPhone 4S Home Button Ribbon Cable Replacement: step 27, image 1 of 1
    • Remove the two 2.4 mm Phillips screws from the sides of the speaker enclosure assembly.

  28. iPhone 4S Home Button Ribbon Cable Replacement: step 28, image 1 of 1
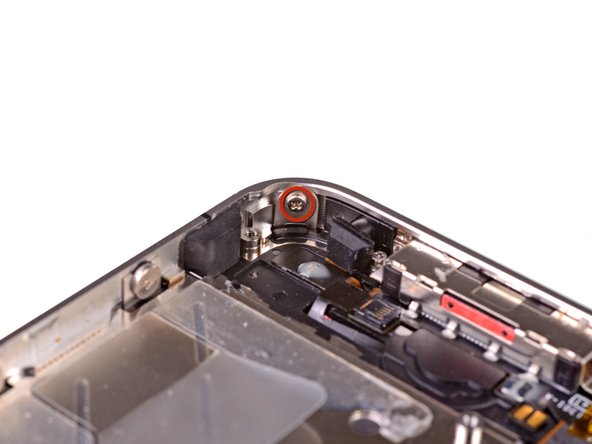
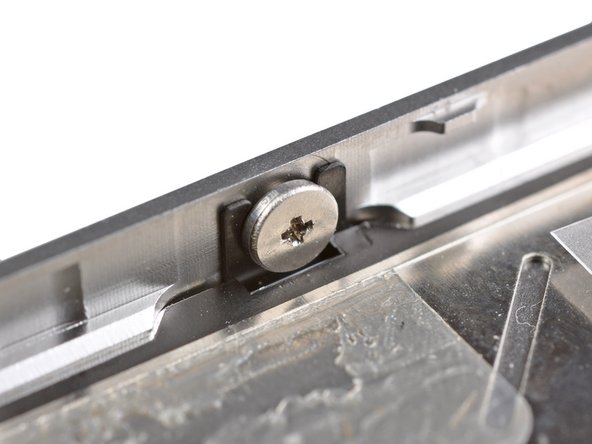
    • Remove the small plastic bracket that was installed under the screw closest to the dock connector cable.

  29. iPhone 4S Home Button Ribbon Cable Replacement: step 29, image 1 of 2 iPhone 4S Home Button Ribbon Cable Replacement: step 29, image 2 of 2
    • Remove the speaker enclosure assembly from the iPhone.

    • Before reinstalling the speaker enclosure assembly's screws, be sure the Wi-Fi grounding fingers are installed below the lip in the iPhone's metal case as seen in the second picture.

    • Before reassembly, be sure to clean all metal-to-metal contact points between the grounding fingers of the Wi-Fi antenna and the case of the iPhone with a de-greaser such as windex or isopropyl alcohol. The oils on your fingers have the potential to cause wireless interference issues.

  30. iPhone 4S Home Button Ribbon Cable Replacement: step 30, image 1 of 1
    • Remove the small pieces of black tape covering the display mounting tabs.

    • Note: These corner screws are not the same thickness as the other 1.5mm screws. Set them aside separately.

  31. iPhone 4S Home Button Ribbon Cable Replacement: step 31, image 1 of 1
    • Remove the 1.5 mm Phillips screw securing the display assembly near the power button.

  32. iPhone 4S Home Button Ribbon Cable Replacement: step 32, image 1 of 1
    • Remove the 1.5 mm Phillips screw near the headphone jack.

    • Removing the headphone jack makes it easier to access this screw, particularly during reassembly. If you're having trouble, refer to [invalid guide link] to remove the headphone jack.

  33. iPhone 4S Home Button Ribbon Cable Replacement: step 33, image 1 of 1
    • Remove the 1.5 mm Phillips screw near the lower microphone.

  34. iPhone 4S Home Button Ribbon Cable Replacement: step 34, image 1 of 1
    • Remove the 1.5 mm Phillips screw near the dock connector cable.

  35. iPhone 4S Home Button Ribbon Cable Replacement: step 35, image 1 of 2 iPhone 4S Home Button Ribbon Cable Replacement: step 35, image 2 of 2
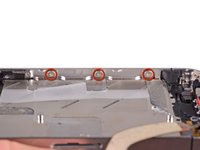
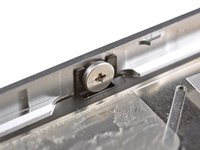
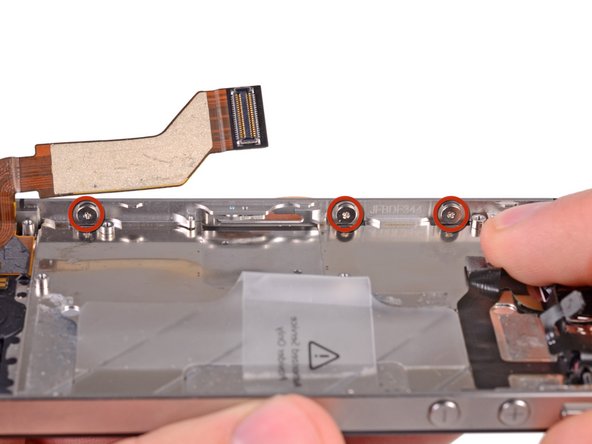
    • Loosen the three large-headed Phillips screws along the volume button side of the iPhone about one half turn.

    • It is not necessary to completely remove these screws. When reinstalling the display assembly, be sure the washers are closest to the screw head (as seen in the second picture).

  36. iPhone 4S Home Button Ribbon Cable Replacement: step 36, image 1 of 1
    • Loosen the three large-headed Phillips screws along the other side of the iPhone about one half turn.

  37. iPhone 4S Home Button Ribbon Cable Replacement: step 37, image 1 of 1
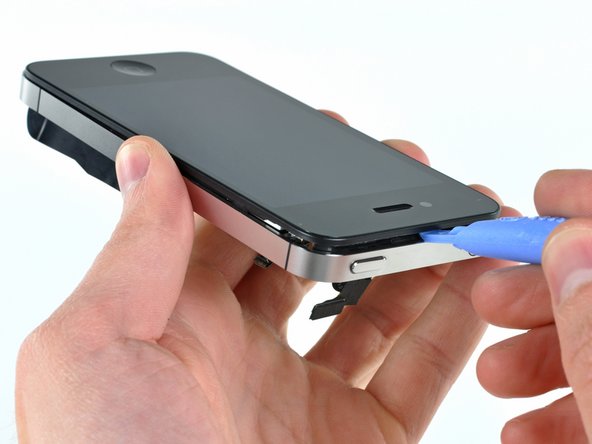
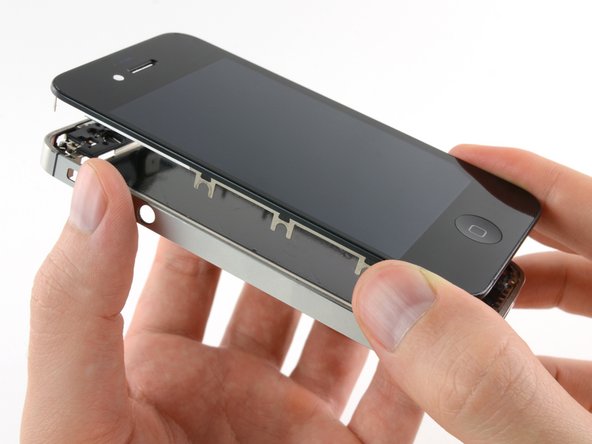
    • Use the edge of a plastic opening tool to gently pry up the display assembly around its perimeter.
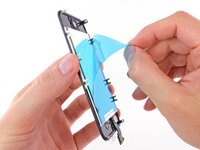
  38. iPhone 4S Home Button Ribbon Cable Replacement: step 38, image 1 of 1
    • Remove the display assembly from the iPhone.

  39. iPhone 4S Home Button Ribbon Cable Replacement, Display Assembly Installation: step 39, image 1 of 2 iPhone 4S Home Button Ribbon Cable Replacement, Display Assembly Installation: step 39, image 2 of 2
    • To successfully install a new/replacement display assembly, note the following:

    • Remember to [invalid guide link] from your old display to the new display (in most cases, this is not provided). The home button gasket is thin rubber, so care must be taken not to tear it. Also, check that the mesh for the speaker hole is present in the replacement; if not, move it over from the old display.

    • Be sure to peel off the protective backing (usually blue or pink) from the new panel before installing it.

    • If your replacement display does not come with a 7 mm clear plastic ring surrounding the front-facing camera, be sure to transfer it between the old and new display.

  40. iPhone 4S Home Button Ribbon Cable Replacement, Display Assembly Installation (Cont'd): step 40, image 1 of 3 iPhone 4S Home Button Ribbon Cable Replacement, Display Assembly Installation (Cont'd): step 40, image 2 of 3 iPhone 4S Home Button Ribbon Cable Replacement, Display Assembly Installation (Cont'd): step 40, image 3 of 3
    • Whether installing a replacement display assembly or re-using the existing display assembly, note the following:

    • Carefully straighten the digitizer and LCD data cables, and feed them through the slot cut in the outer case. This photo on the left shows the display assembly being installed incorrectly, with a loop in the digitizer caught in the slot of the enclosure. The center photo shows the loop.

    • The photo on the right shows the digitizer cable being correctly fed through to its full length.

    • If the digitizer cable has been installed incorrectly, it will not reach its socket on the logic board. Do not attempt to pull it through by force, or it will be cut by the sharp enclosure, and tear where the loop in the cable joins with the thinner cable lead. Remove the display assembly, straighten the cable, and re-feed the loop correctly.

  41. iPhone 4S Home Button Ribbon Cable Replacement, Display Assembly Installation (Cont'd): step 41, image 1 of 1
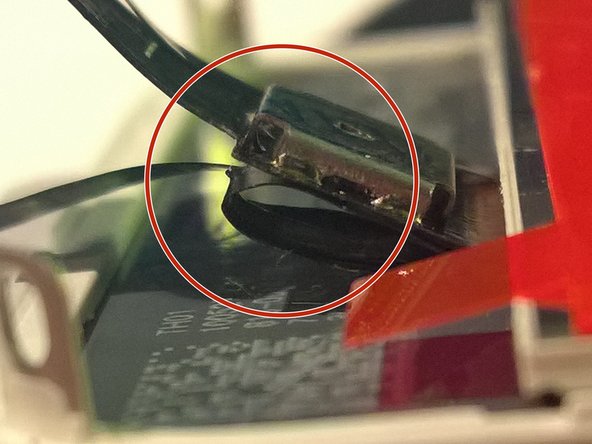
    • During reassembly, do not touch the metallic area at the base of the LCD data cable, as this can cause problems with the LCD. If you do touch it accidentally, clean it gently with an alcohol wipe before continuing.

    • After reassembly, clean the touchscreen surface with an alcohol wipe prior to turning the iPhone back on. The alcohol helps dissipate any lingering static electricity, which can cause problems with the display.

    • After reassembly, connect the iPhone to an AC power source before turning it on for the first time. Once the iPhone has booted up successfully, you can disconnect the AC power.

    • After reassembly, protect your new display from any scratches by installing a new .

  42. iPhone 4S Home Button Ribbon Cable Replacement: step 42, image 1 of 2 iPhone 4S Home Button Ribbon Cable Replacement: step 42, image 2 of 2
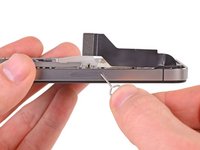
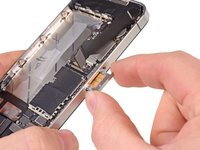
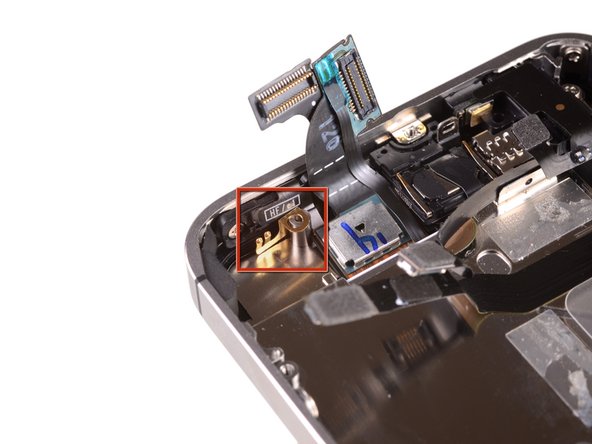
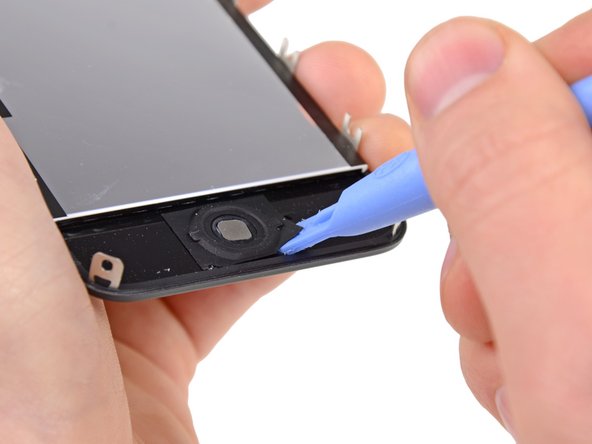
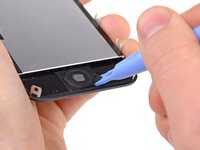
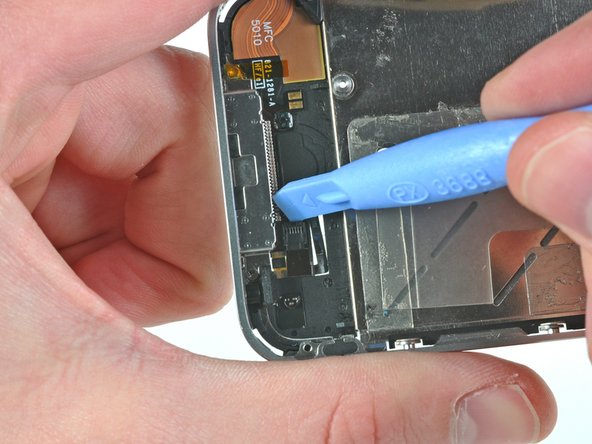
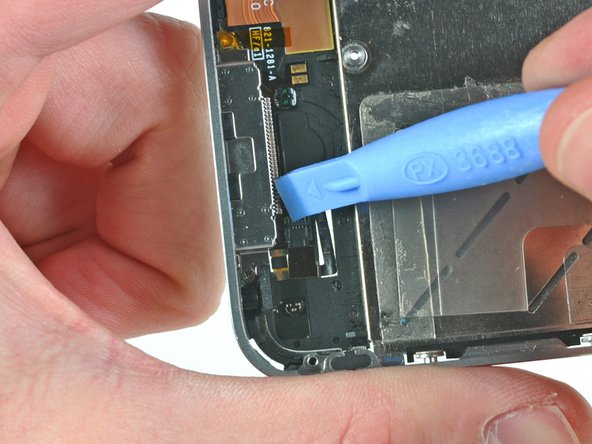
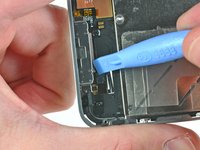
    • Use the edge of a plastic opening tool to flip up the retaining flap on the home button ribbon cable.

    • Be sure you are prying up on the hinged flap, not the socket itself.

  43. iPhone 4S Home Button Ribbon Cable Replacement: step 43, image 1 of 1
    • Use a pair of tweezers to pull the home button cable out of its socket.

  44. iPhone 4S Home Button Ribbon Cable Replacement: step 44, image 1 of 1
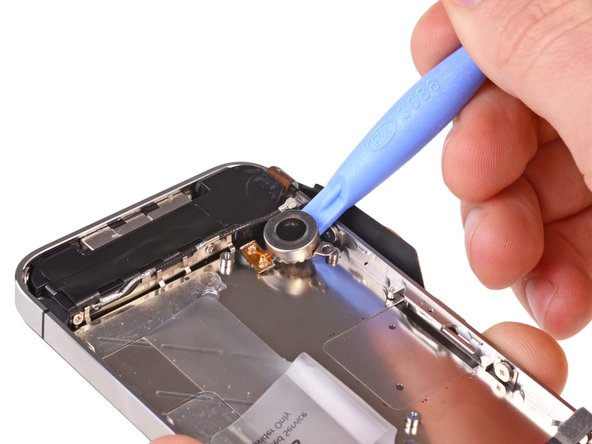
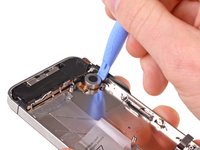
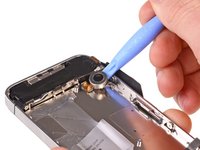
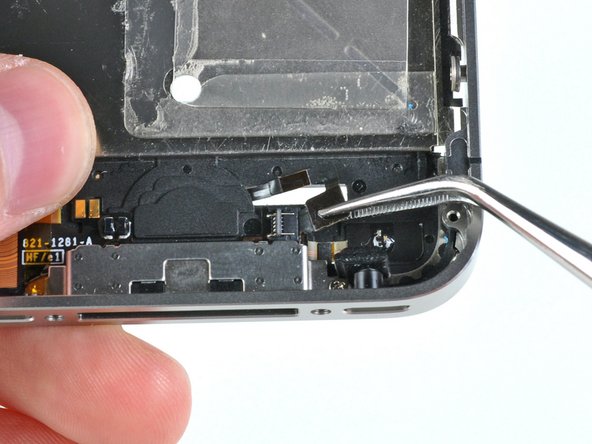
    • Carefully de-route the home button cable through its slot in the outer case and remove it from the iPhone.

    • Be sure to properly seat the new home button ribbon cable in its groove, otherwise you may experience functionality issues.

Conclusion

To reassemble your device, follow these instructions in reverse order.

System

Member since: 09/24/09

2,562 Guides authored

0 Comments

Add Comment

View Statistics:

Past 24 Hours: 0

Past 7 Days: 0

Past 30 Days: 0

All Time: 0