/

iPhone 5s Pentalobe Screws Replacement

What you need

  1. iPhone 5s Pentalobe Screws Replacement, iPhone 5s Pentalobe Screws Replacement: step 1, image 1 of 1
    • Before we proceed, let's make sure you have the correct tools for the job. iFixit's includes:

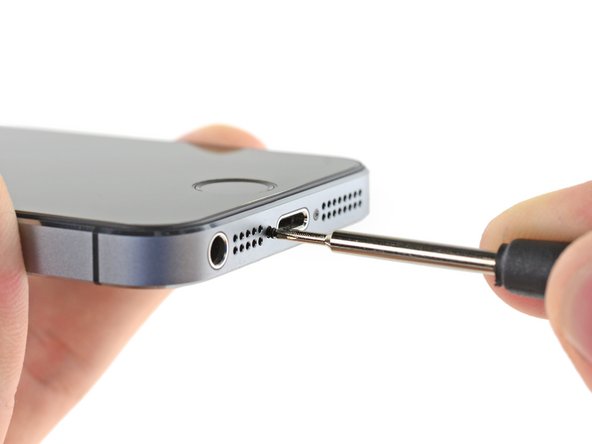
    • One 5-Point Pentalobe screwdriver

    • One #000 Phillips screwdriver

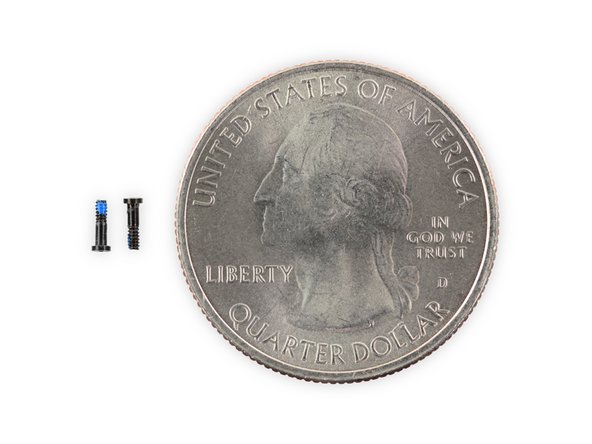
    • Two 3.9 mm "Liberation" Phillips screws

    • Are you ready to break the shackles of hardware oppression and liberate your iPhone? Let's rock!

  2. iPhone 5s Pentalobe Screws Replacement: step 2, image 1 of 2 iPhone 5s Pentalobe Screws Replacement: step 2, image 2 of 2
    • Remove the two 3.9 mm Pentalobe screws next to the Lightning connector.

    • The 5-Point Pentalobe screwdriver should only be used a limited number of times because it has the potential to strip the screws.

  3. iPhone 5s Pentalobe Screws Replacement: step 3, image 1 of 2 iPhone 5s Pentalobe Screws Replacement: step 3, image 2 of 2
    • Peel and remove the two 3.9 mm Phillips screws from the iPhone Liberation Card.

    • Be careful! Both the Phillips and Pentalobe screws are really small. How small? See for yourself, and be careful not to drop them!

  4. iPhone 5s Pentalobe Screws Replacement: step 4, image 1 of 1
    • Insert the two 3.9 mm Phillips screws into the screw holes using the provided #000 Phillips screwdriver.

    • Huzzah! Your iPhone is now liberated from those pesky "Pentalobular" screws.

Conclusion

To reassemble your device, follow these instructions in reverse order.

System

Member since: 09/24/09

2,562 Guides authored

0 Comments

Add Comment

View Statistics:

Past 24 Hours: 0

Past 7 Days: 0

Past 30 Days: 0

All Time: 20