
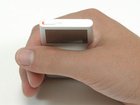
iPod Nano 2nd Generation Top Bezel Replacement

Last updated on Sep 17, 2016
Views: 24
View statistics:
- Past 24 Hours:
- 0
- Past 7 Days:
- 2
- Past 30 Days:
- 3
- All Time:
- 24
Comments: 0
No one has left comments on this guide. Will you be first?
Go to guide commentsCompleted: 0 1
No one has marked this guide "completed." Will you be the first?
1 person has marked this guide "completed." It's you — great job!
Favorites: 0 1
No one has favorited (and subscribed to) this guide. Will you be the first?
1 person has favorited (and subscribed to) this guide — and that's you!
Introduction
Go to step 1 ↓The plastic part on the top of the iPod.
What you need
-
-
-
Carefully insert an iPod opening tool in the seam between the metal casing and white plastic top.
-
Lift the top bezel off the iPod. It's glued on using a mild adhesive, so some force may be required.
-


To reassemble your device, follow these instructions in reverse order.

