
iPhone 1st Generation Logic Board Replacement

What you need

  1. iPhone 1st Generation Logic Board Replacement, iPhone 1st Generation Logic Board Replacement: step 1, image 1 of 1
    • Insert a SIM card eject tool or paper clip into the hole next to the headphone jack.

    • Press down on the paper clip until the SIM card tray pops out.

    Add Comment

  2. iPhone 1st Generation Logic Board Replacement: step 2, image 1 of 1
    • Grasp the SIM card tray and slide it out of the iPhone.

    Add Comment

  3. iPhone 1st Generation Logic Board Replacement: step 3, image 1 of 1
    • This image shows the two tabs and two catches located on the underside of the antenna cover. The two tabs at the top of the image must be pushed towards the black cover to release them.

    Add Comment

  4. iPhone 1st Generation Logic Board Replacement: step 4, image 1 of 1
    • Be sure to slide the metal spudger between the dock connector and the antenna cover, and not into the dock connector itself.

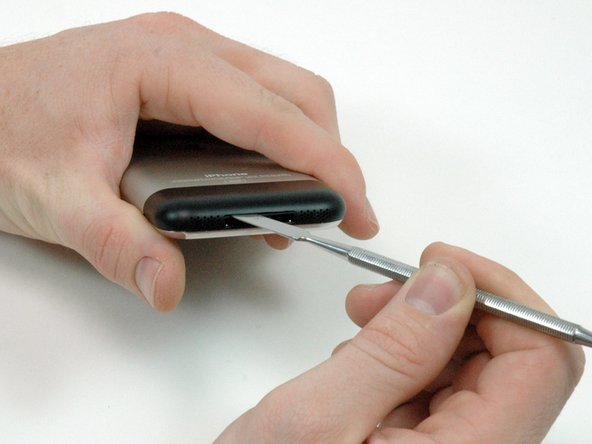
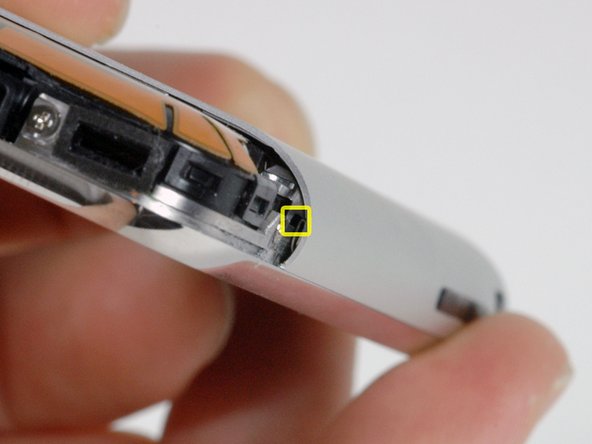
    • Insert a metal spudger into the slot between the dock connector and the antenna cover. Gently pry up near the two tabs to create a small gap between the antenna cover and the silver front bezel.

    Add Comment

  5. iPhone 1st Generation Logic Board Replacement: step 5, image 1 of 1
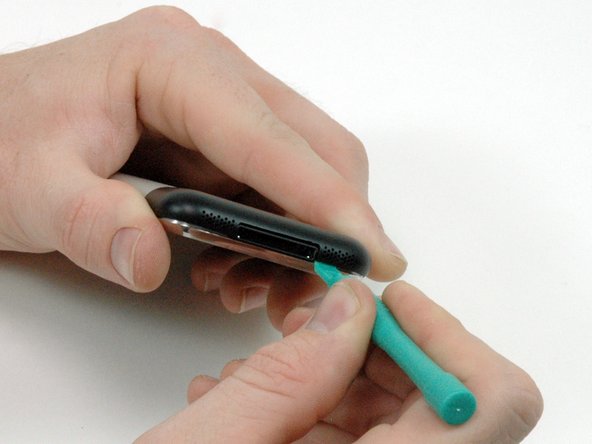
    • Insert an iPod opening tool in the gap between the antenna cover and the front bezel. The wedge of the tool should be pointing towards the antenna cover. Slide the tool around the corner and up until you reach the metal backing.

    • Repeat the same procedure on the other side of the dock connector.

    Add Comment

  6. iPhone 1st Generation Logic Board Replacement: step 6, image 1 of 1
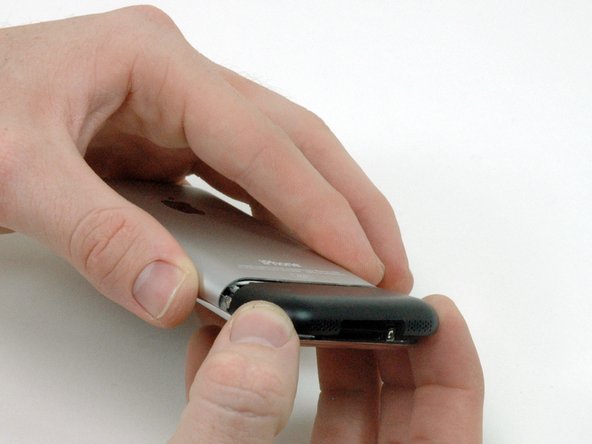
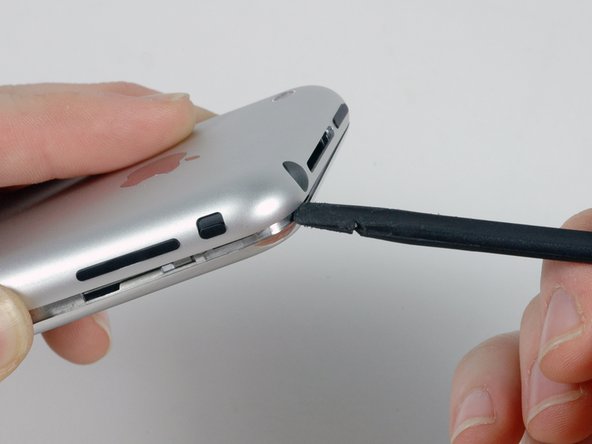
    • Grasp the antenna cover on either side and slide it up and away from the iPhone. This requires some force. If it does not come free, ensure that the antenna cover is lifted up enough to free the catches.

    Add Comment

  7. iPhone 1st Generation Logic Board Replacement: step 7, image 1 of 1
    • Remove the three Phillips #00 screws securing the rear panel to the iPhone.

    Add Comment

  8. iPhone 1st Generation Logic Board Replacement: step 8, image 1 of 1
    • Getting the iPhone open is a challenging feat, so don't get discouraged. Take a deep breath and make sure you have plenty of time to get the job done.

    • The small square hole is the location to insert the dental pick in the next step.

    Add Comment

  9. iPhone 1st Generation Logic Board Replacement: step 9, image 1 of 1
    • Start removing the rear panel on the side with the buttons.

    • Slide the dental pick completely into the square hole. You may need to wiggle the tool and apply a good amount of force to get it to go all the way.

    Add Comment

  10. iPhone 1st Generation Logic Board Replacement: step 10, image 1 of 1
    • Pry up the rear panel by pulling the dental pick counterclockwise in a quick motion. Apply force perpendicular to the plane of the display assembly. You may be afraid to go fast, but going slowly is more likely to bend the case.

    Add Comment

  11. iPhone 1st Generation Logic Board Replacement: step 11, image 1 of 1
    • Use a spudger to free the rear panel from the iPhone along the corner and top.

    Add Comment

  12. iPhone 1st Generation Logic Board Replacement: step 12, image 1 of 1
    • Repeat the same procedure on the other side of the iPhone. Slide the dental pick completely into the square hole. You may need to wiggle the tool and apply a good amount of force to get it to go all the way.

    Add Comment

  13. iPhone 1st Generation Logic Board Replacement: step 13, image 1 of 1
    • Pry up the rear panel by pulling the dental pick clockwise in a quick motion. Apply force perpendicular to the plane of the display assembly. You may be afraid to go fast, but going slowly is more likely to bend the case.

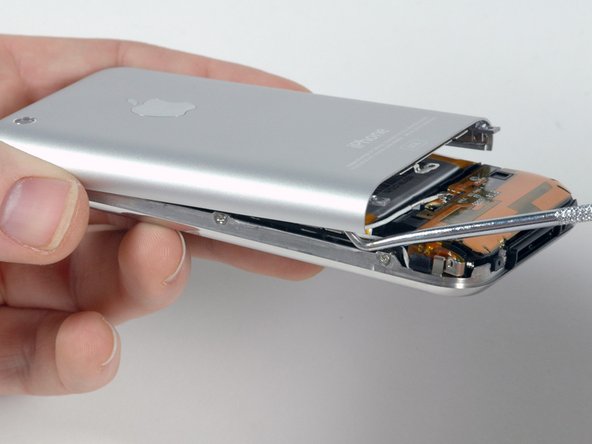
    • The rear panel is still attached to the iPhone by the headphone jack cable, so don't entirely remove the rear panel from the iPhone just yet.

    Add Comment

  14. iPhone 1st Generation Logic Board Replacement: step 14, image 1 of 1
    • Make sure the phone is off before disconnecting the headphone jack cable.

    • Use a spudger to disconnect the headphone jack cable from the logic board.

    Add Comment

  15. iPhone 1st Generation Logic Board Replacement: step 15, image 1 of 1
    • Peel up the orange tape securing the white antenna cable to the side of the iPhone.

    Add Comment

  16. iPhone 1st Generation Logic Board Replacement: step 16, image 1 of 1
    • Use a spudger to disconnect the headphone jack cable from the logic board.

    Add Comment

  17. iPhone 1st Generation Logic Board Replacement: step 17, image 1 of 1
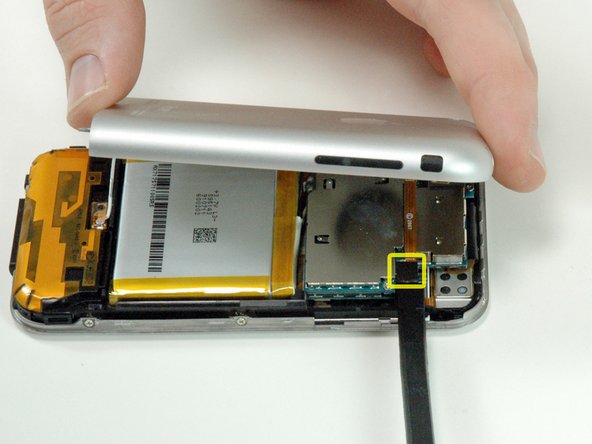
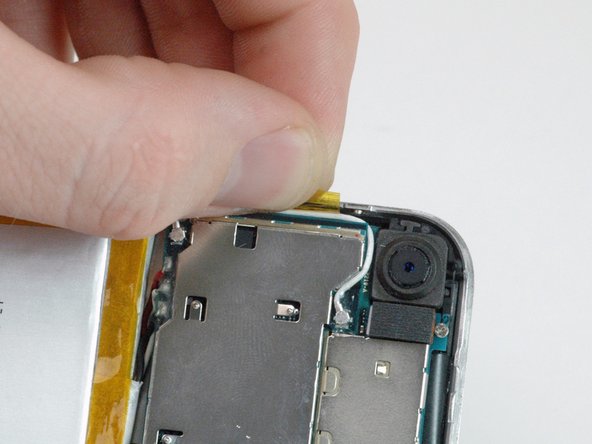
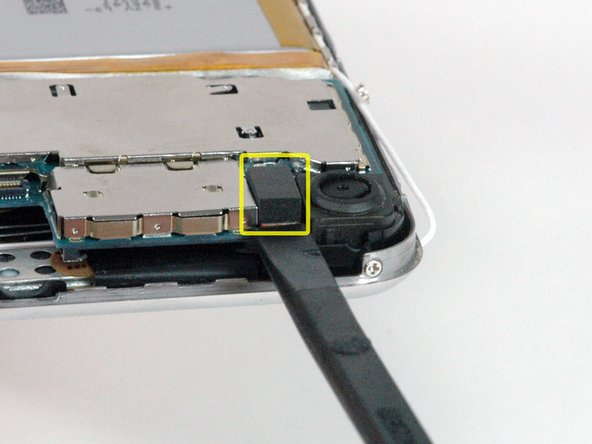
    • Use a spudger to disconnect the two antenna cables from the communications board. Apple used a small dab of glue on these connections, which may make removing the antenna connections harder.

    Add Comment

  18. iPhone 1st Generation Logic Board Replacement: step 18, image 1 of 1
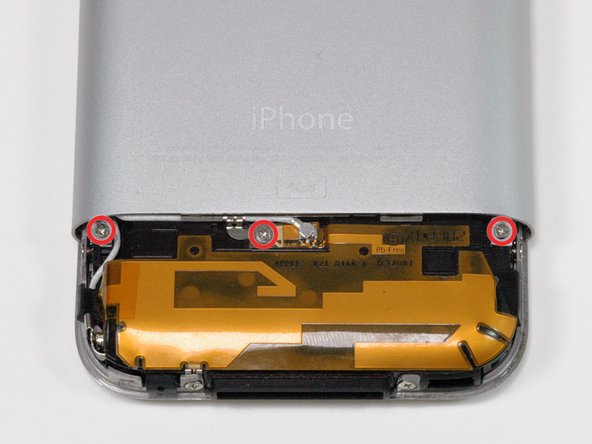
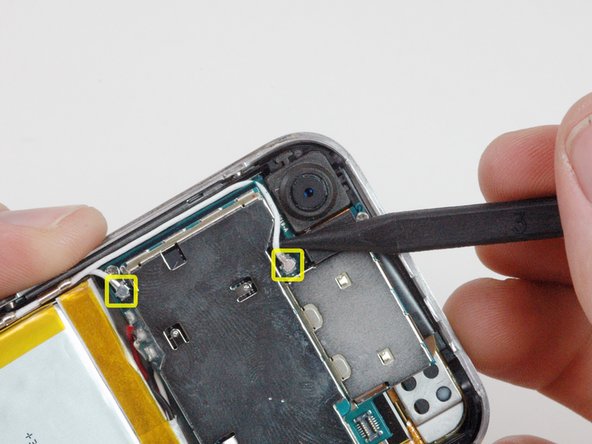
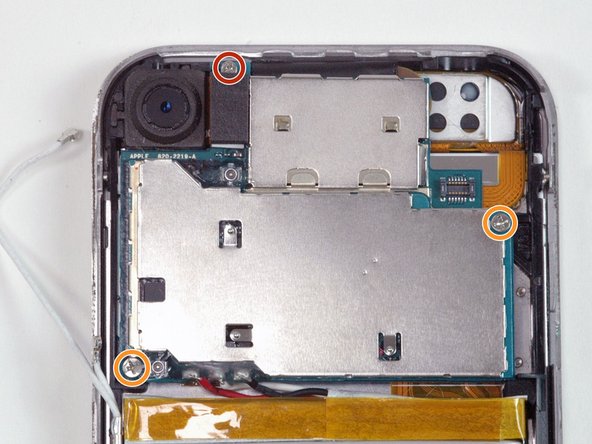
    • Remove the following 3 screws:

    • One Phillips #00 screw securing the logic board to the iPhone near the camera.

    • Two Phillips #00 screws, one on either corner of the logic board.

    Add Comment

  19. iPhone 1st Generation Logic Board Replacement: step 19, image 1 of 1
    • Use a spudger to disconnect the camera connector.

    • Lift the camera out of the iPhone.

    Add Comment

  20. iPhone 1st Generation Logic Board Replacement: step 20, image 1 of 1
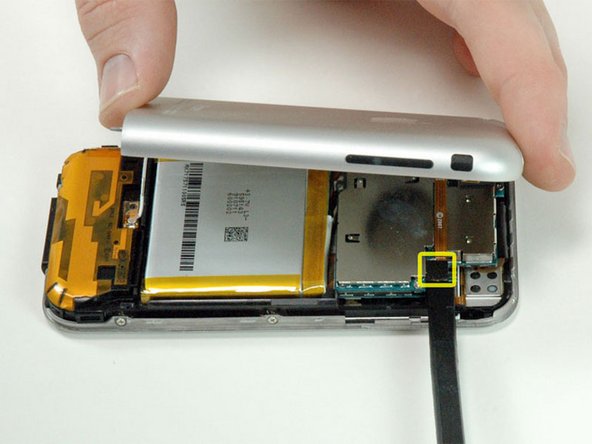
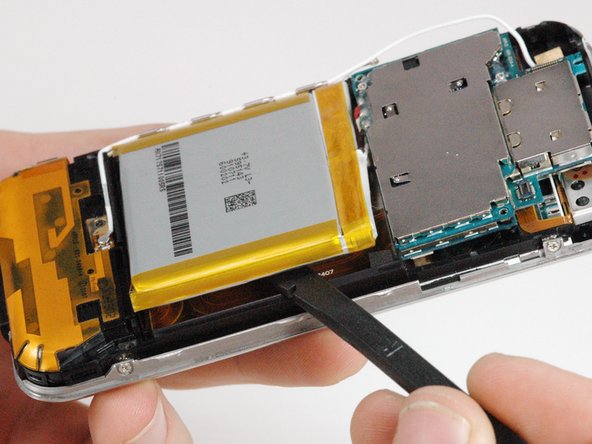
    • Working from the edge opposite the battery connectors, insert a spudger between the battery and the plastic frame and pry up on the battery. It is attached to the casing with an adhesive, but should slowly come free.

    • Leave the battery resting slightly out of its housing, but be sure not to put too much pressure on the battery wires as the solder joints break easily.

    Add Comment

  21. iPhone 1st Generation Logic Board Replacement: step 21, image 1 of 1
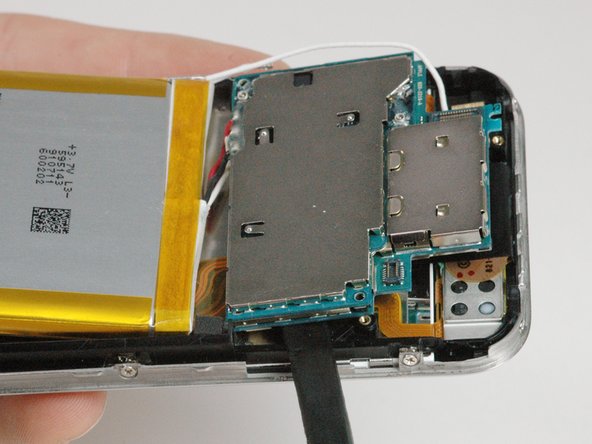
    • Slide a spudger beneath the logic board on the side opposite the battery connector and pry up slightly. Don't lift up too far, because there are still four attached connectors on the bottom of the logic board.

    Add Comment

  22. iPhone 1st Generation Logic Board Replacement: step 22, image 1 of 1
    • In a similar manner, slide a spudger beneath the logic board where the camera was. Again, don't lift up too far yet as there are still four attached connectors on the bottom of the logic board.

    Add Comment

  23. iPhone 1st Generation Logic Board Replacement: step 23, image 1 of 1
    • Lift up the logic board slightly and slide a spudger beneath the logic board to disconnect the display ribbon cable.

    • After freeing the first connector, slide the spudger further towards the battery and the center of the iPhone to disconnect the speaker connector.

    Add Comment

  24. iPhone 1st Generation Logic Board Replacement: step 24, image 1 of 1
    • Go to the other side of the logic board and use a spudger to disconnect the touch sensor cable on the under side of the logic board.

    Add Comment

  25. iPhone 1st Generation Logic Board Replacement: step 25, image 1 of 1
    • Slide a spudger beneath the black locking bar and pry up to rotate the bar 90 degrees (the bar is already rotated in the picture).

    Add Comment

  26. iPhone 1st Generation Logic Board Replacement: step 26, image 1 of 1
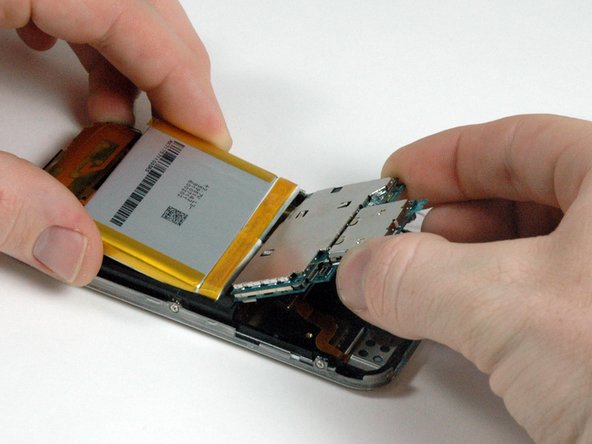
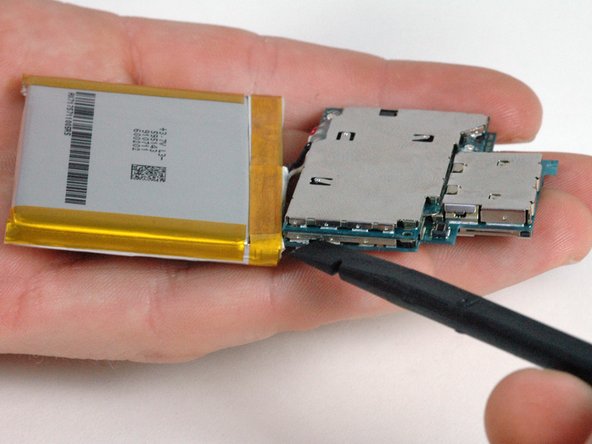
    • Hold both the battery and the logic board assembly and slide both parts away from the orange antenna and out of the iPhone.

    Add Comment

  27. iPhone 1st Generation Logic Board Replacement: step 27, image 1 of 1
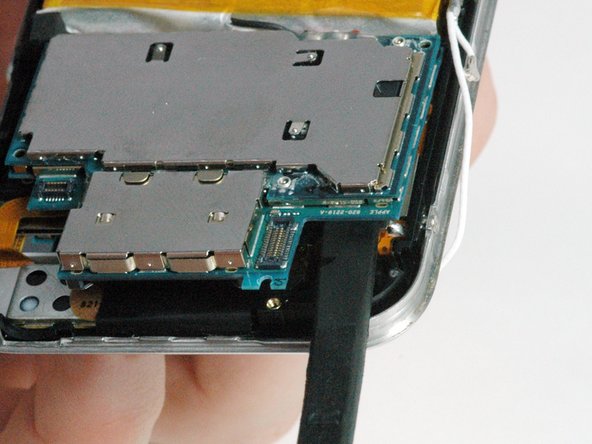
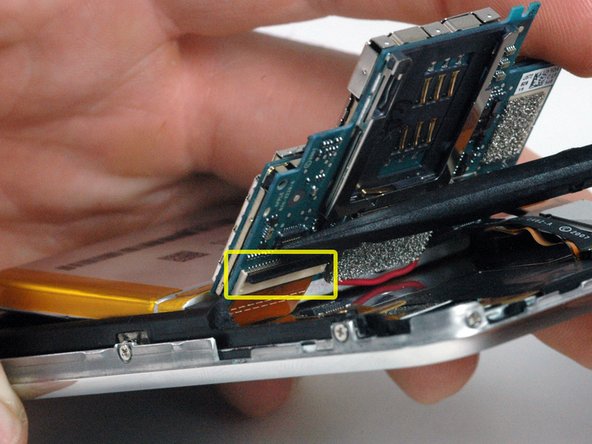
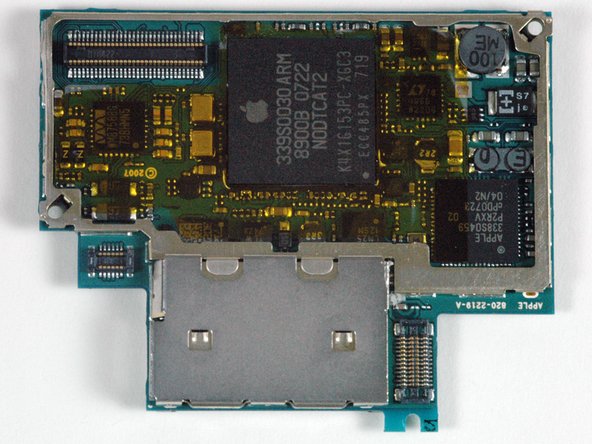
    • There are two stacked circuit boards on the iPhone. The communcations board is on the top, and the logic board is located on the bottom.

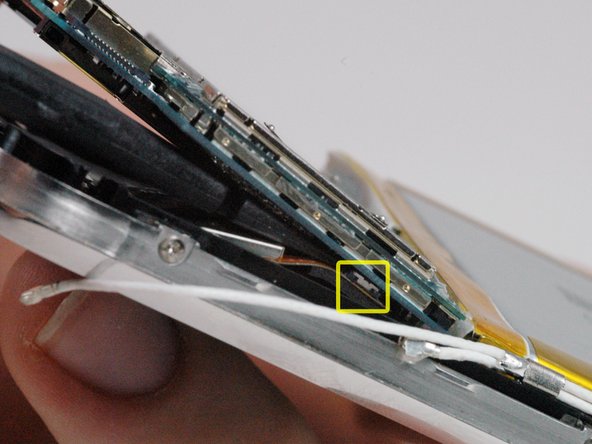
    • To separate the boards, insert a spudger into the gap in the metal shielding as shown. Carefully pry with the spudger to loosen the connector.

    Add Comment

  28. iPhone 1st Generation Logic Board Replacement: step 28, image 1 of 1
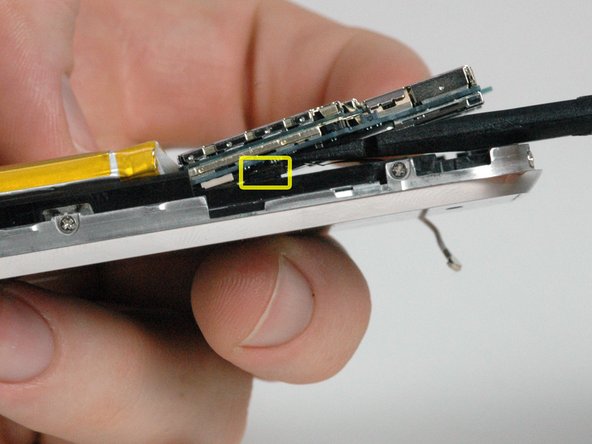
    • Continue to separate the two boards. The silver metal shielding may not immediately separate. If necessary, work around the edge of the board to separate the metal shielding.

    • If you are replacing the communications board, you need to desolder it from the battery. The battery replacement guide can help you remove the battery.

    Add Comment

  29. iPhone 1st Generation Logic Board Replacement: step 29, image 1 of 1
    • Logic board remains.

    Add Comment

Conclusion

To reassemble your device, follow these instructions in reverse order.

Cancel: I did not complete this guide.

System

Member since: 09/24/09

2,562 Guides authored

0 Guide Comments

Add Comment

View Statistics:

Past 24 Hours: 0

Past 7 Days: 1

Past 30 Days: 5

All Time: 25