
Introduction
Source: Dismantling Guide for IT Equipment, which was elaborated within the SRI project and financially supported by SECO and UNIDO, June 2015

World Resources Forum (WRF)
Mathias Schluep, St. Gallen / Switzerland

Dismantling and Recycling Centre (DRZ)
Markus Spitzbart, Vienna / Austria

Institute for Materials Science & Technology (Empa)
Fabian Blaser, St. Gallen / Switzerland
Introduction
A CRT monitor consists of a plastic case (ABS/PC), a cathode ray tube (CRT) with an attached magnetic deflector and electron gun, printed wiring boards (PWB) and cables. The CRT glass contains a large amount of lead which may be released when it brakes. Therefore it is crucial to only conduct dismantling operations on monitors in adequate facilities. Further processing of CRT glass should only happen in industrial channels that have adequate facilities.
Health and Safety
Equalize the pressure in the CRT glass body in the very beginning to prevent explosion.
Wear protective equipment to smash the magnetic deflector with a hammer as flying splints can injure personnel.
CRTs must be handled carefully also after pressure equalizing to ensure that no substances of concern are released. CRT glass bodies should be further processed only in industrial channels with adequate facilities.
What you need
-
-
Before doing anything the monitor has to be placed face down to protect the monitor screen from breaking.
-
-
-
Remove the plastic casing by unscrewing all the screws in the cover (generally around 4). Clean the casing properly by removing all the foreign materials in the plastic such as labels, rubber mountains etc.
-
-
-
Before removing other parts from the monitor it is crucial to equalize pressure in the CRT glass body. Therefore place the side of the monitor screen with the flap (anode connection) away from your face.
-
Remove the flap in the monitor screen with a flat screw driver and punch carefully a hole into the CRT glass where the flap was fixed.
-
-
-
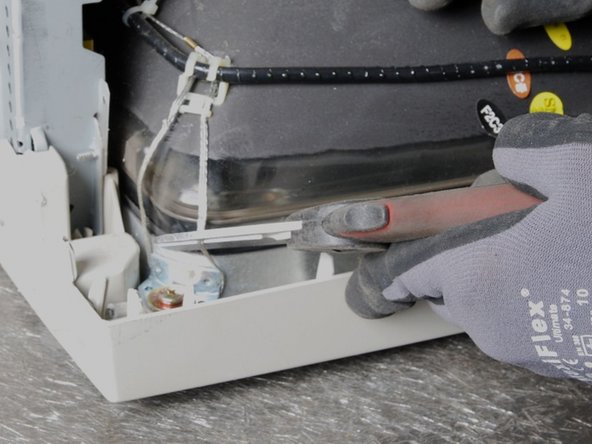
Remove the cable ties around the wires, so that you can freely remove the wires from the monitor.
-
-
-
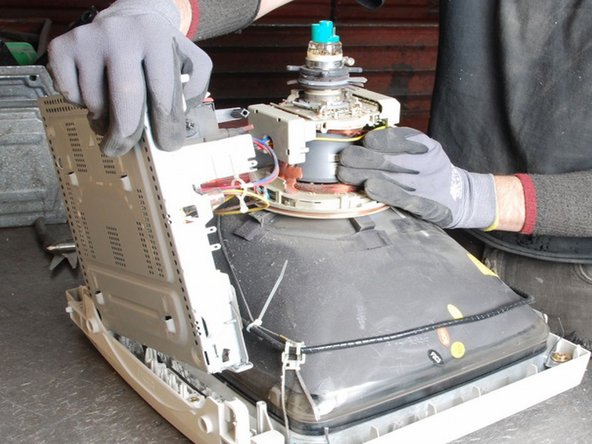
There are generally two Printed Wiring Boards (PWB) in a monitor. A small PWB is attached at the base of the monitor screen by glue or a screw. A bigger PWB is attached at the back. Particularly the bigger PWBs might need further dismantling.
-
-
-
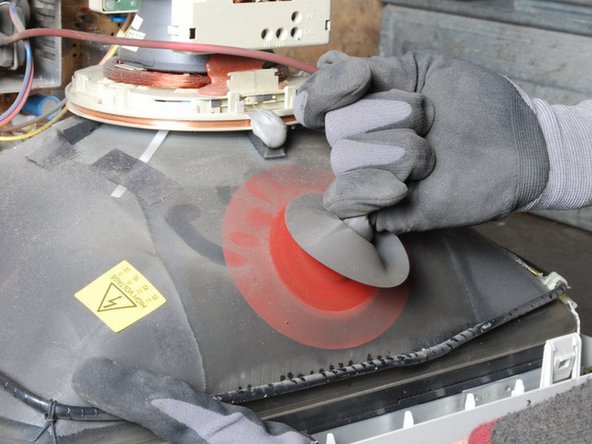
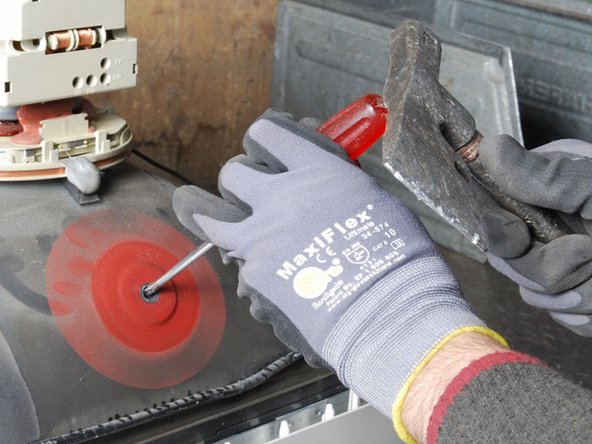
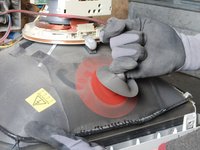
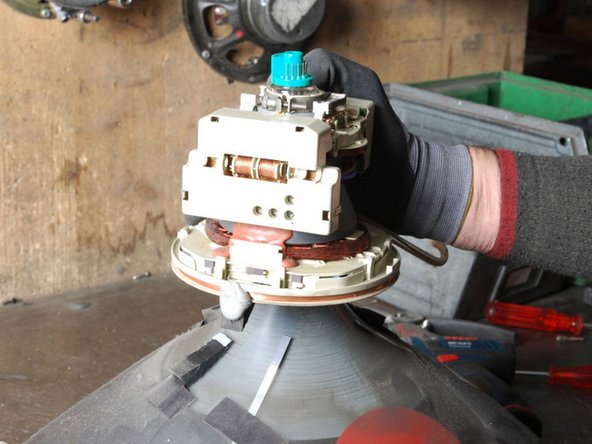
Cut off all the wires around the monitor to be able to remove the magnetic deflector (on top of the CRT glass) that is surrounded by copper windings.
-
-
-
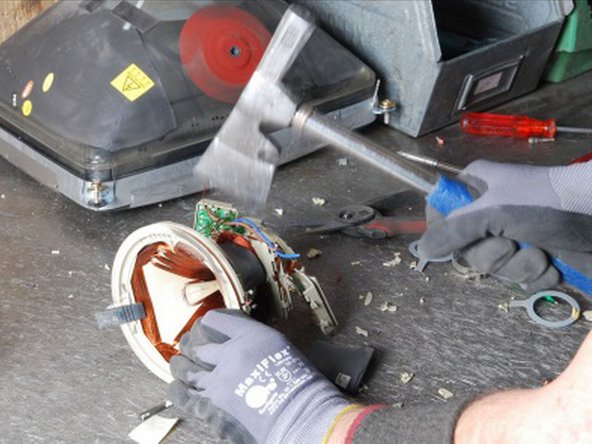
Remove the copper from the Magnetic Deflector by crashing it with a hammer. Strip the big wire around the monitor screen with a knife or side cutter and remove the copper. Clean the copper, plastic and steel and place it aside separately.
-
-
-
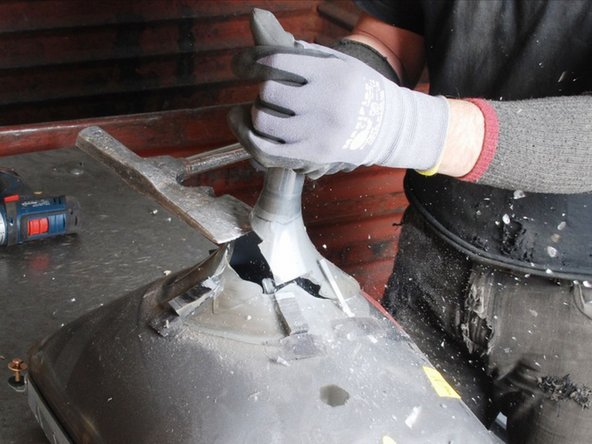
Unscrew the CRT glass from the front plastic casing and break off the electron gun from the tube with a hammer or a small axe just below the gun.
-
-
-
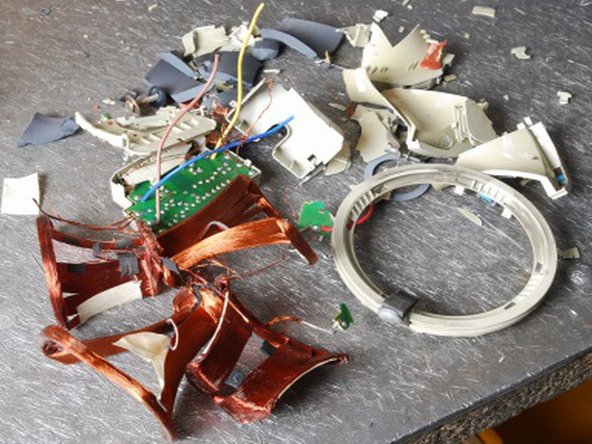
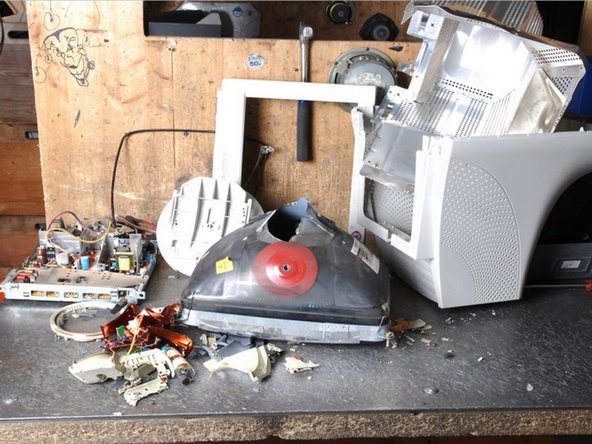
Separate the remaining materials according to their type (e.g. aluminium, ferrous metals, plastic, further PWBs, etc.).
-
Make sure the plastic parts are completely free of metal pieces.
-
For information about storage and handling refer to chapter 3 (Output Fractions).
-
Continue to separate the CRT glass into these components.
-
Output Fractions: Metals (steel, aluminium, copper), PWBs, plastics, mixed fractions (cables, mixed scrap), and CRT specific fractions (CRT glass, CRT deflection coil, CRT gun).
-
-
-
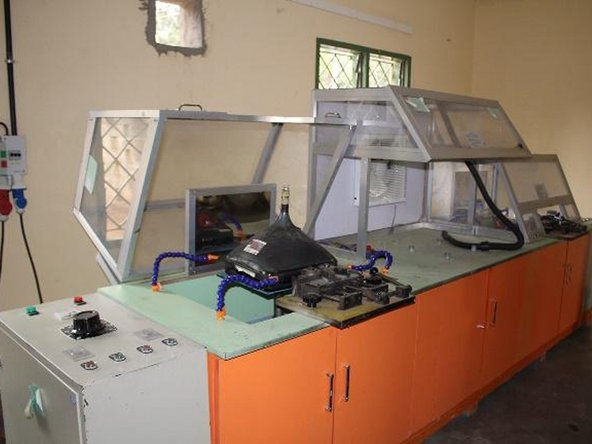
The CRT glass body can be separated into panel glass, funnel glass, shadow mask and phosphor coating (as shown in the picture on the right: CRT dismantling equipment at the WEEE Centre, Nairobi, Kenya).
-


Cancel: I did not complete this guide.
2 other people completed this guide.